Add Images & Graphics to the Space
Images can be very easily added to be Vatom Spaces and can be used in any number of ways. Use large images as floor planes and walls, small images as portals and as navigation around your space, or display images as traditional artwork on your walls. Images can be links, music players, ramps, or transform into a video when someone walks closer to it.
- Image Formats allowed: PNG and JPG
- Smaller images improve the performance of the space. Please re-scale large artwork down to a website-friendly size. Recommended 1024 x 1024px
- Max Dimensions: 4096 x 4096px (limit the total number of 4k textures)
- PNG Transparency OK 👍
Adding Images to Spaces
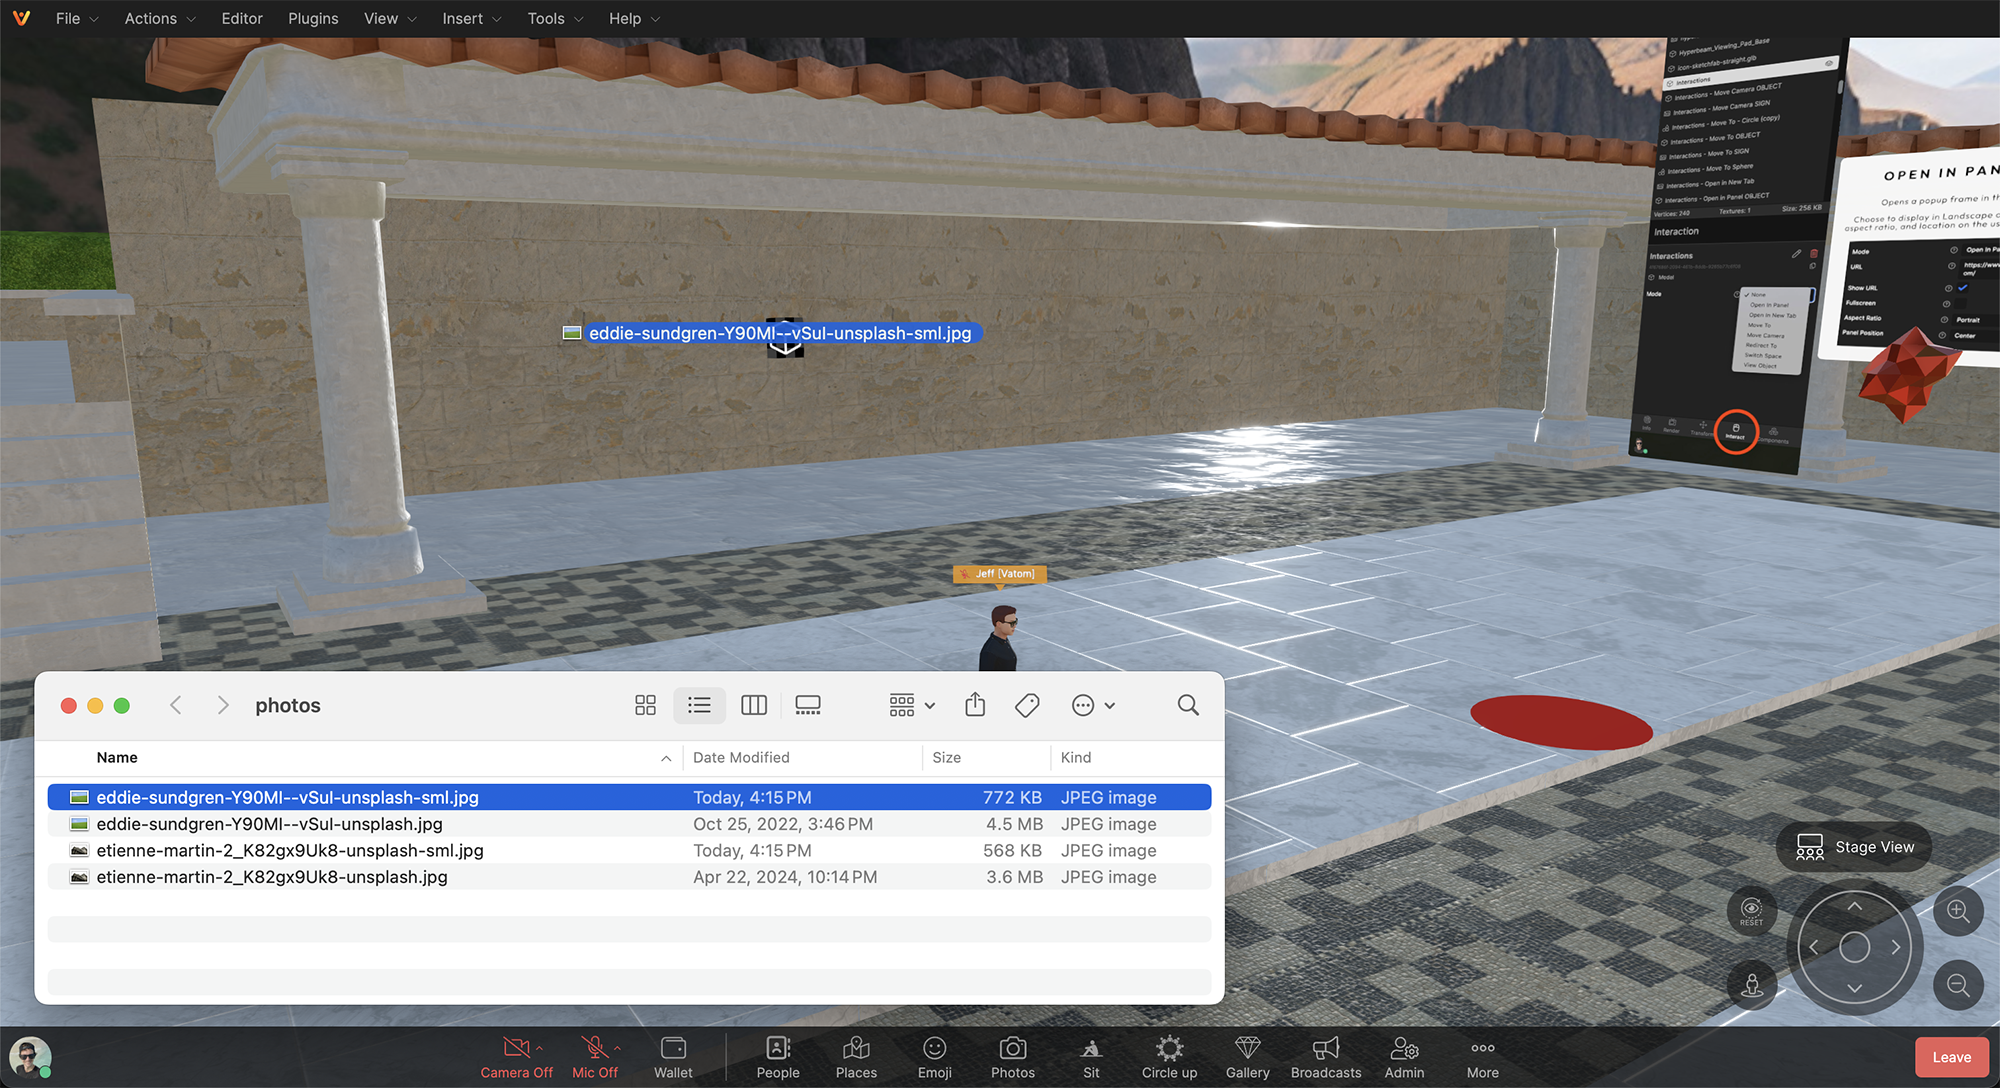
Drag and Drop Images from Desktop
Drag and drop images from your Desktop directly onto the ground and walls of Vatom Spaces. Adjust the size and position of images using the Editor Tools.
Upload Images from File
The Editor Toolbar has several ways to upload images. Insert - From File adds the image directly into the Space where your avatar is standing.
- File > Insert > From File
- Insert > From File
- Advanced Editor > Insert > From File
- Upload to Vatom Storage and Add to World.

Modifying Images
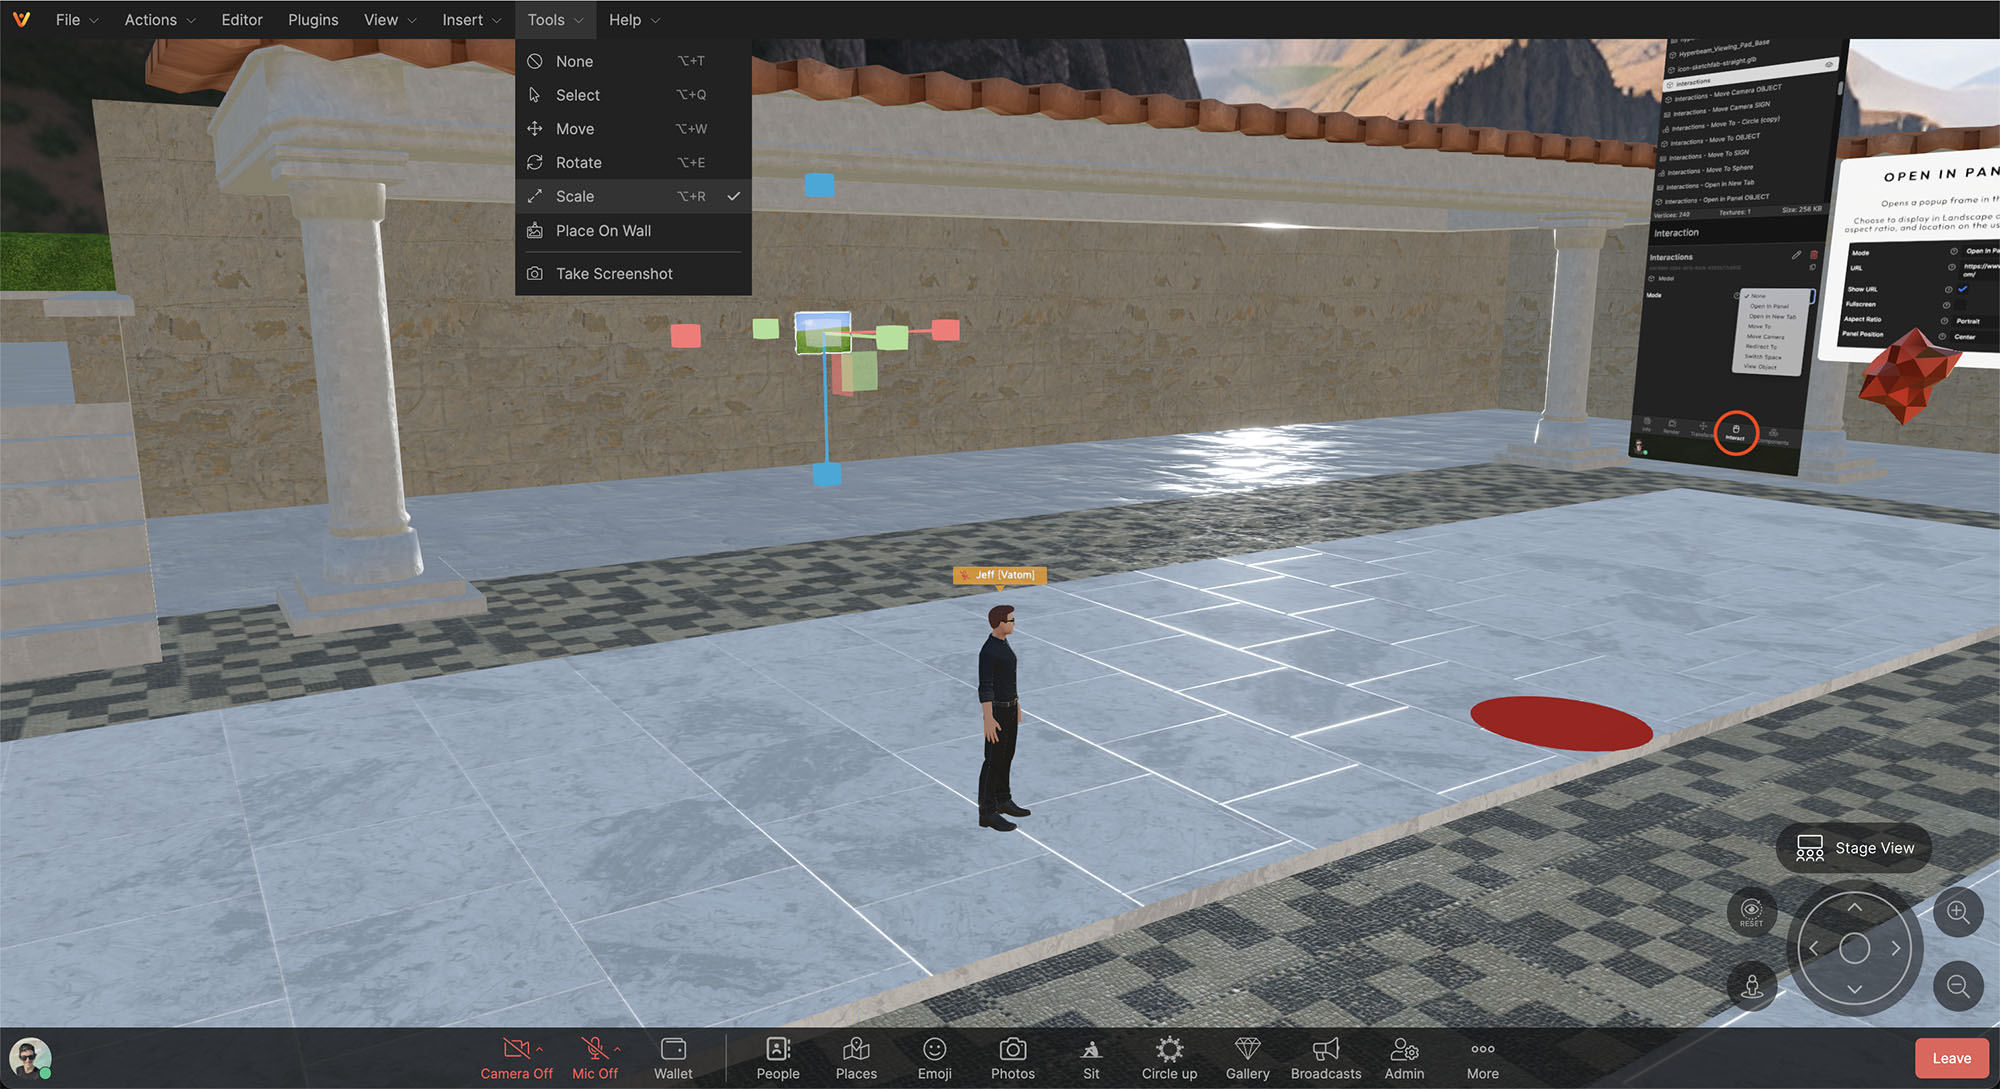
Resize images with the Scale Tool (⎇+R) and Move them around using the Move Tool (⎇+W).
Use "Place On Wall" found at Tools > Place On Wall to Select and then drag images onto surfaces, snapping to match the angle of the surface.
Rotate Images using the Rotate Tool (⎇+E). Hold Ctrl to snap rotation incrementally.
Check for Issues
After adding images, use the Auto-Optimize tool located at File > Check For Issues to resize images into "power-of-two" size. Your images will be automatically replaced with identical graphics in an optimized size for Spaces.
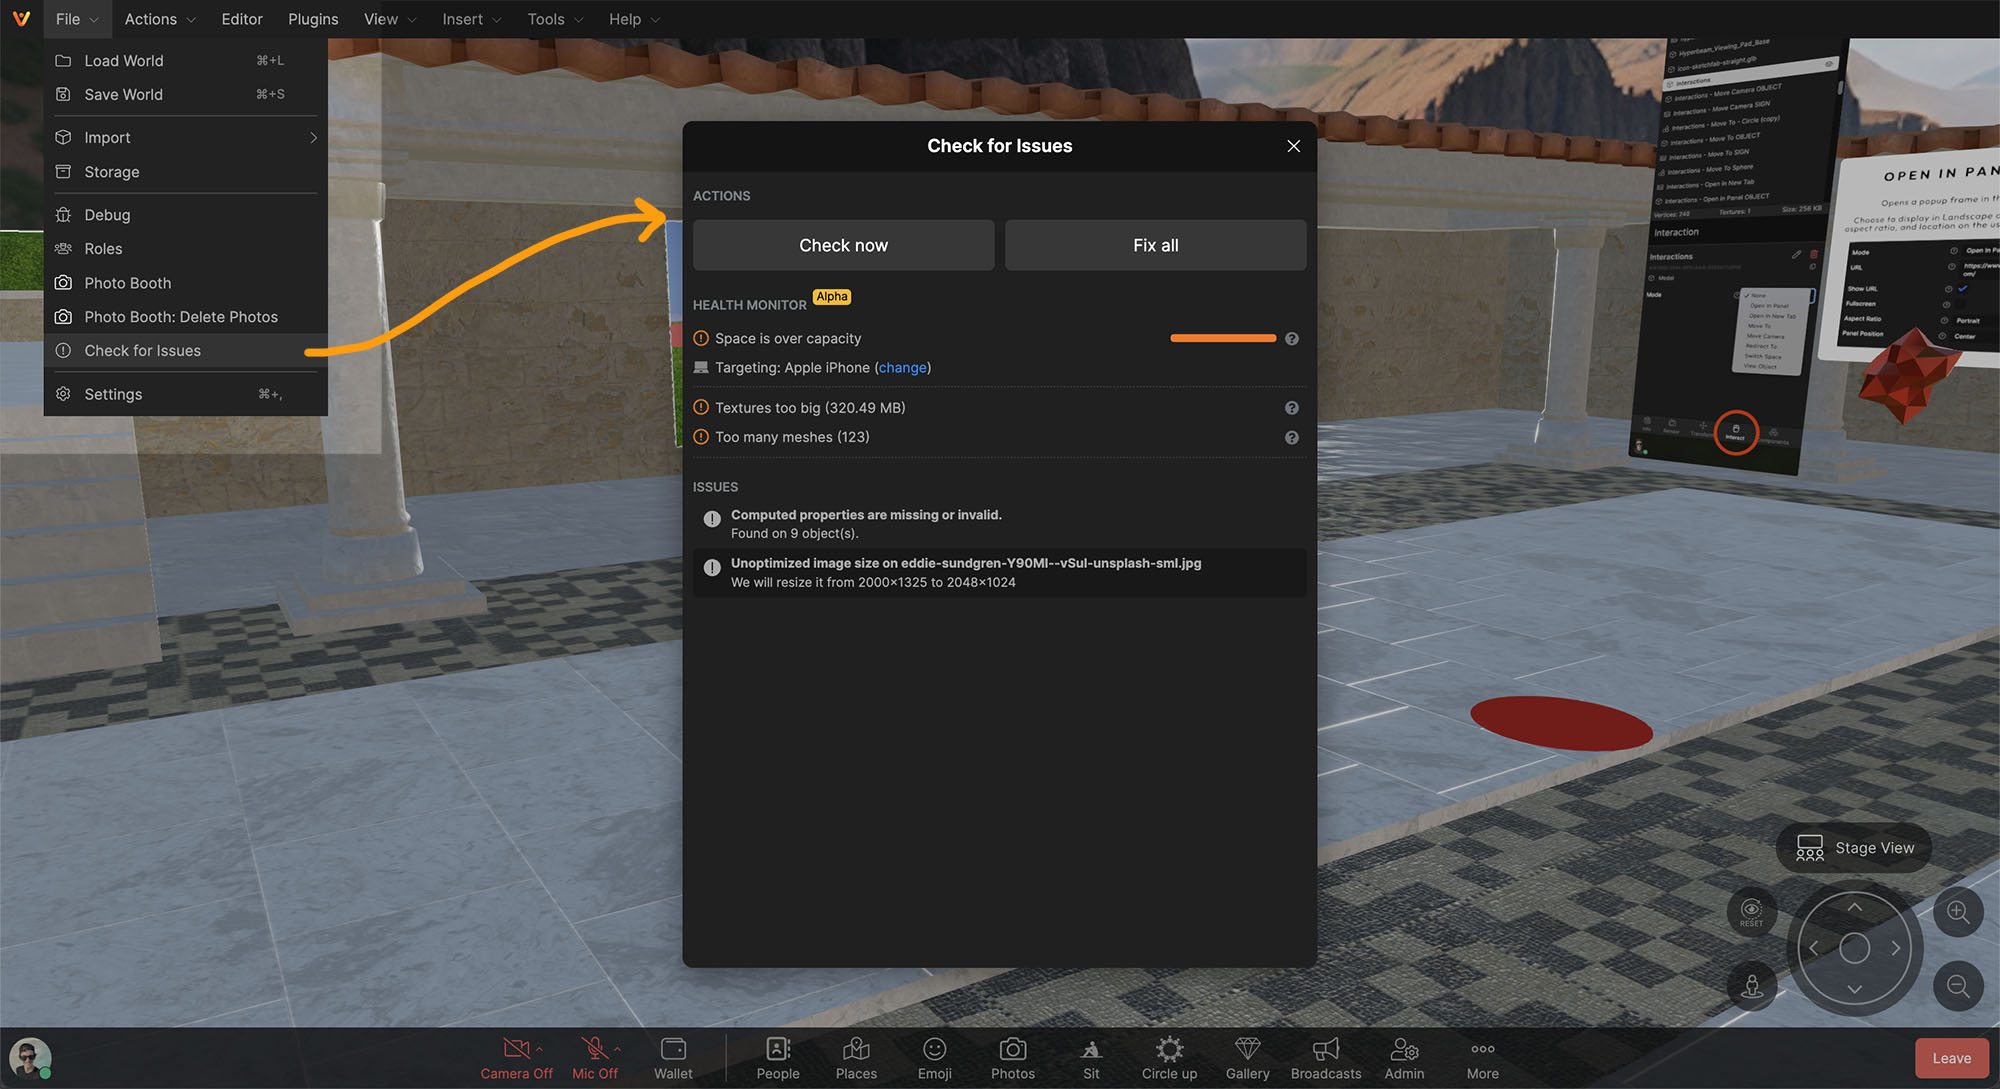
Image Interactions
Set interactions when a user clicks on images using the Interact Properties tab. Most common are:
- Move Camera: Moves and zooms the camera to a preferred camera angle or "perfect view"
- Open in New Tab: Open a link in a new tab
- Move To: Clicking the object moves the user to a new location.
Image Rendering Settings
Back-Face Culling (One-Sided Images)
Vatom Spaces utilizes "Back-face Culling", meaning by default Spaces does not render the back of an image. It will look invisible when viewing it from behind. This is done to avoid blocking the camera when looking away from a wall or image.
If an image isn't showing up where you left it, it may have been turned around or you're looking at the wrong side. Look from all angles or search for the object in the Advanced Editor.
Image Render Properties:
- Transparent: Allows object transparency. Check this box for transparent PNGs
- Opacity: with "Transparent" checked, lowering the slider makes the image more transparent or see-through.
- Double-Sided: Disable back-face culling and show the backside of the image. The back will display a reversed view of the image.
- Shading Type: Images rendered as "Basic" generally display color best and truest to the created image, for galleries and displaying images. Standard (PBR) shading is affected by the scene lighting, and will render image color differently at different angles.