Themes and Templates
Design, save, and reuse your themes within your business to ensure consistency and control. With powerful lock settings, you can secure your designs, keeping your identity intact while making it easy to launch new spaces, events and experiences.
Throughout this article we use the terms Themes and Templates interchangeably.
Creating a Template
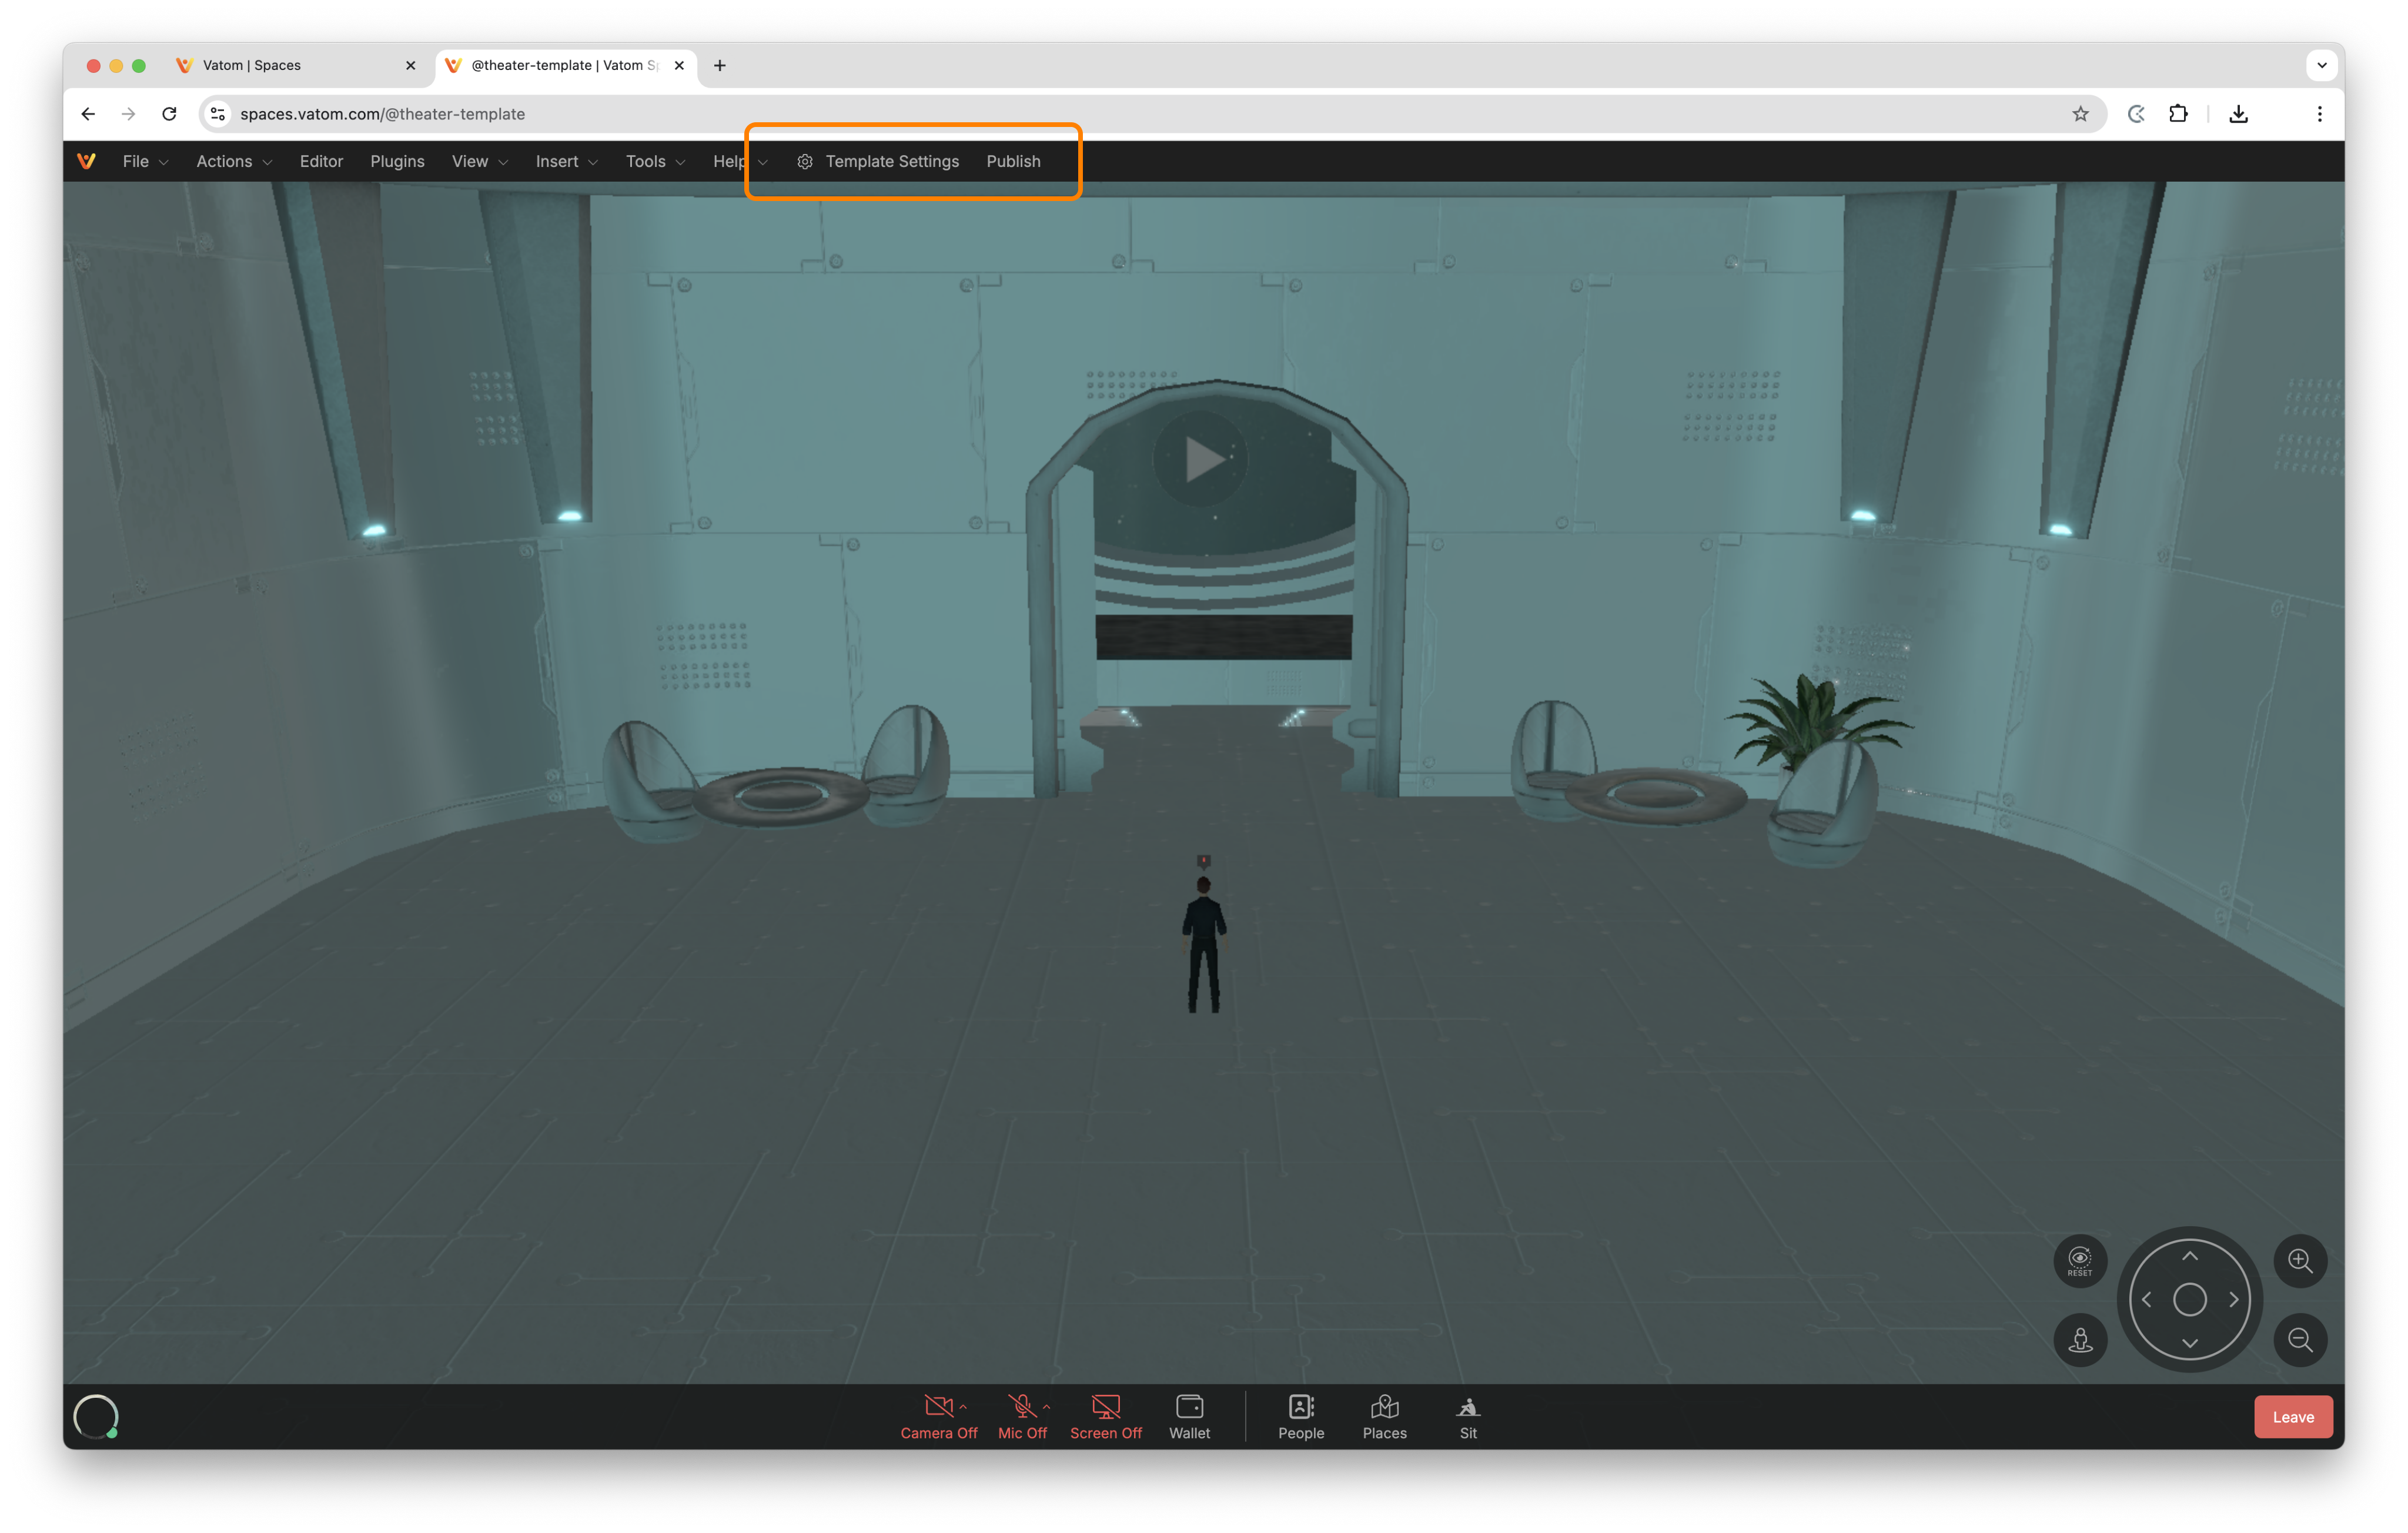
Admins with the Template Designer user role have additional settings in their Admin Toolbar, and can Publish customized spaces as "Templates".
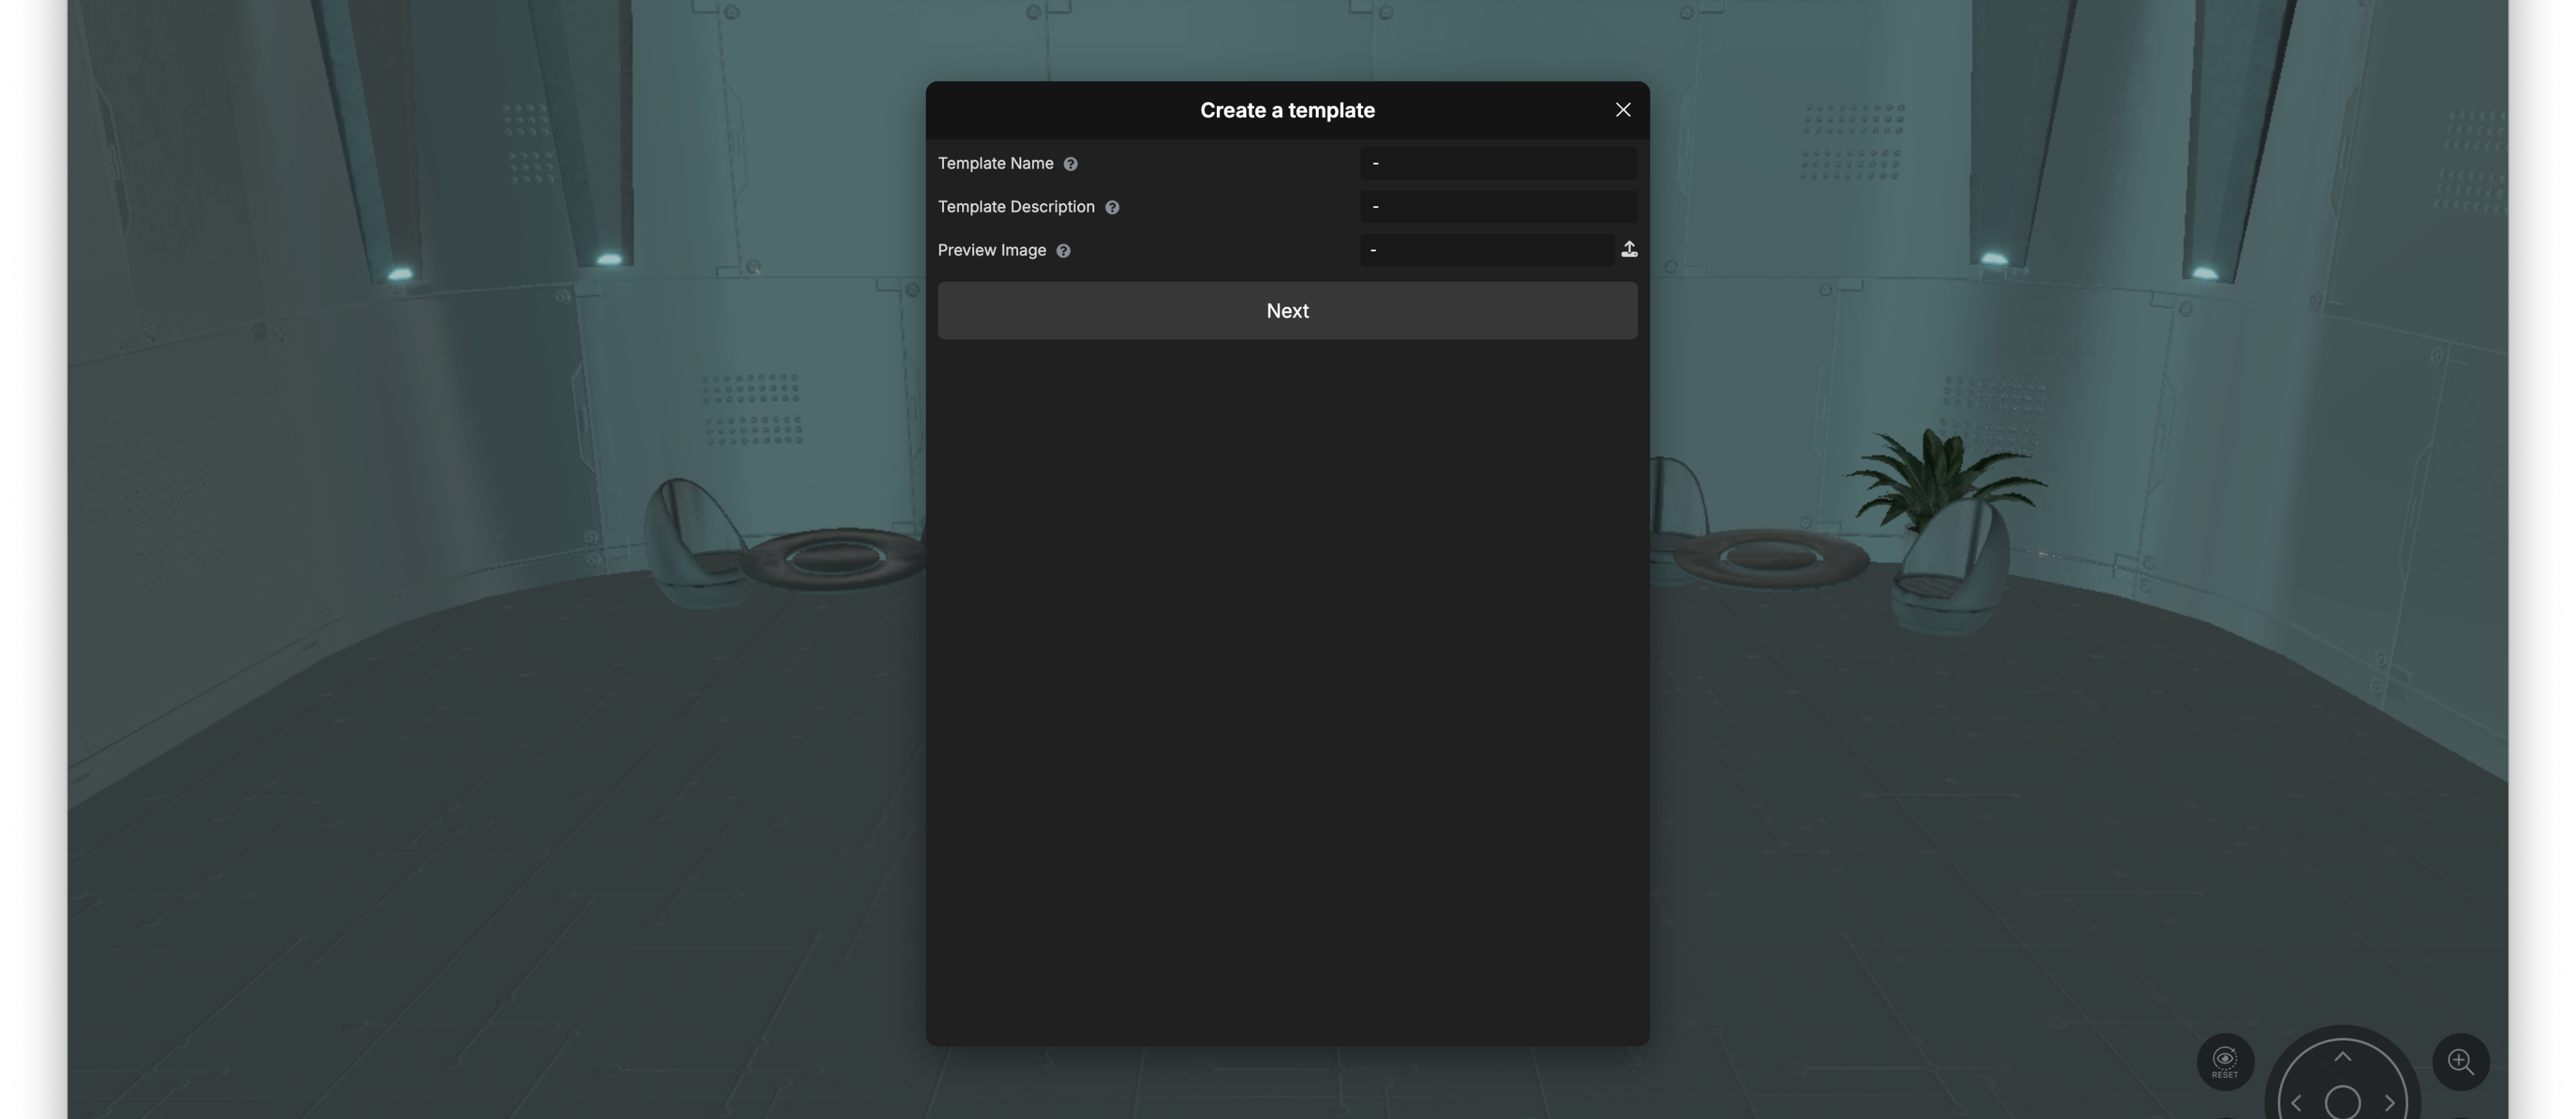
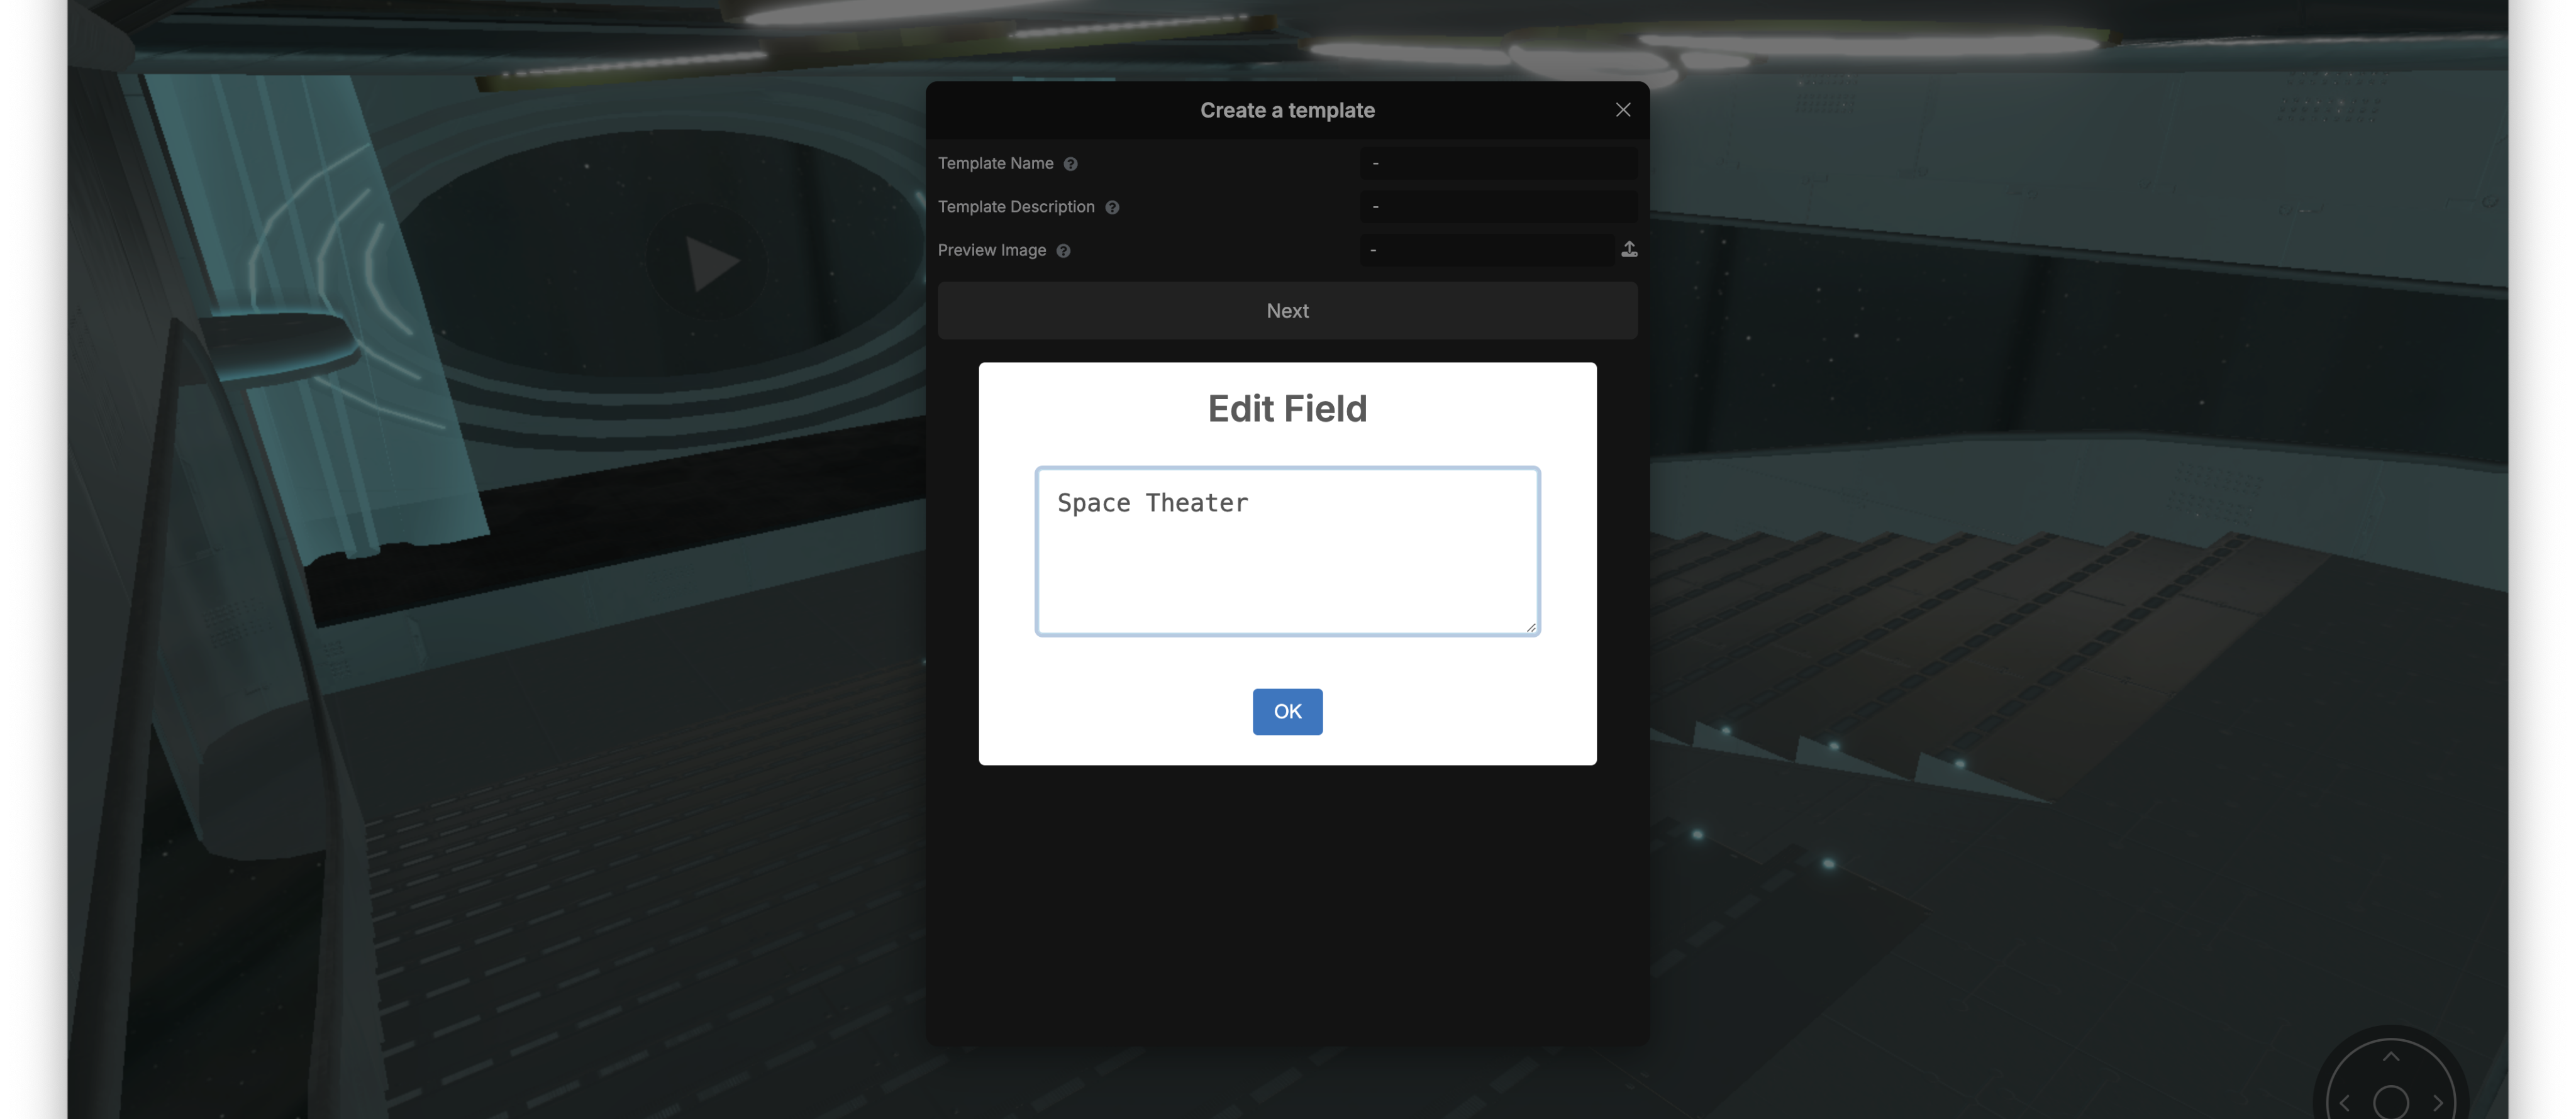
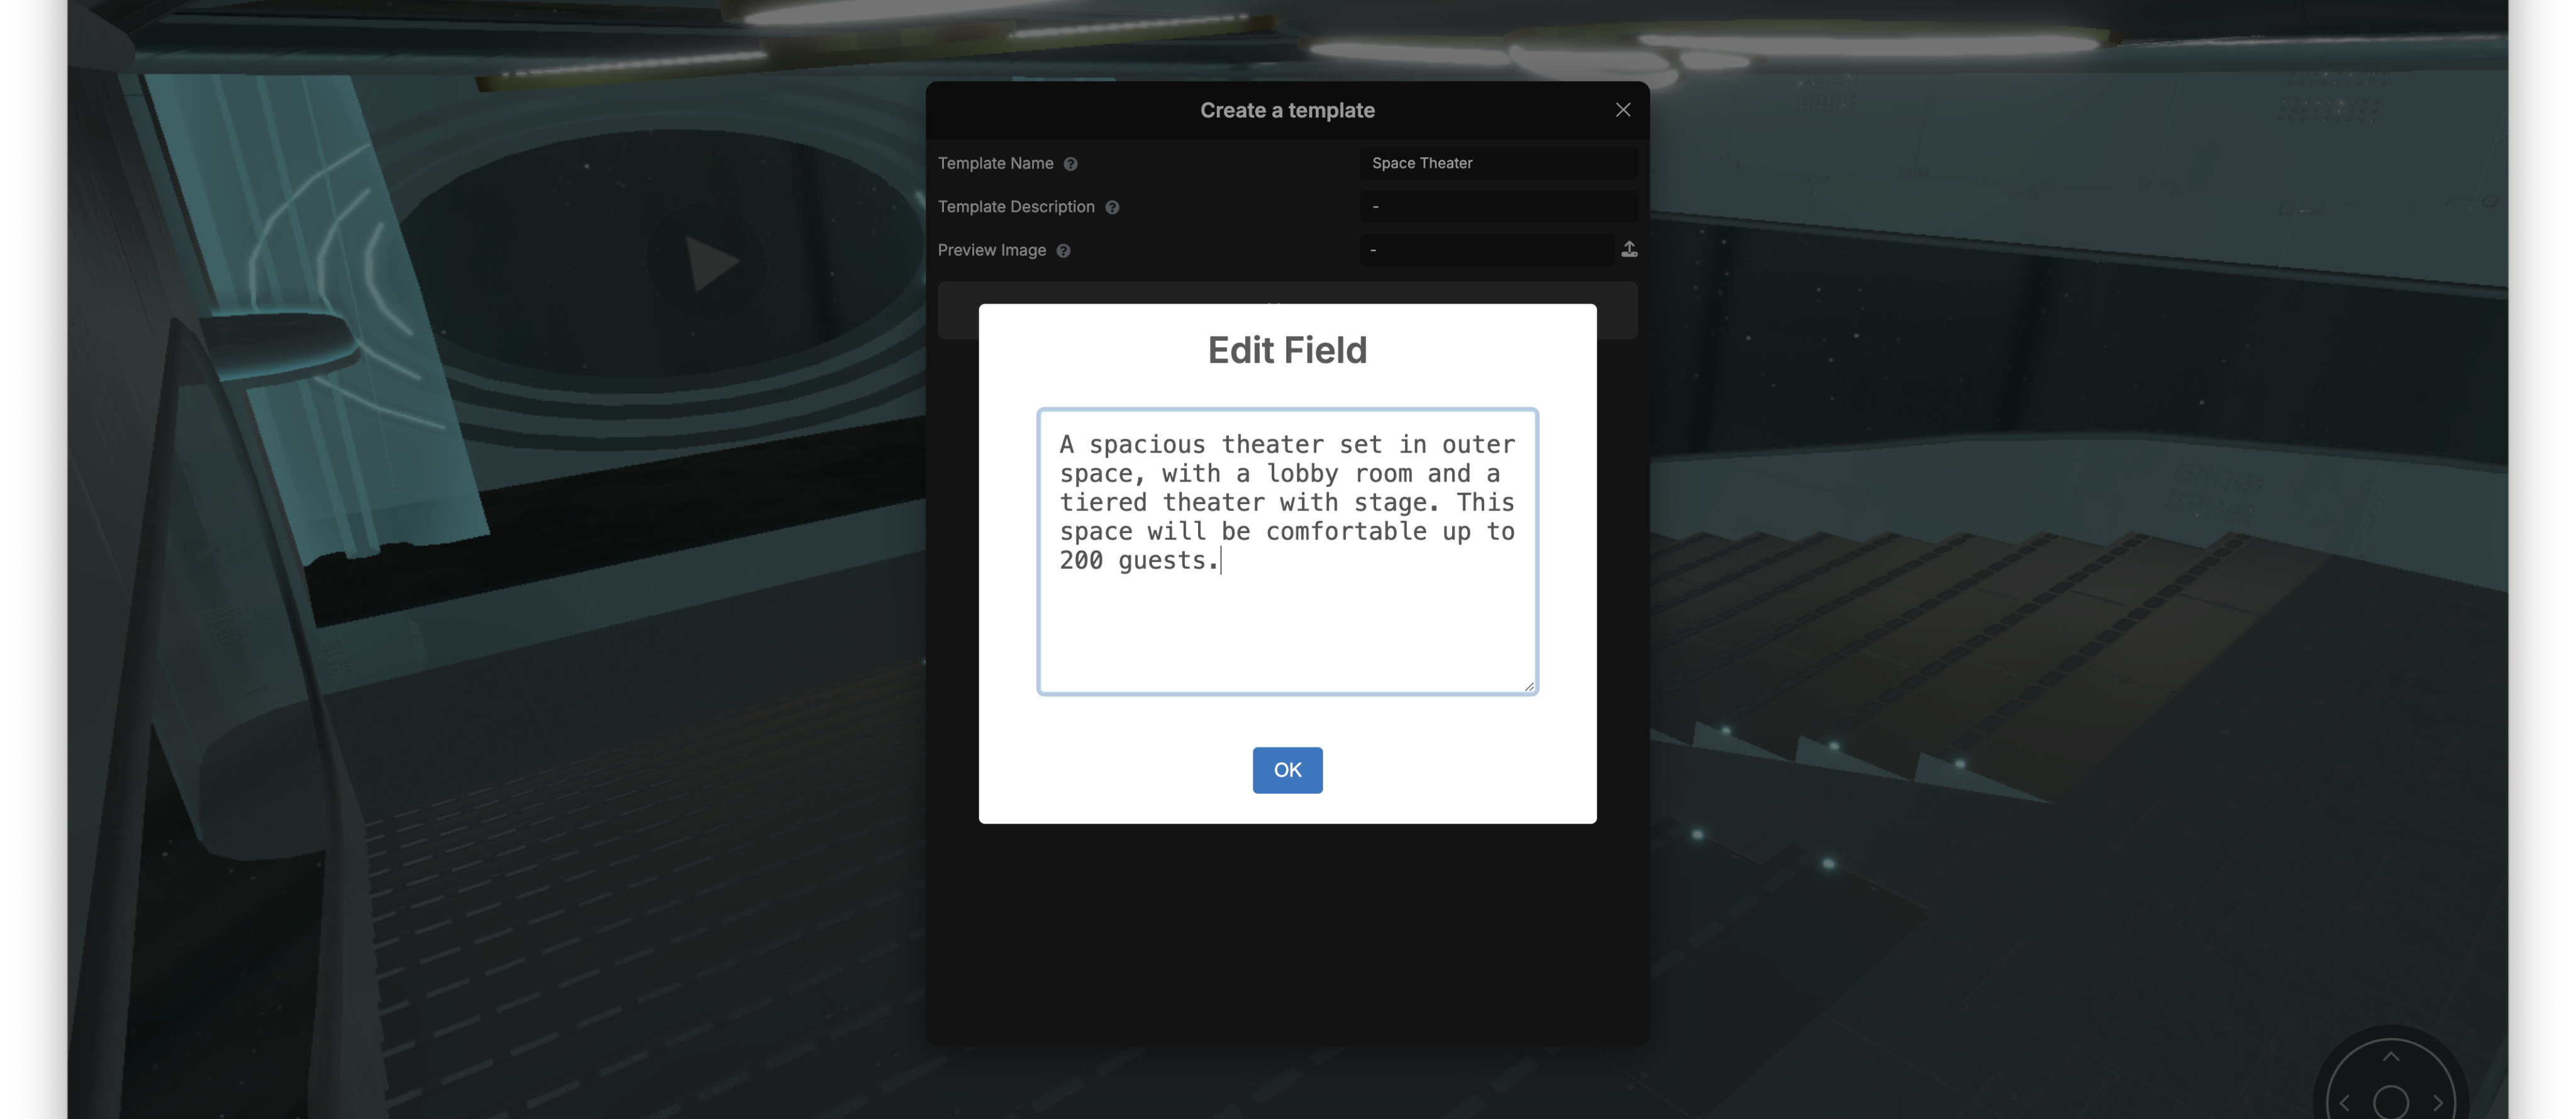
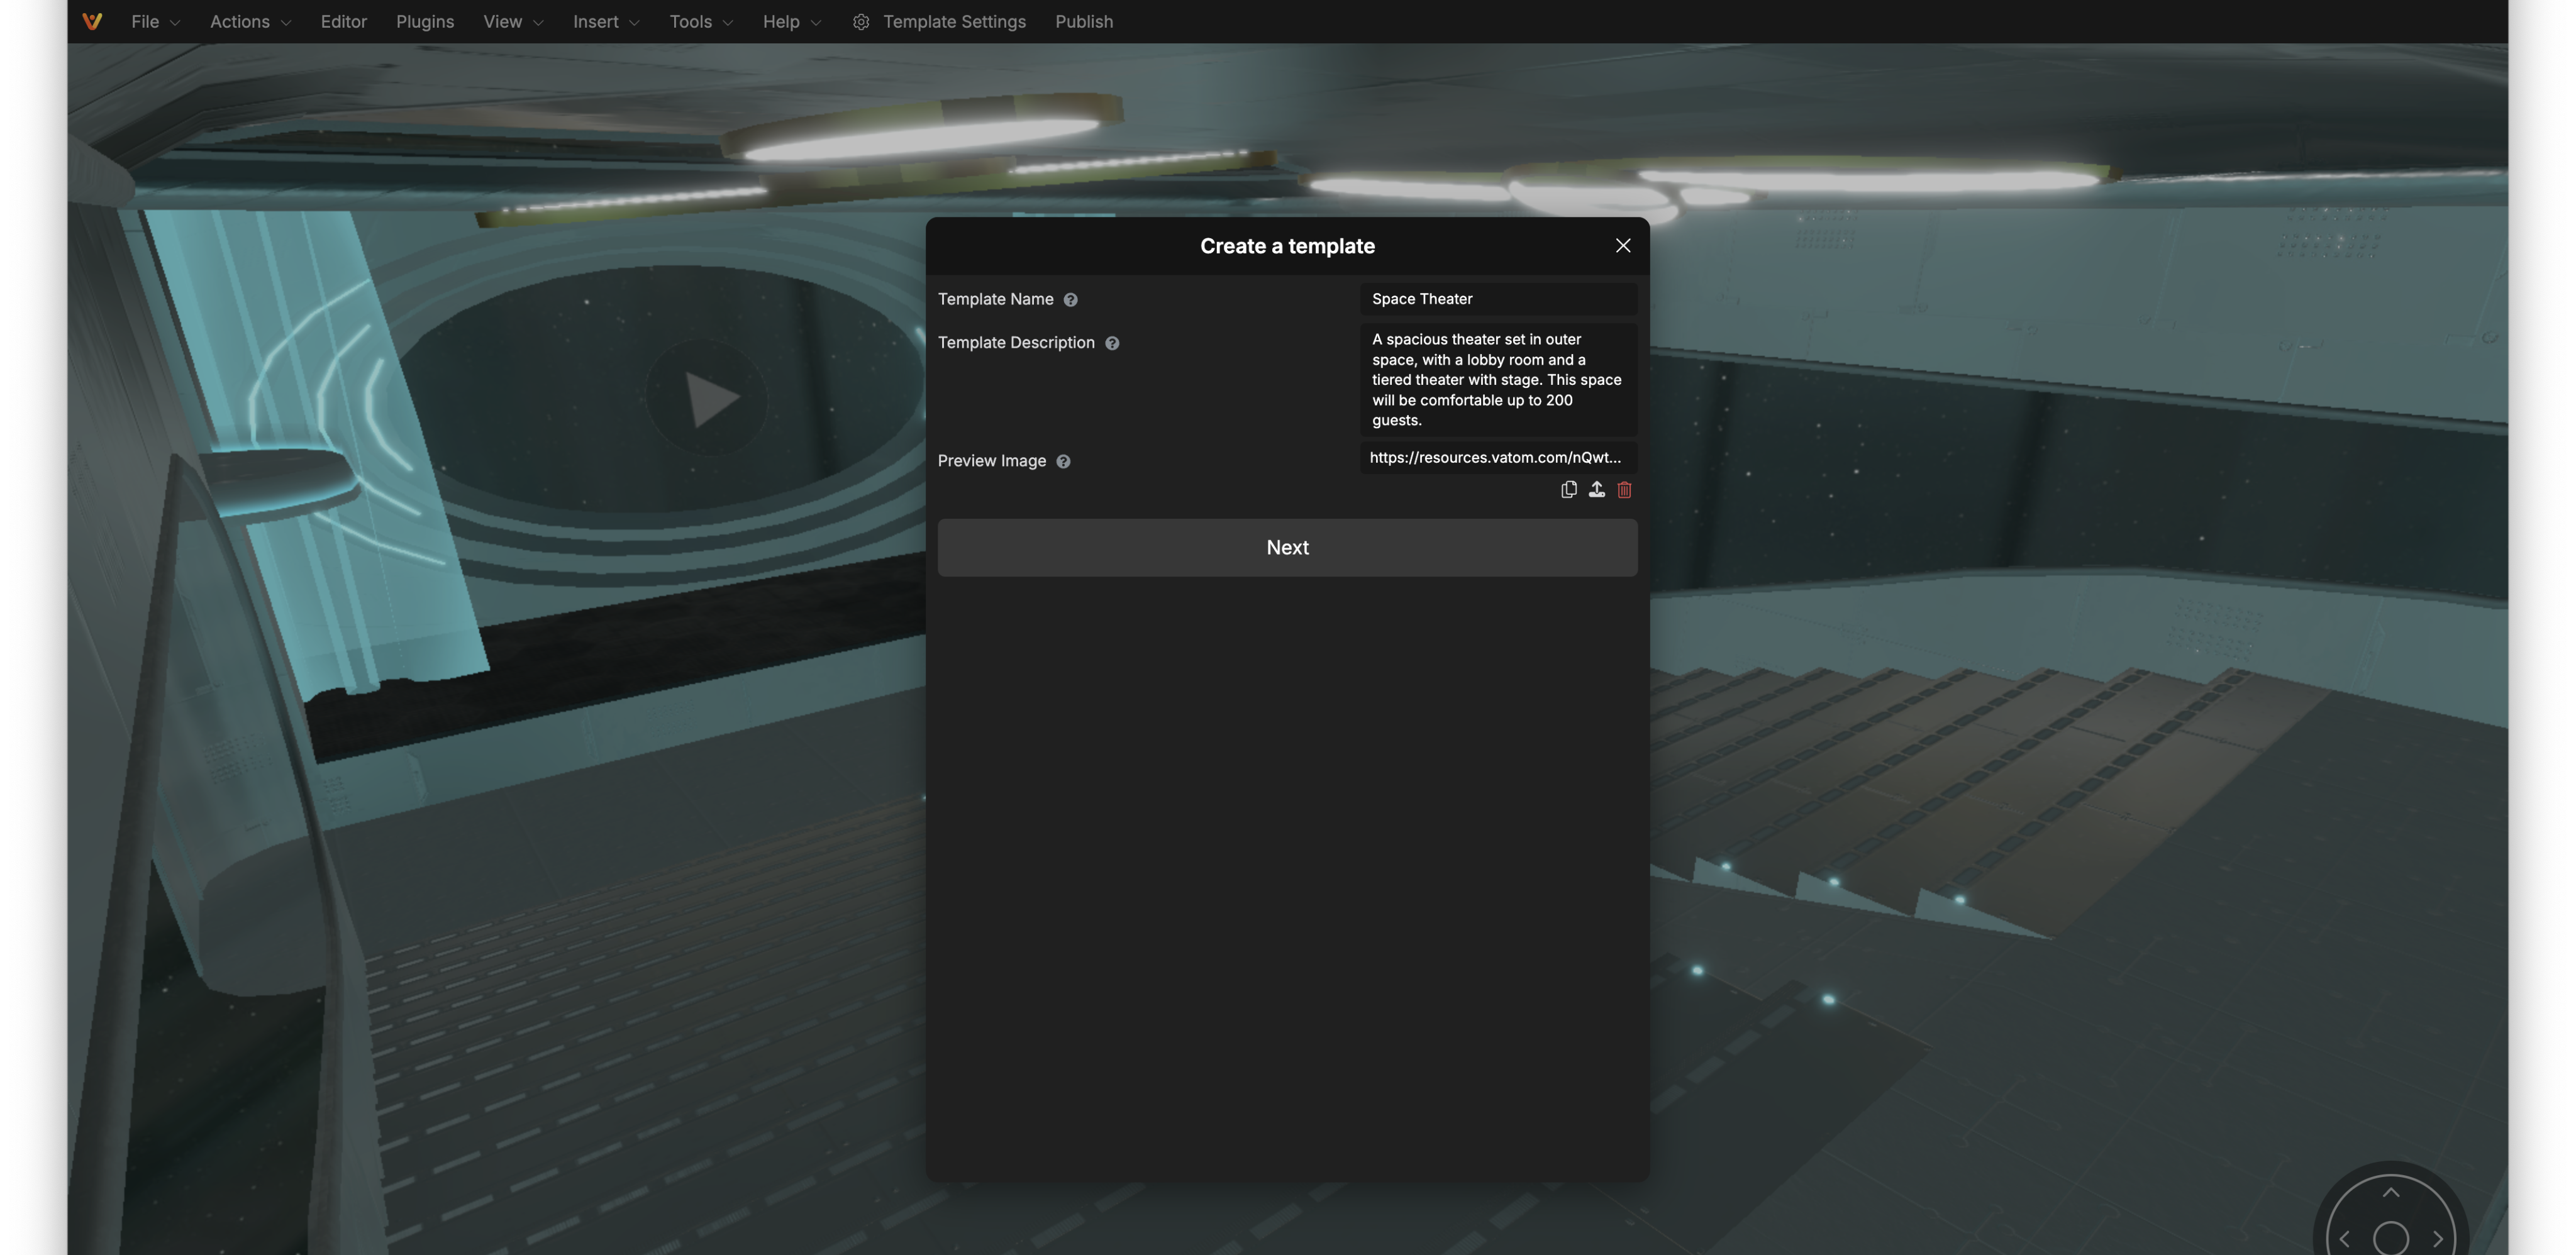
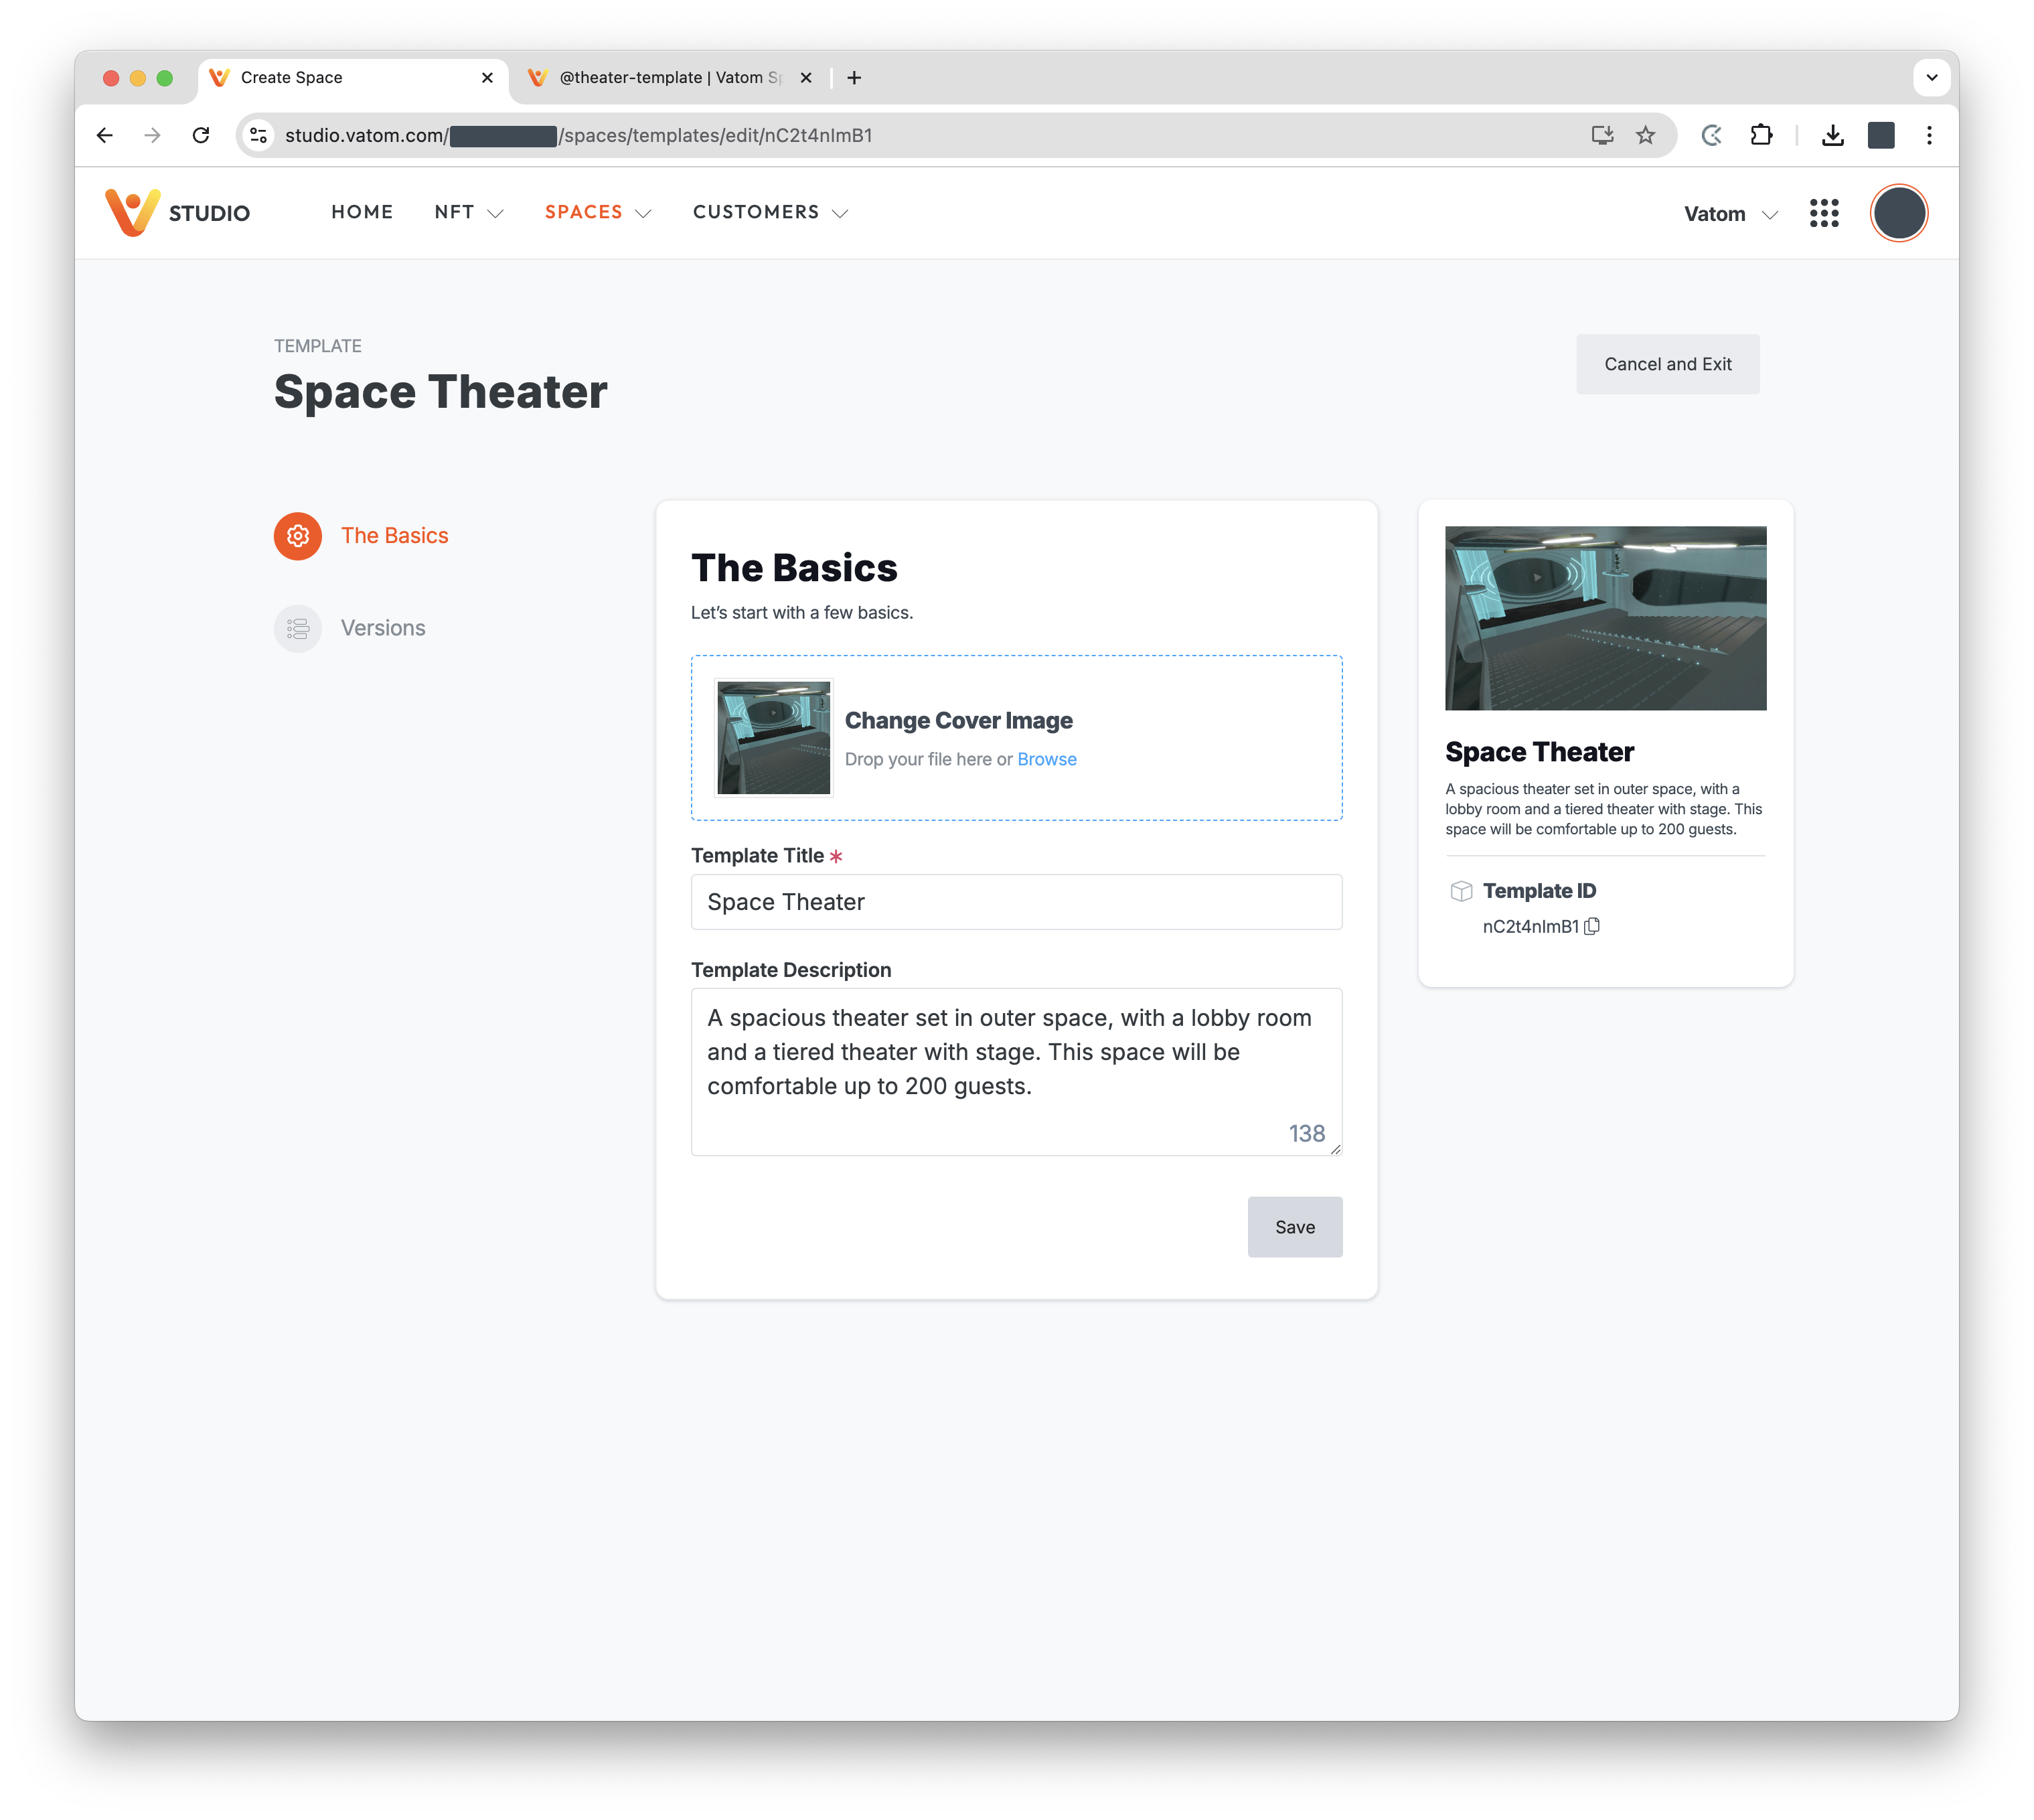
Name and Description
The three pieces of information required for a Template are:
- Template Name - Name of the Theme
- Template Description - A short description of the Theme
- Preview Image - Upload a thumbnail to preview when selecting a Space Theme
Once these are added, the space can be published as a Template.
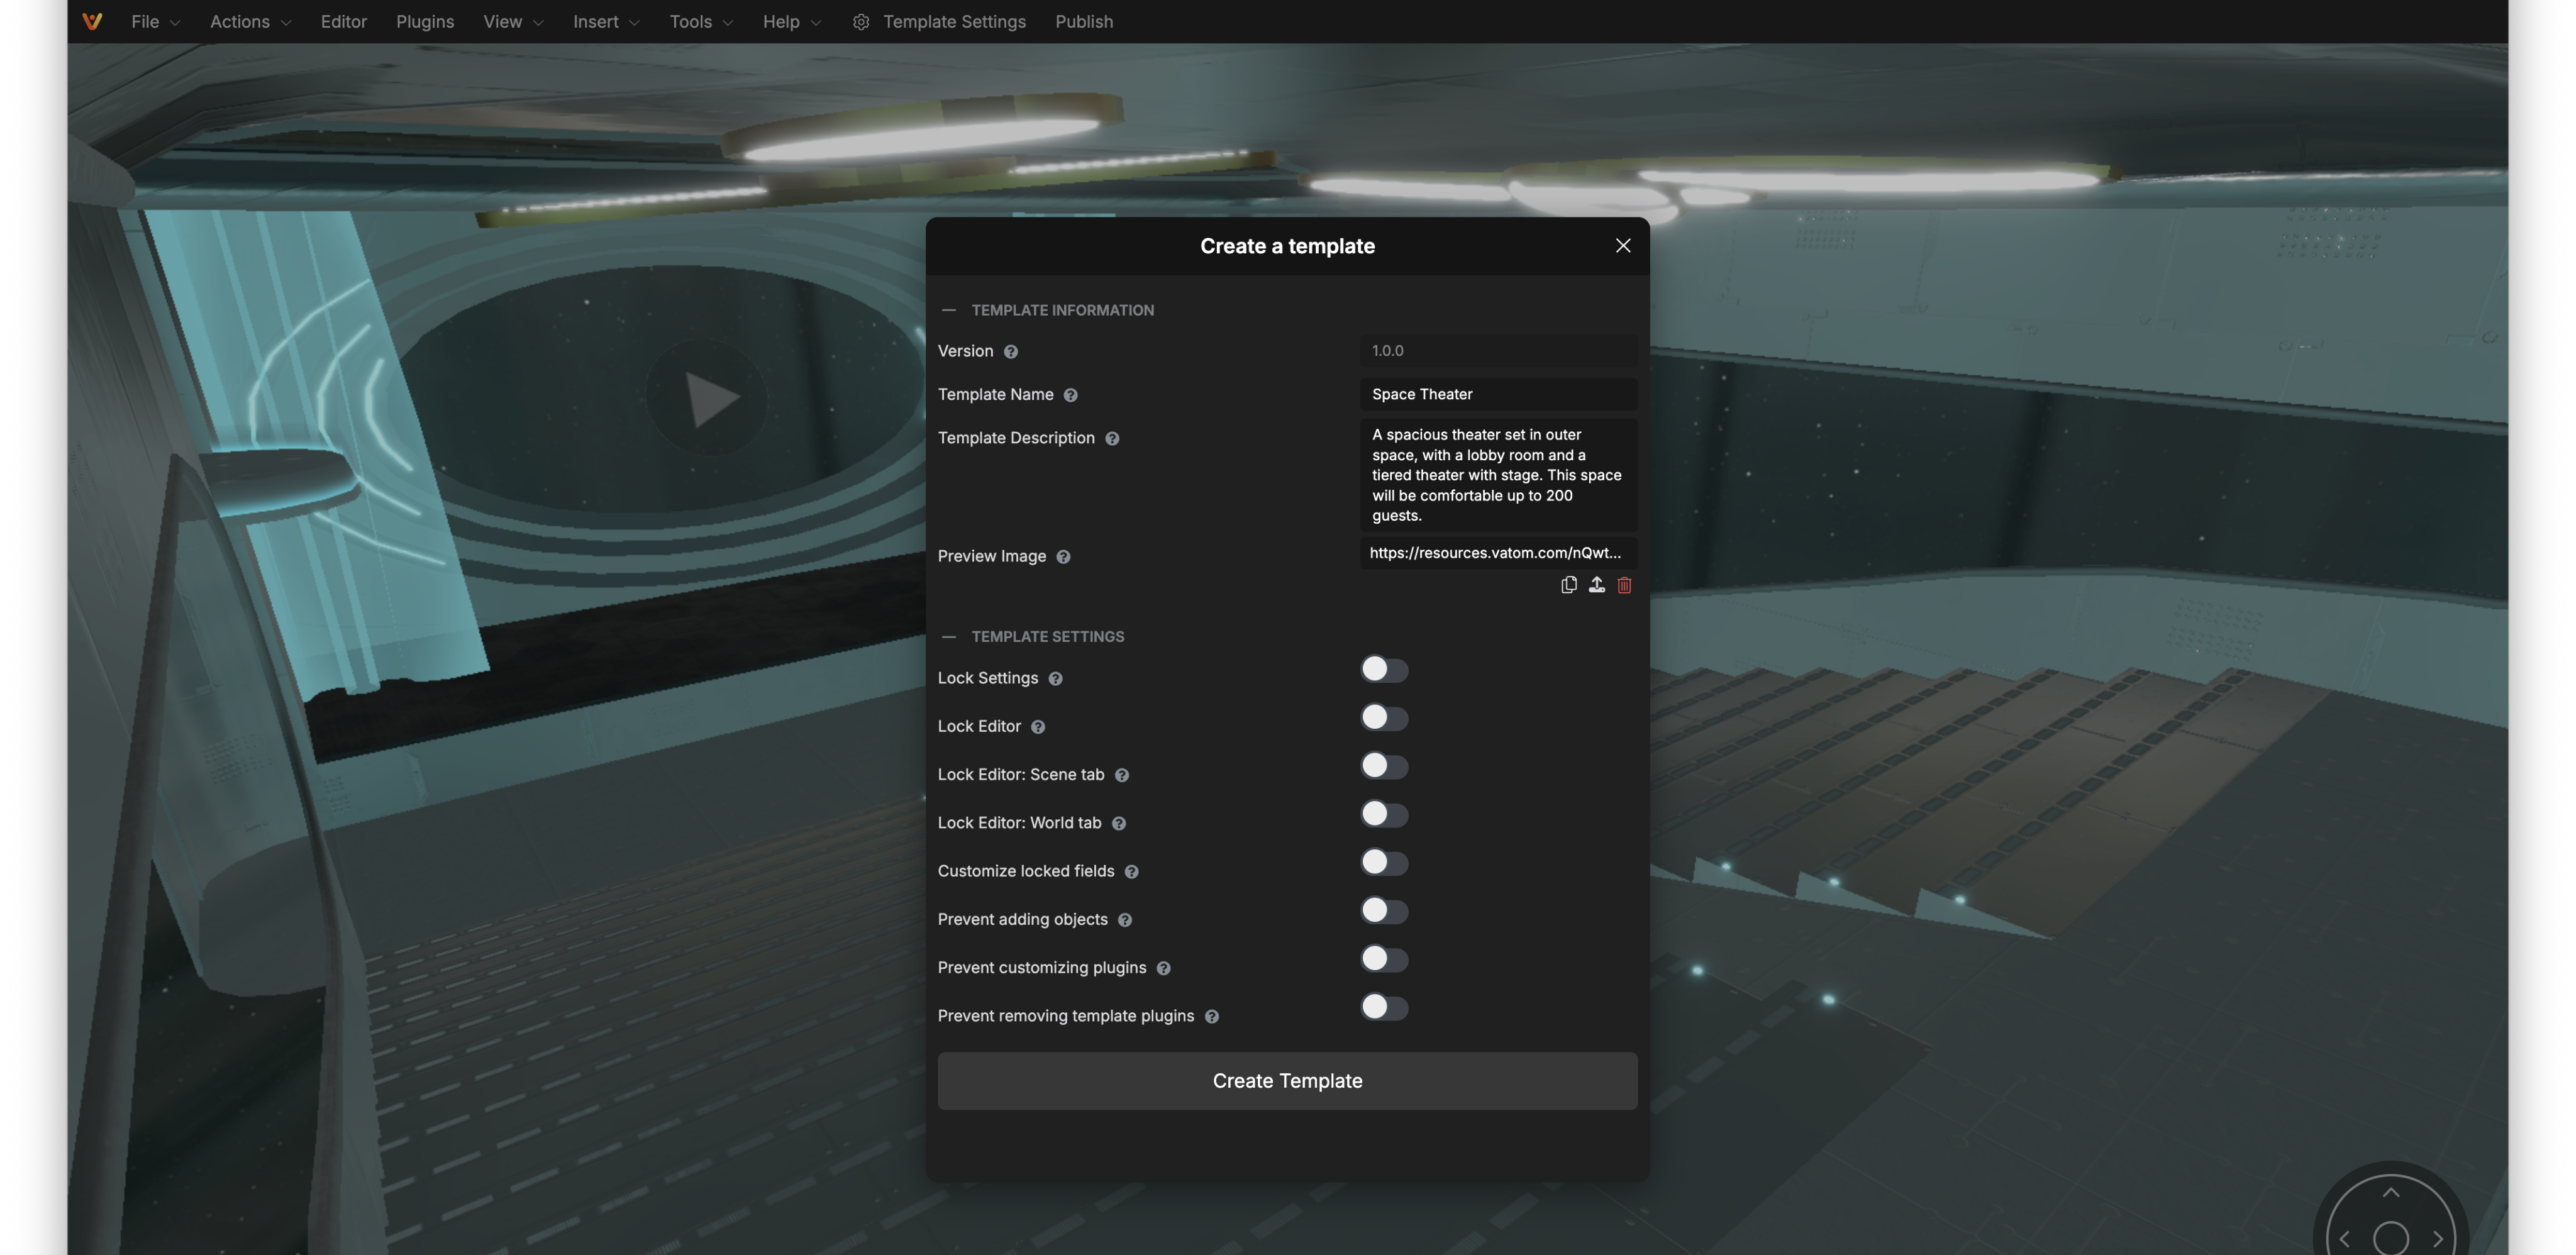
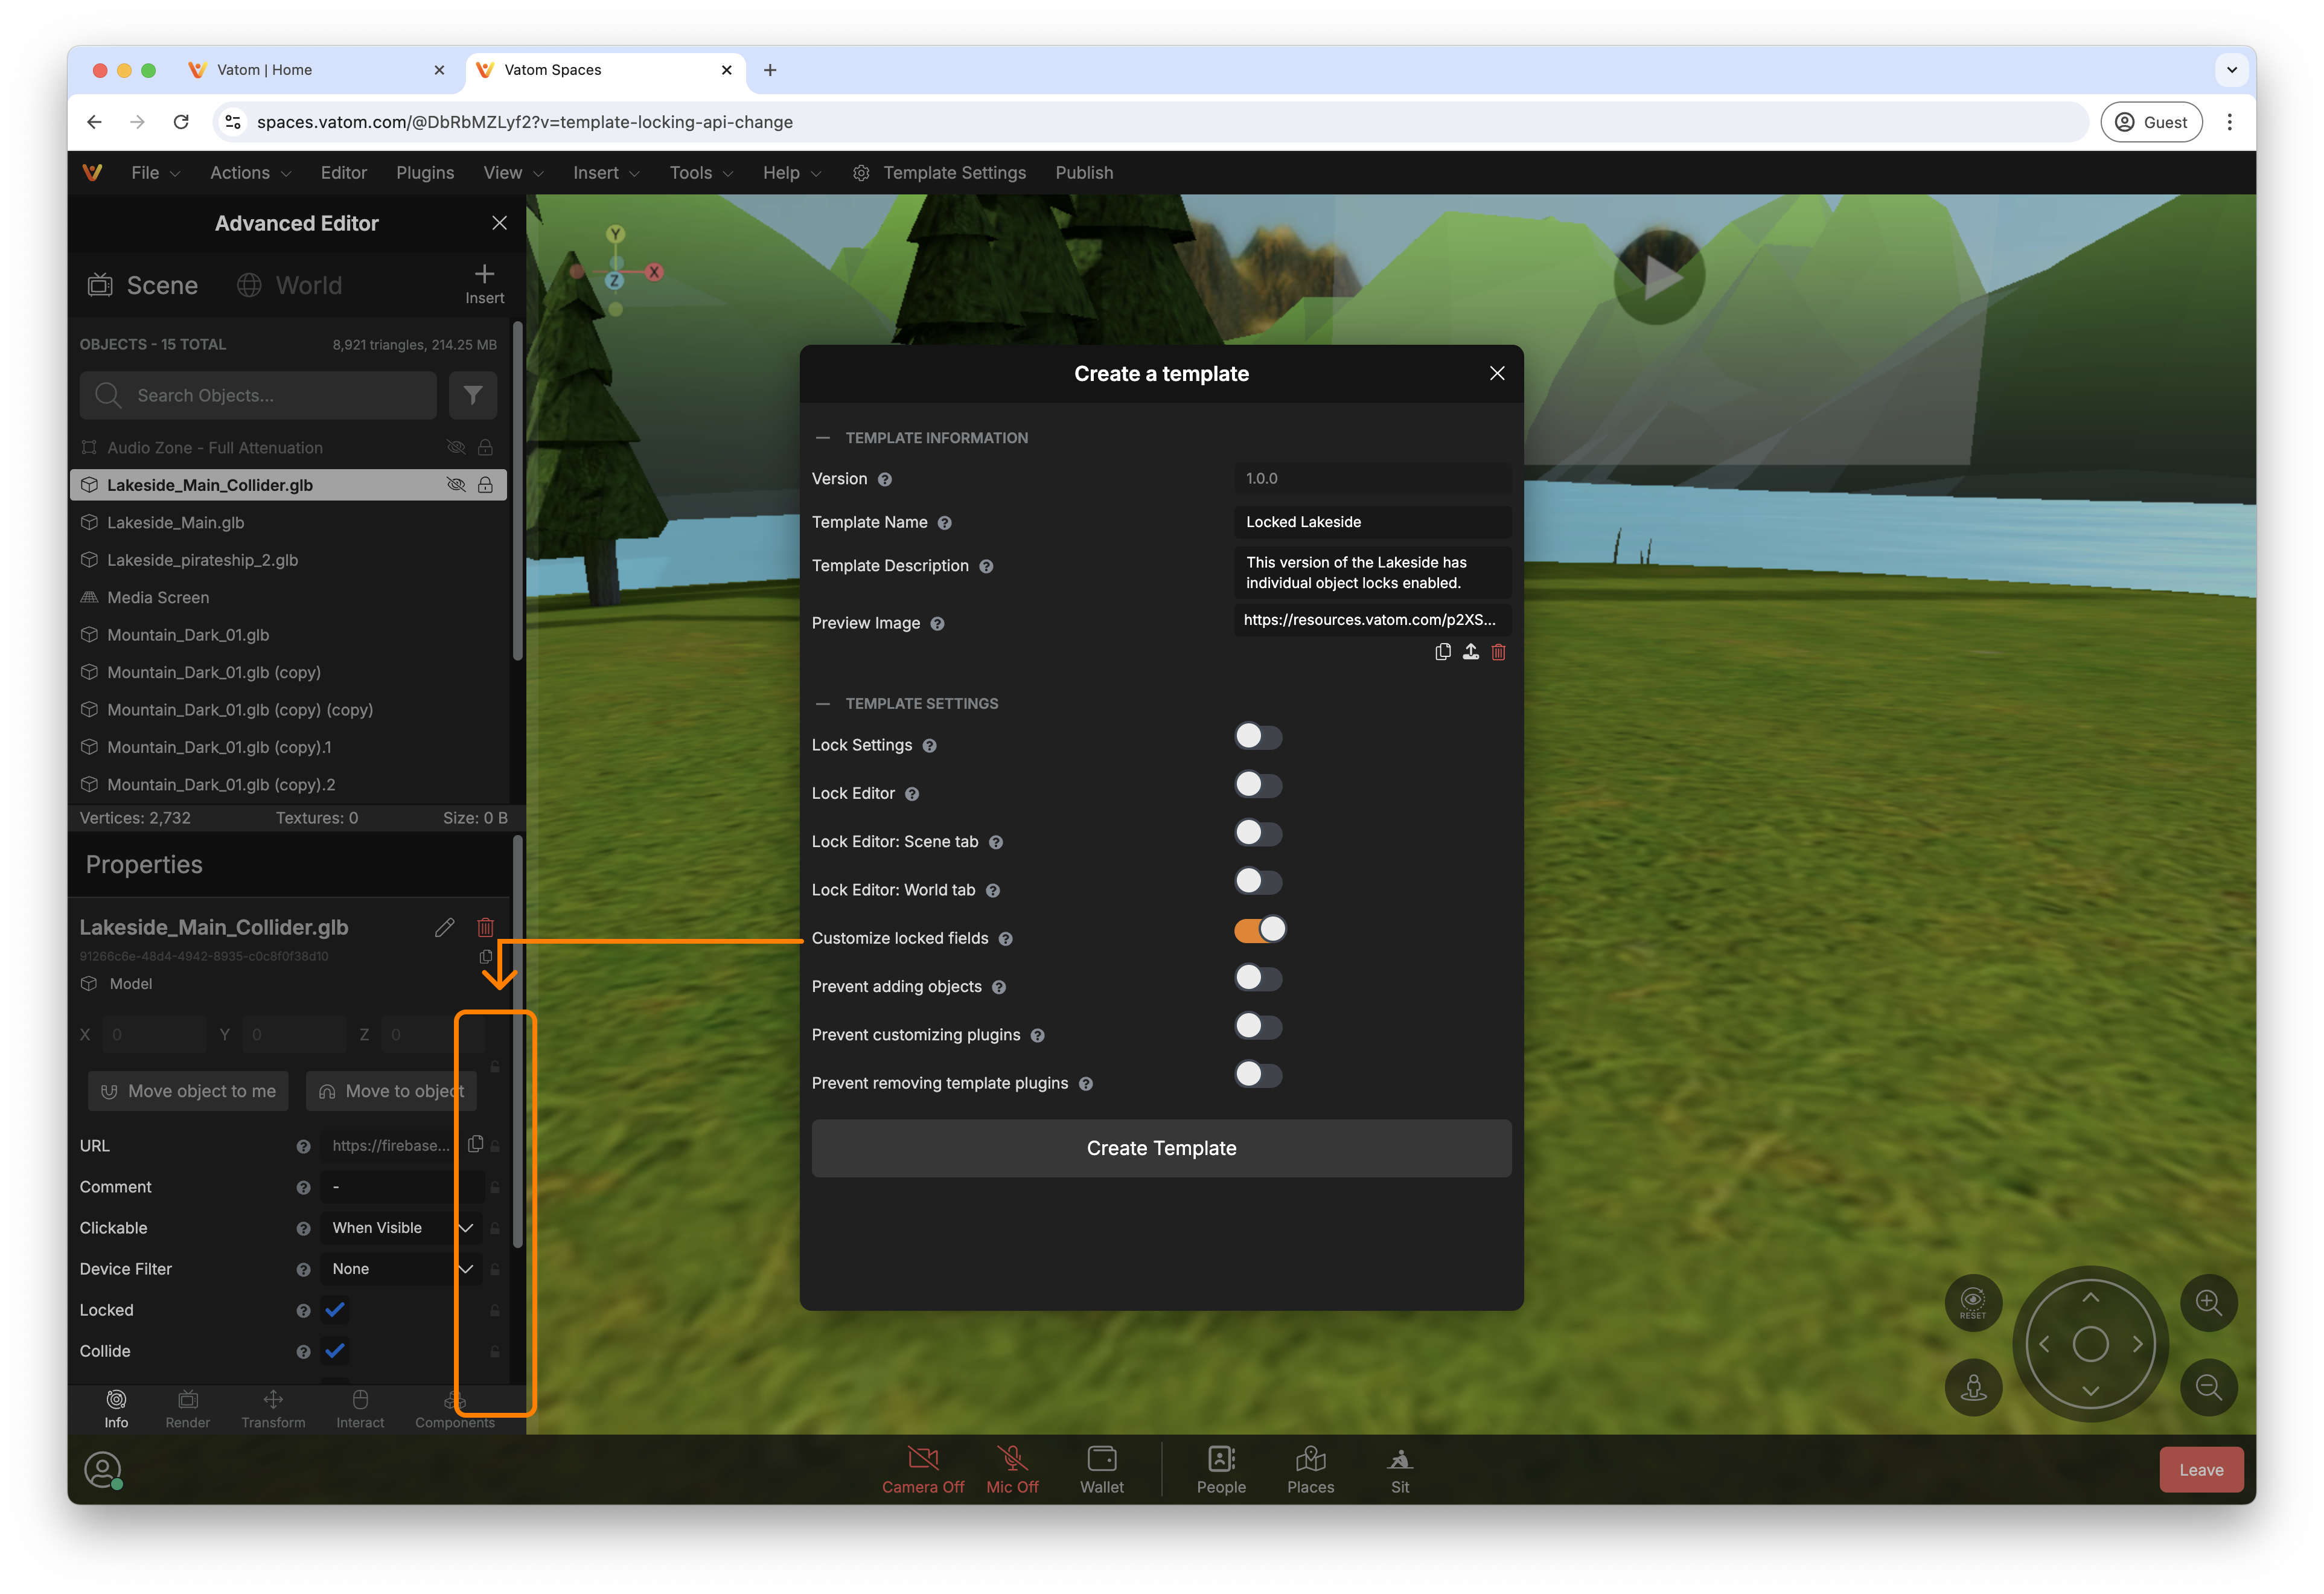
Template Locks & Settings
Control the experience for Admins within your space. For example, if you want to throw an event for your organization but don't want Admins to be able to modify the environment of your space, the scene objects can be fully locked while still allowing Admins to install plugins and manage the user experience.
The Template Settings panel are the top-level settings and locks of the Template system. Here you can lock entire settings menus.
- Lock Settings - Locks the File > Settings window
- Lock Editor - Locks the entire Edit menu, including Scene and World
- Lock Editor: Scene tab - Locks only the Scene tab of the Editor Menu
- Lock Editor: World tab - Locks only the World tab
- Customize Locked Fields - Enable individual locks for object settings.
- Prevent adding Objects - Prevent Admins from adding objects to the space
- Prevent Customizing Plugins - Prevent Admins from modifying Plugins
- Prevent Removing Template Plugins - Prevent Admins from removing Plugins installed in the Template.
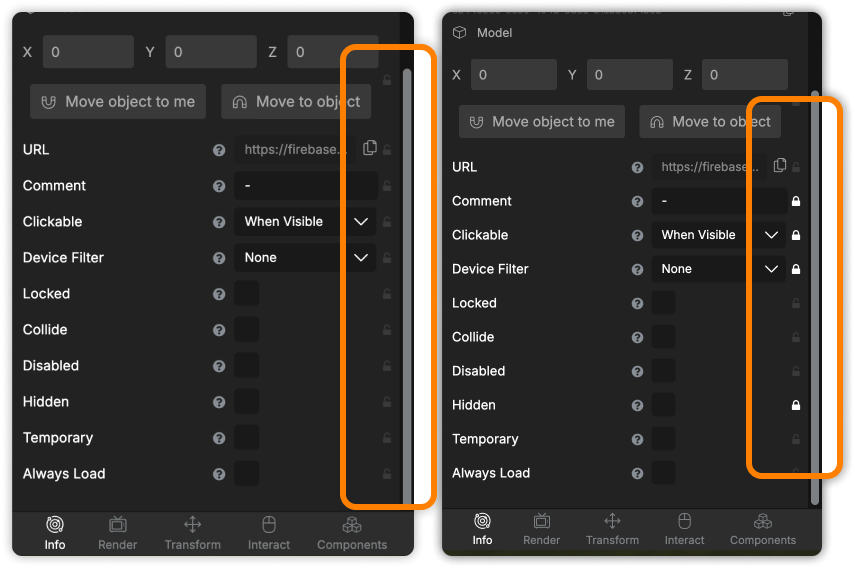
Customize locked fields
Lock individual objects and settings. With this enabled, an additional set of lock options is added to the editor, to the right of every setting in the Scene Editor.
If you would like to lock an entire object, enable the "Locked" setting and then lock the setting field.
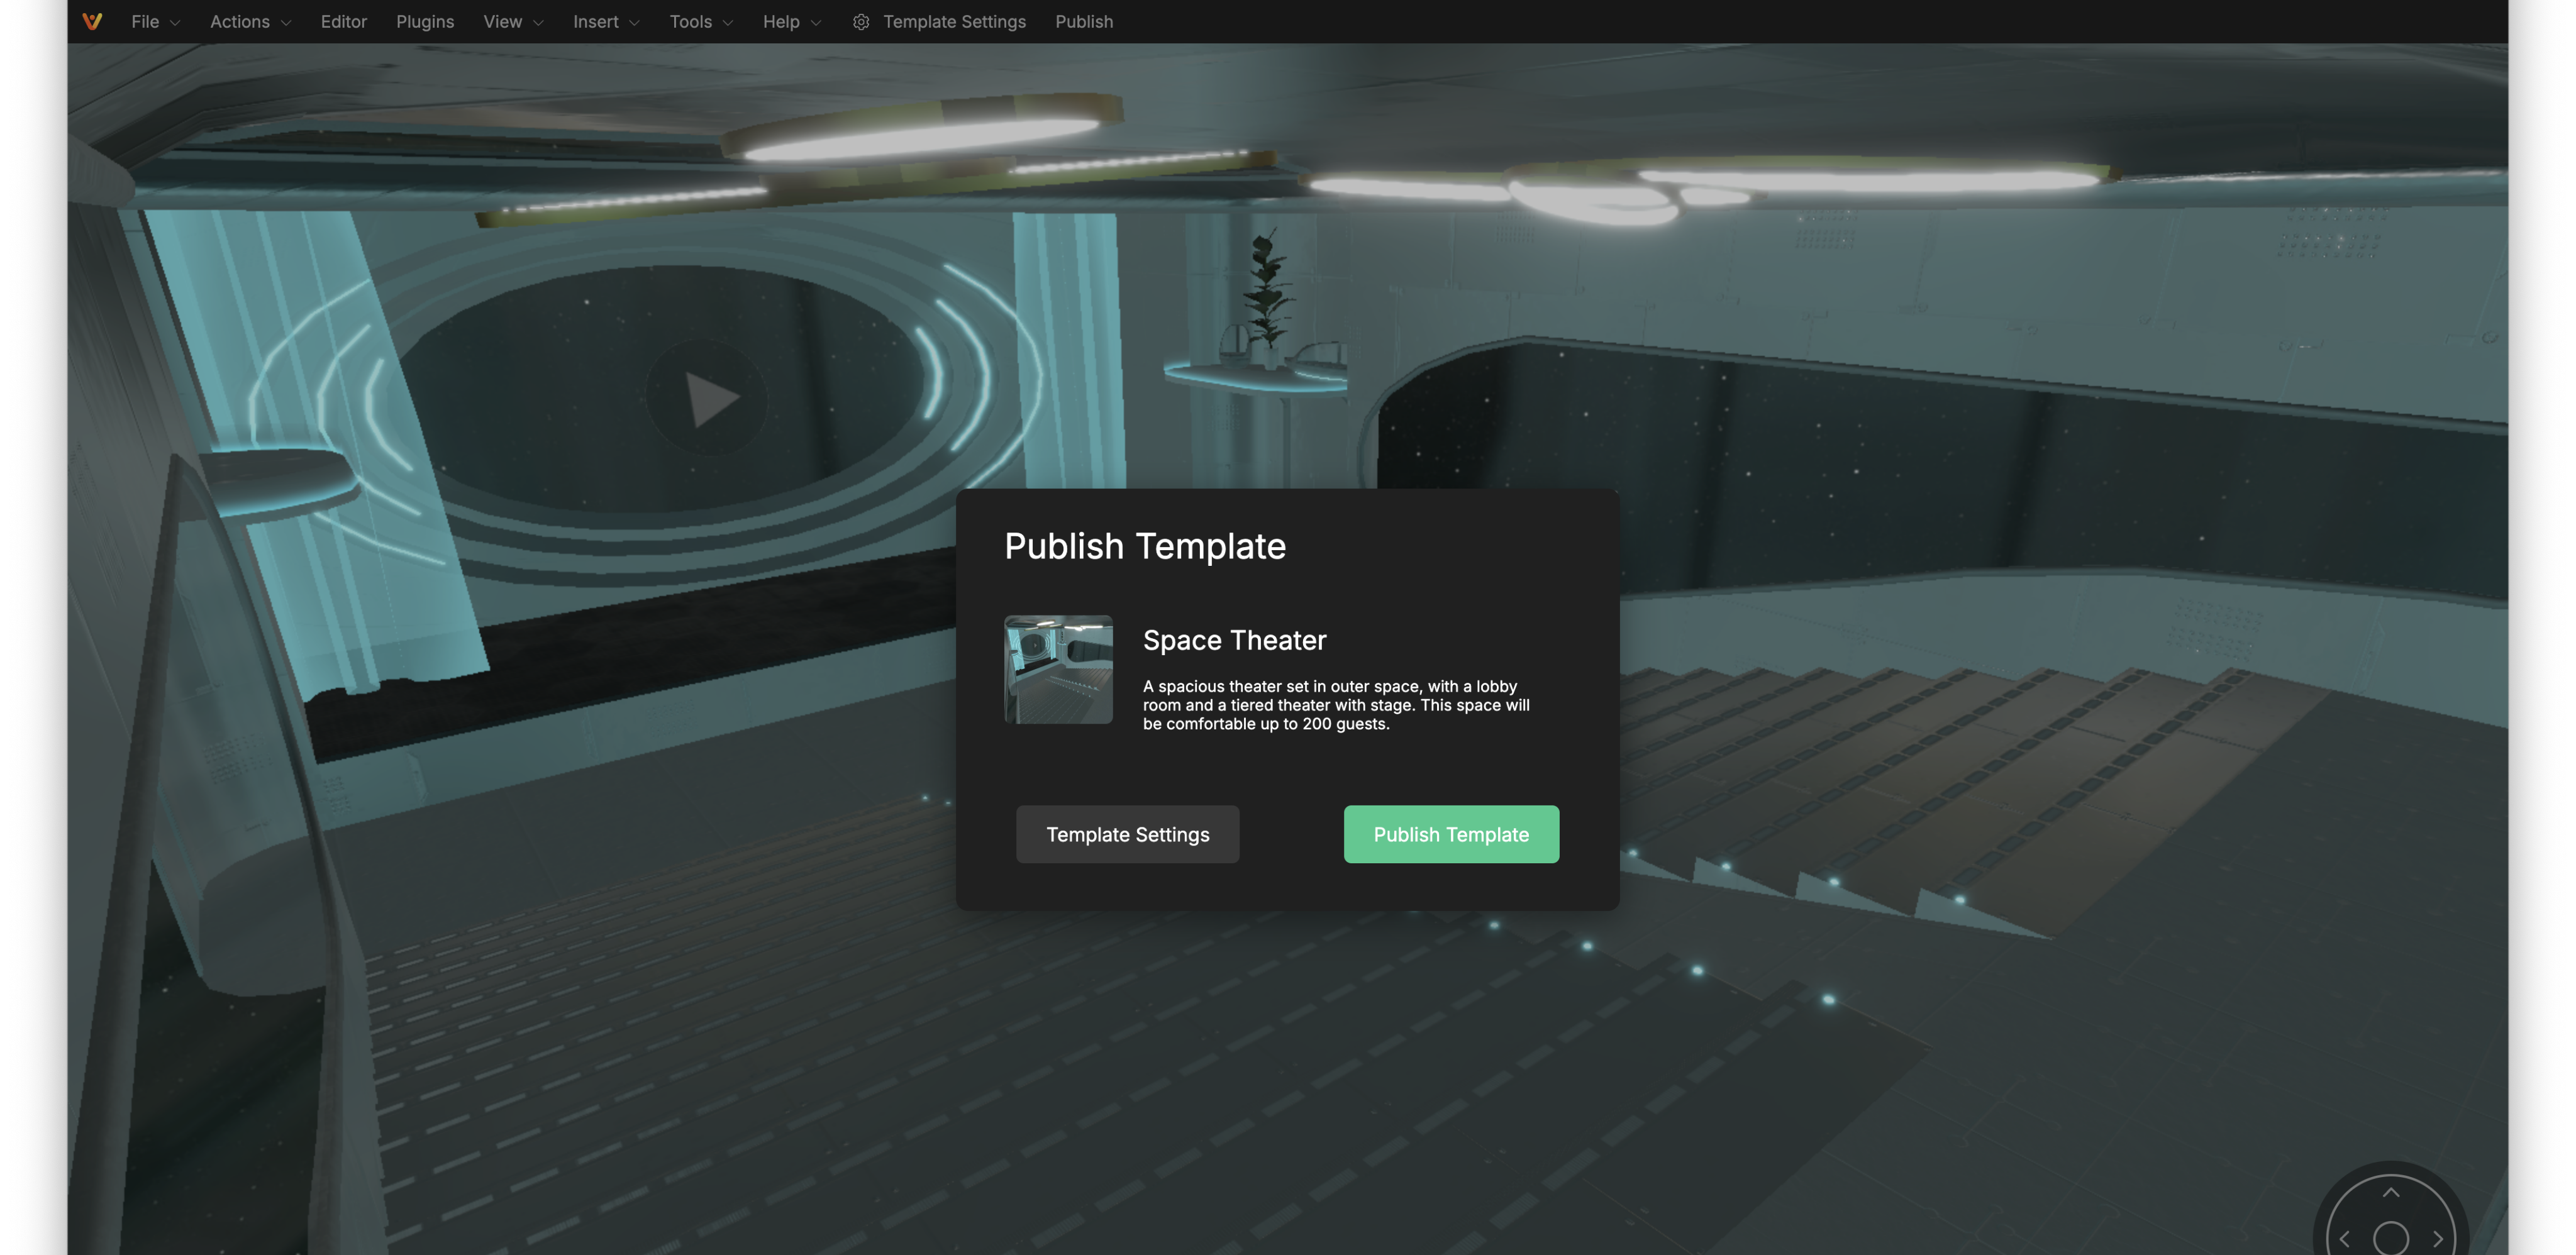
Publishing a Template
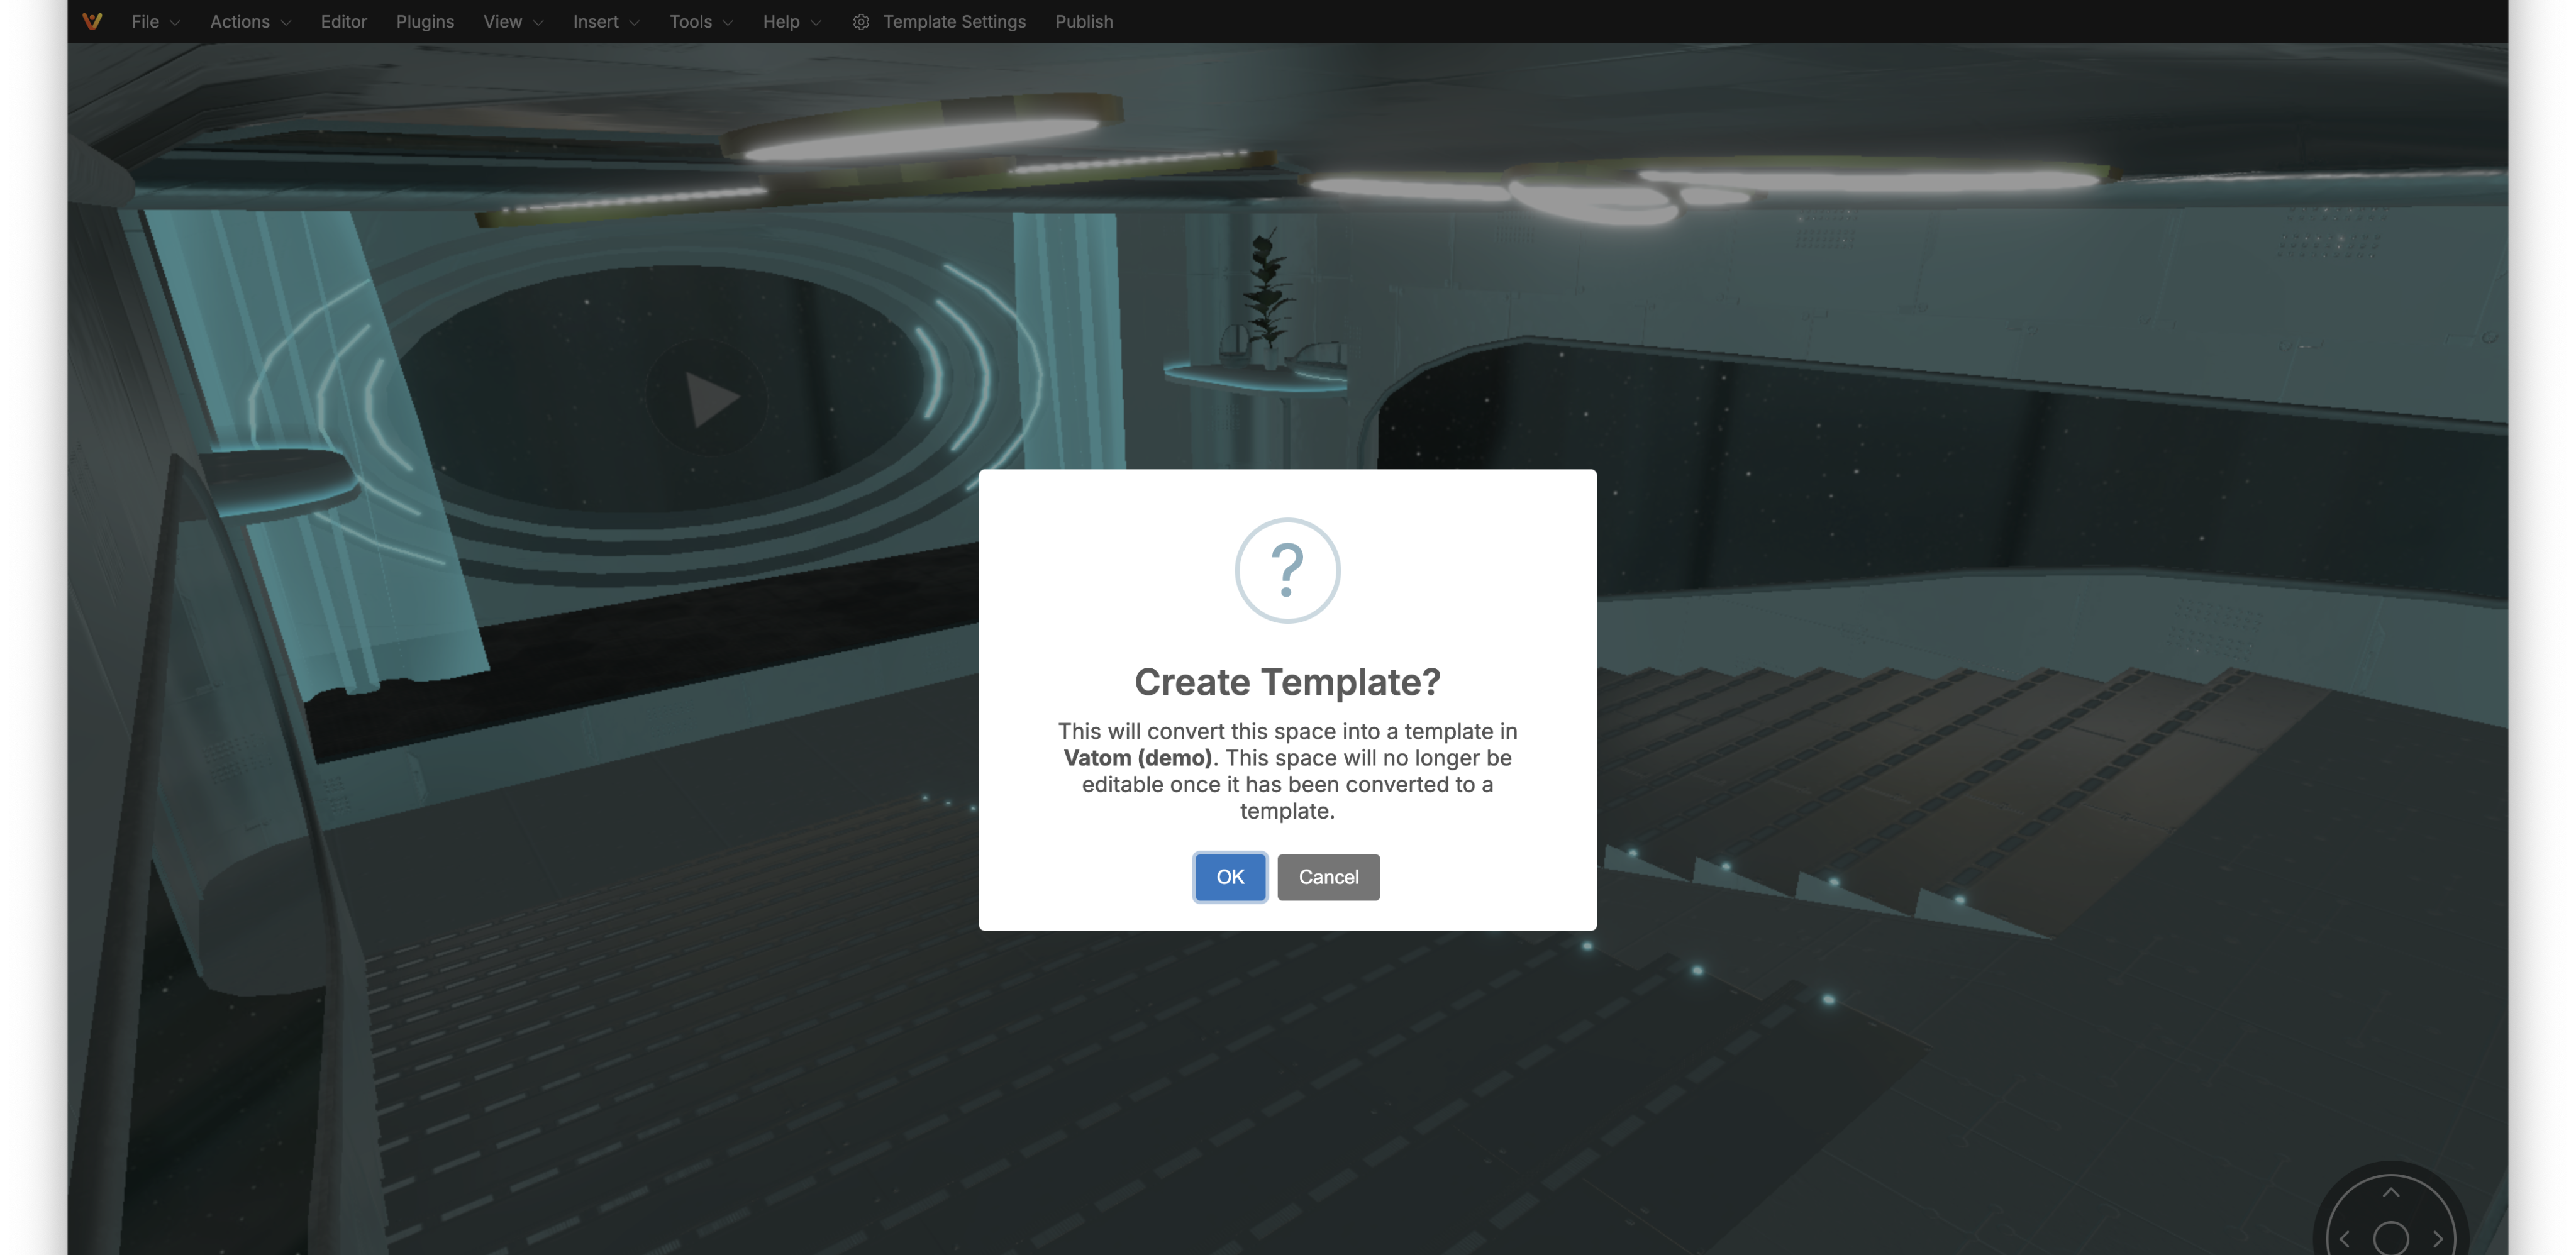
Once your space is configured and the Template Settings are as you would like, press Publish in the Admin Toolbar. When a space is published, guests can no longer visit the space and any custom @handle set will be lost. You will need to create a New Space using the newly created template.

Managing Templates
In Vatom Studio, click the expand icon next to Spaces and select Templates.
Your list of published templates will be listed here. Click on the template listing card to open the Template Settings.
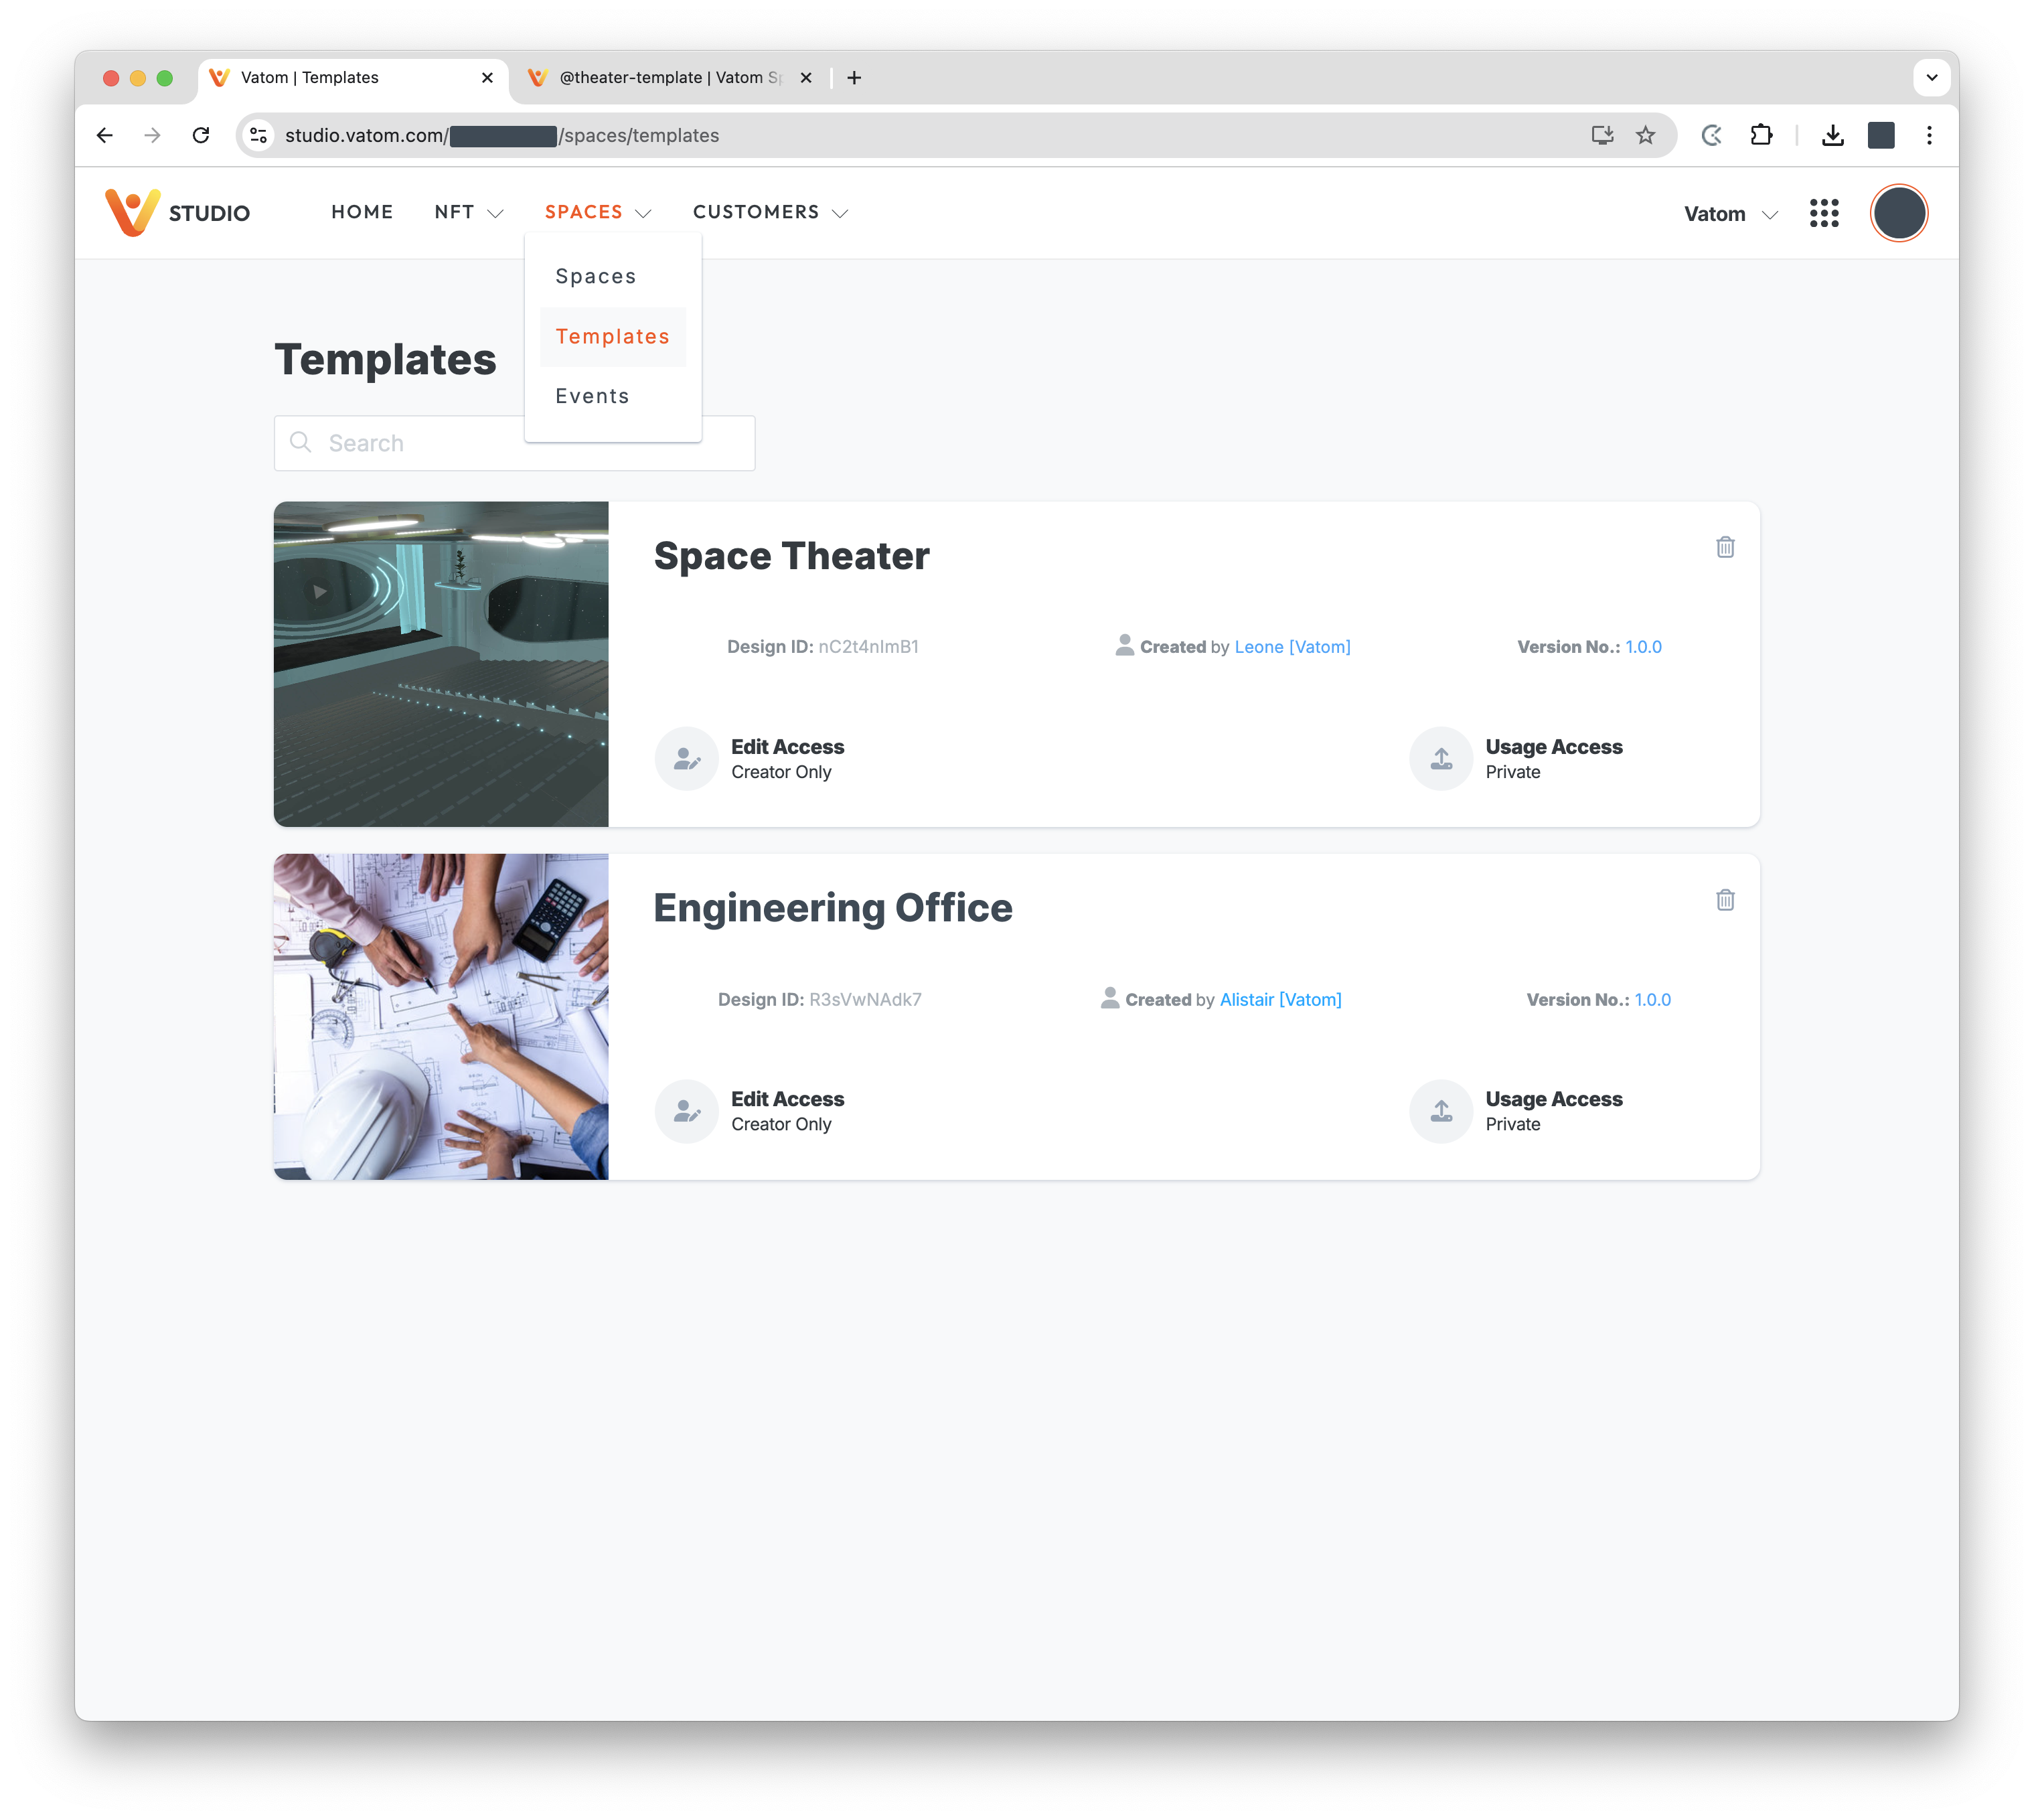
Here you can edit the template Title, Description and Preview Image, as well as seeing the previous versions in order to return and make updates.
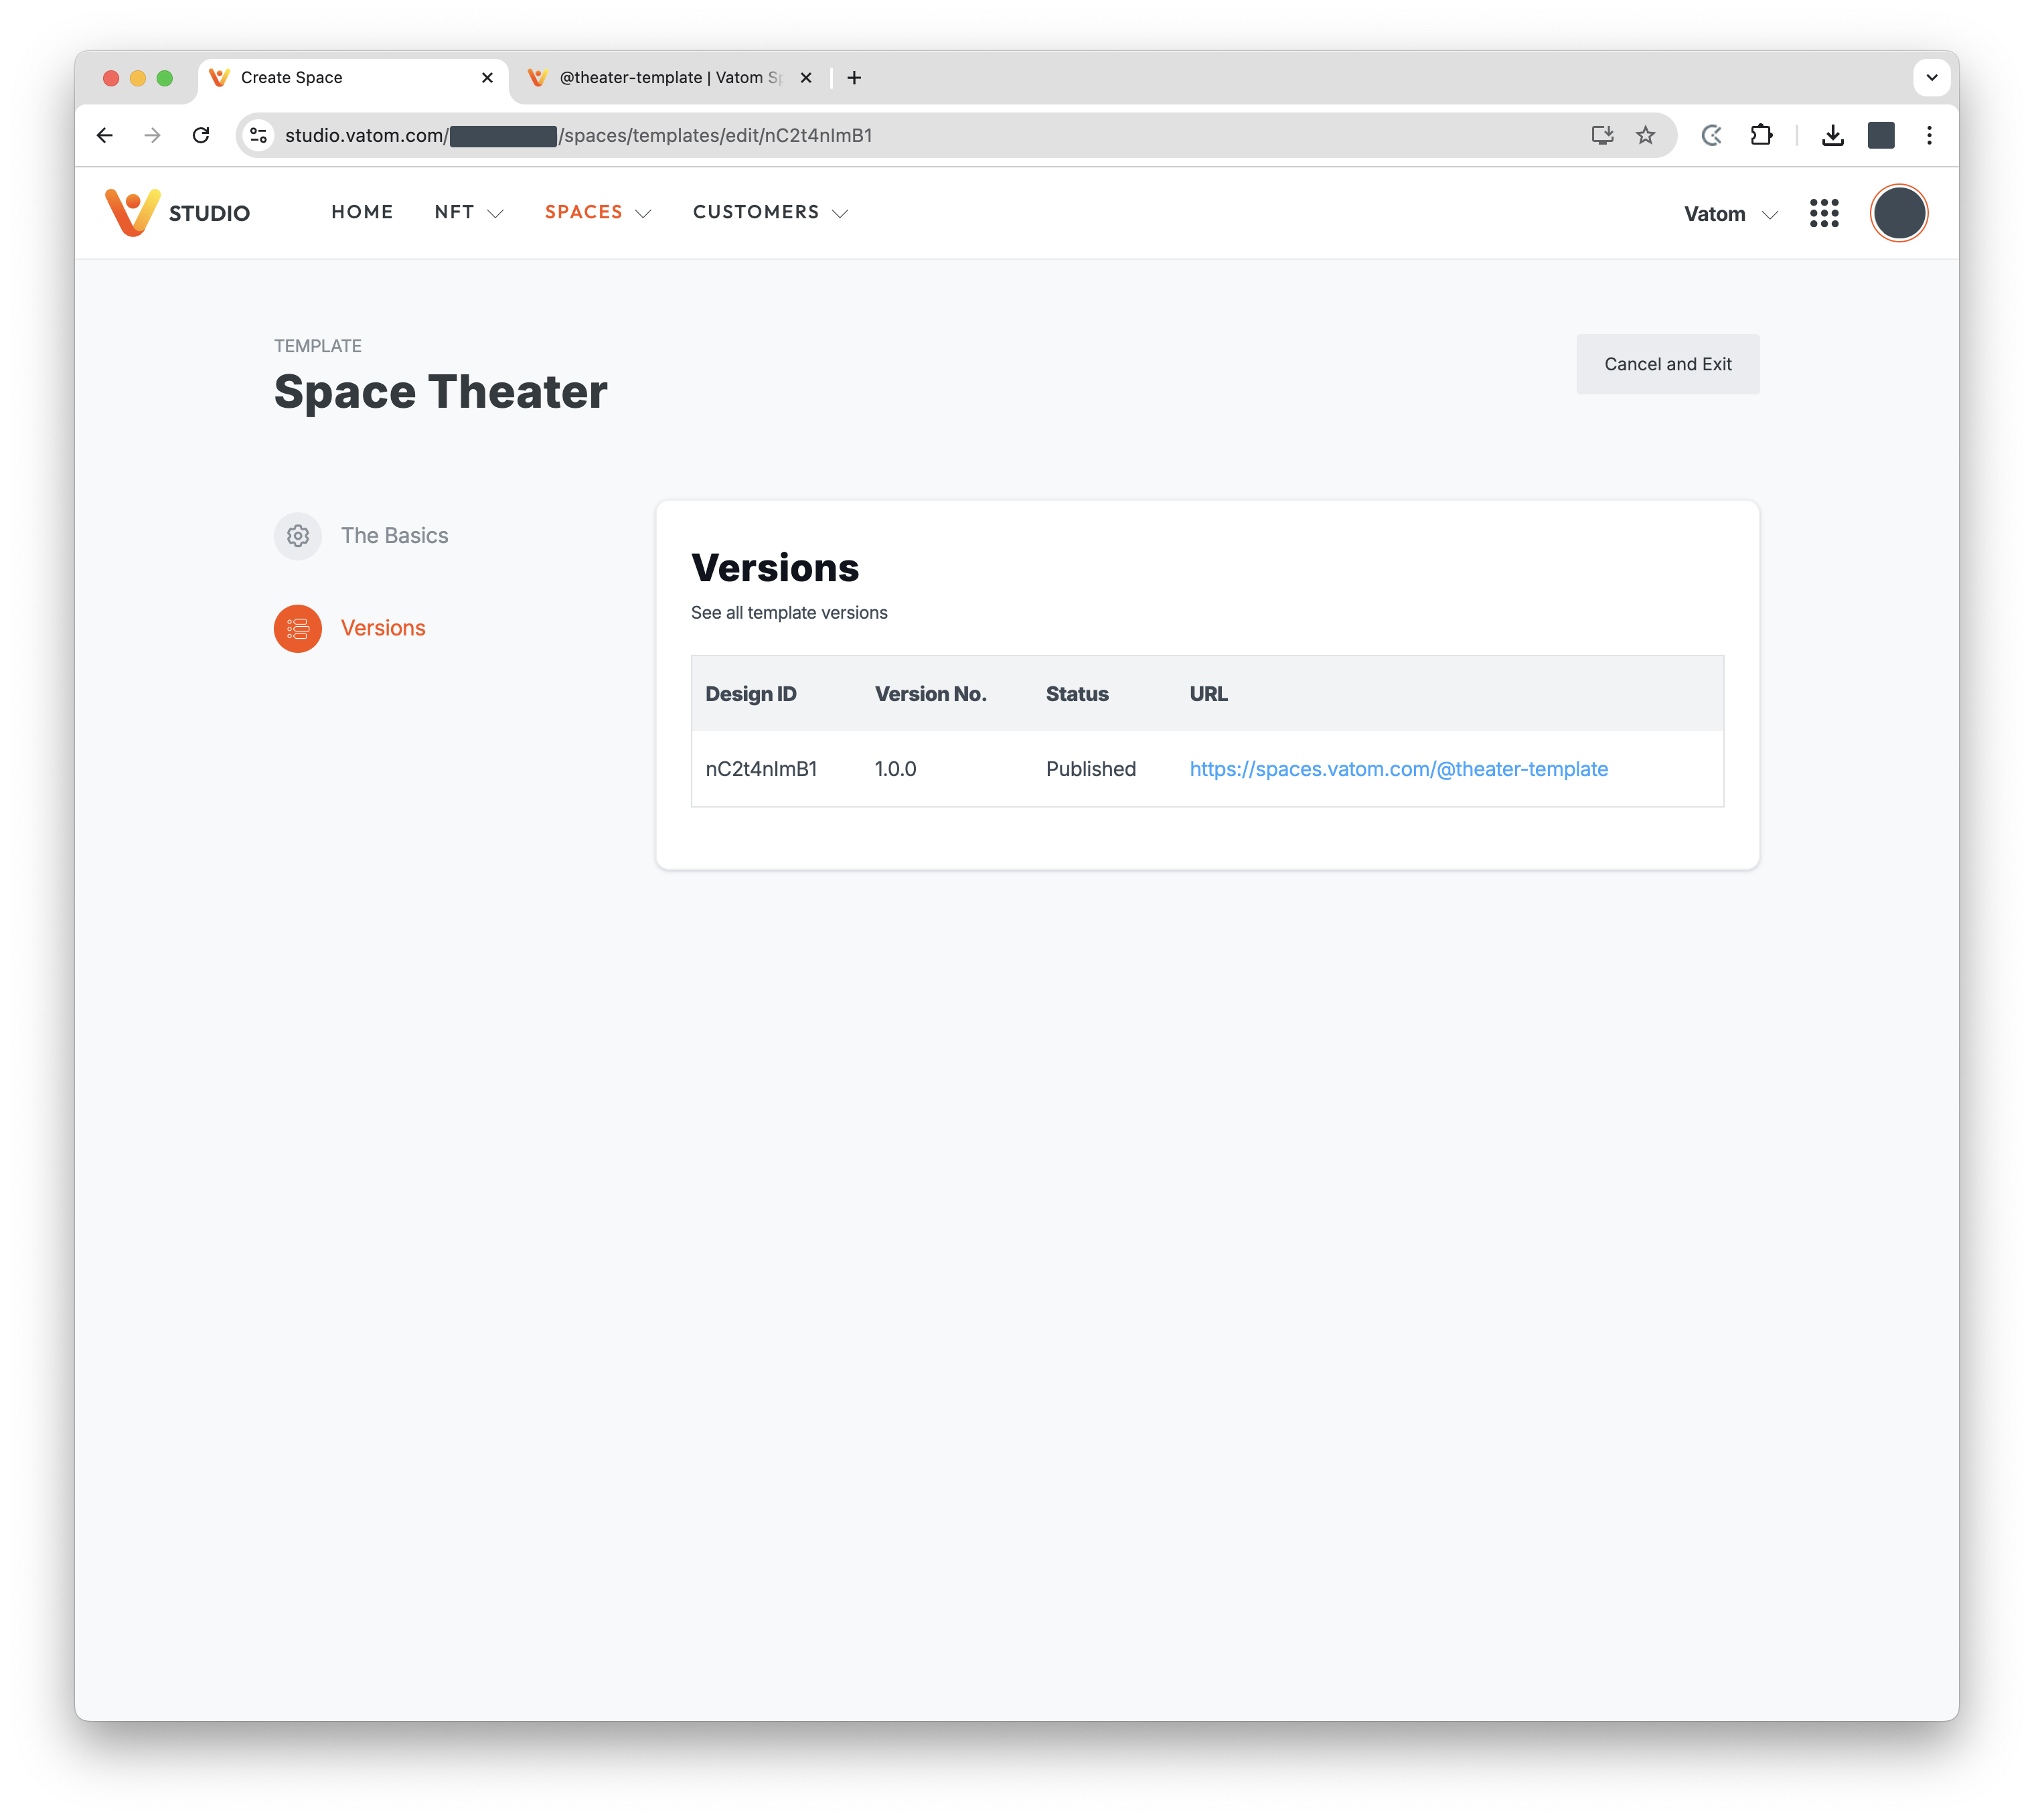
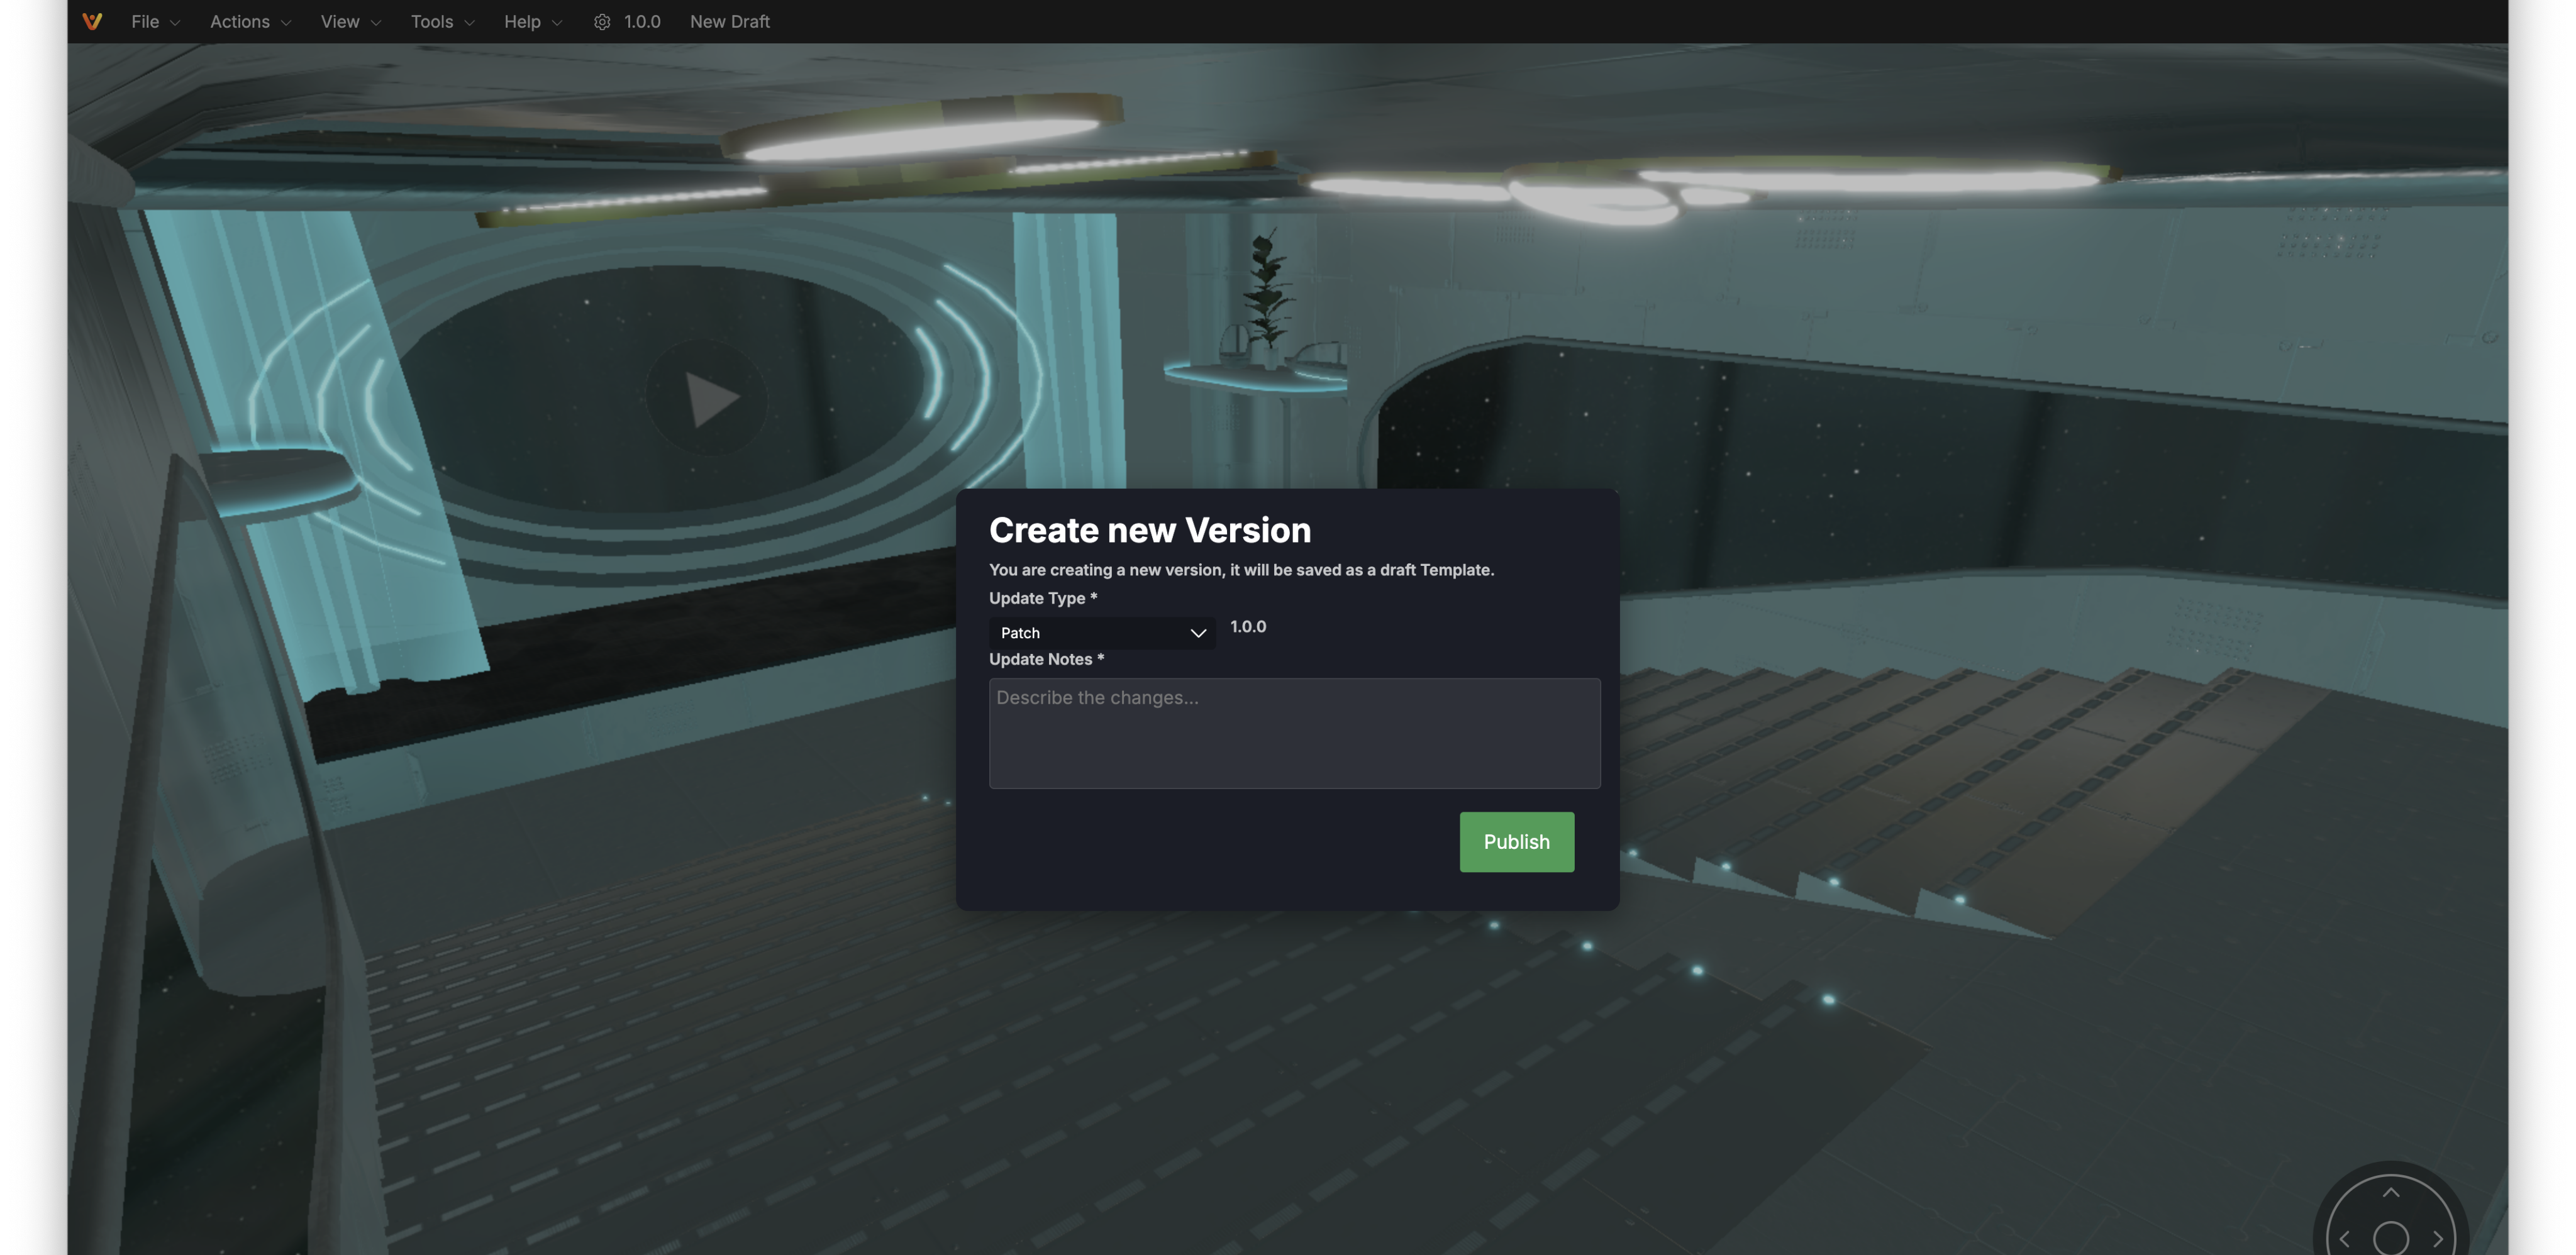
Updating your Template
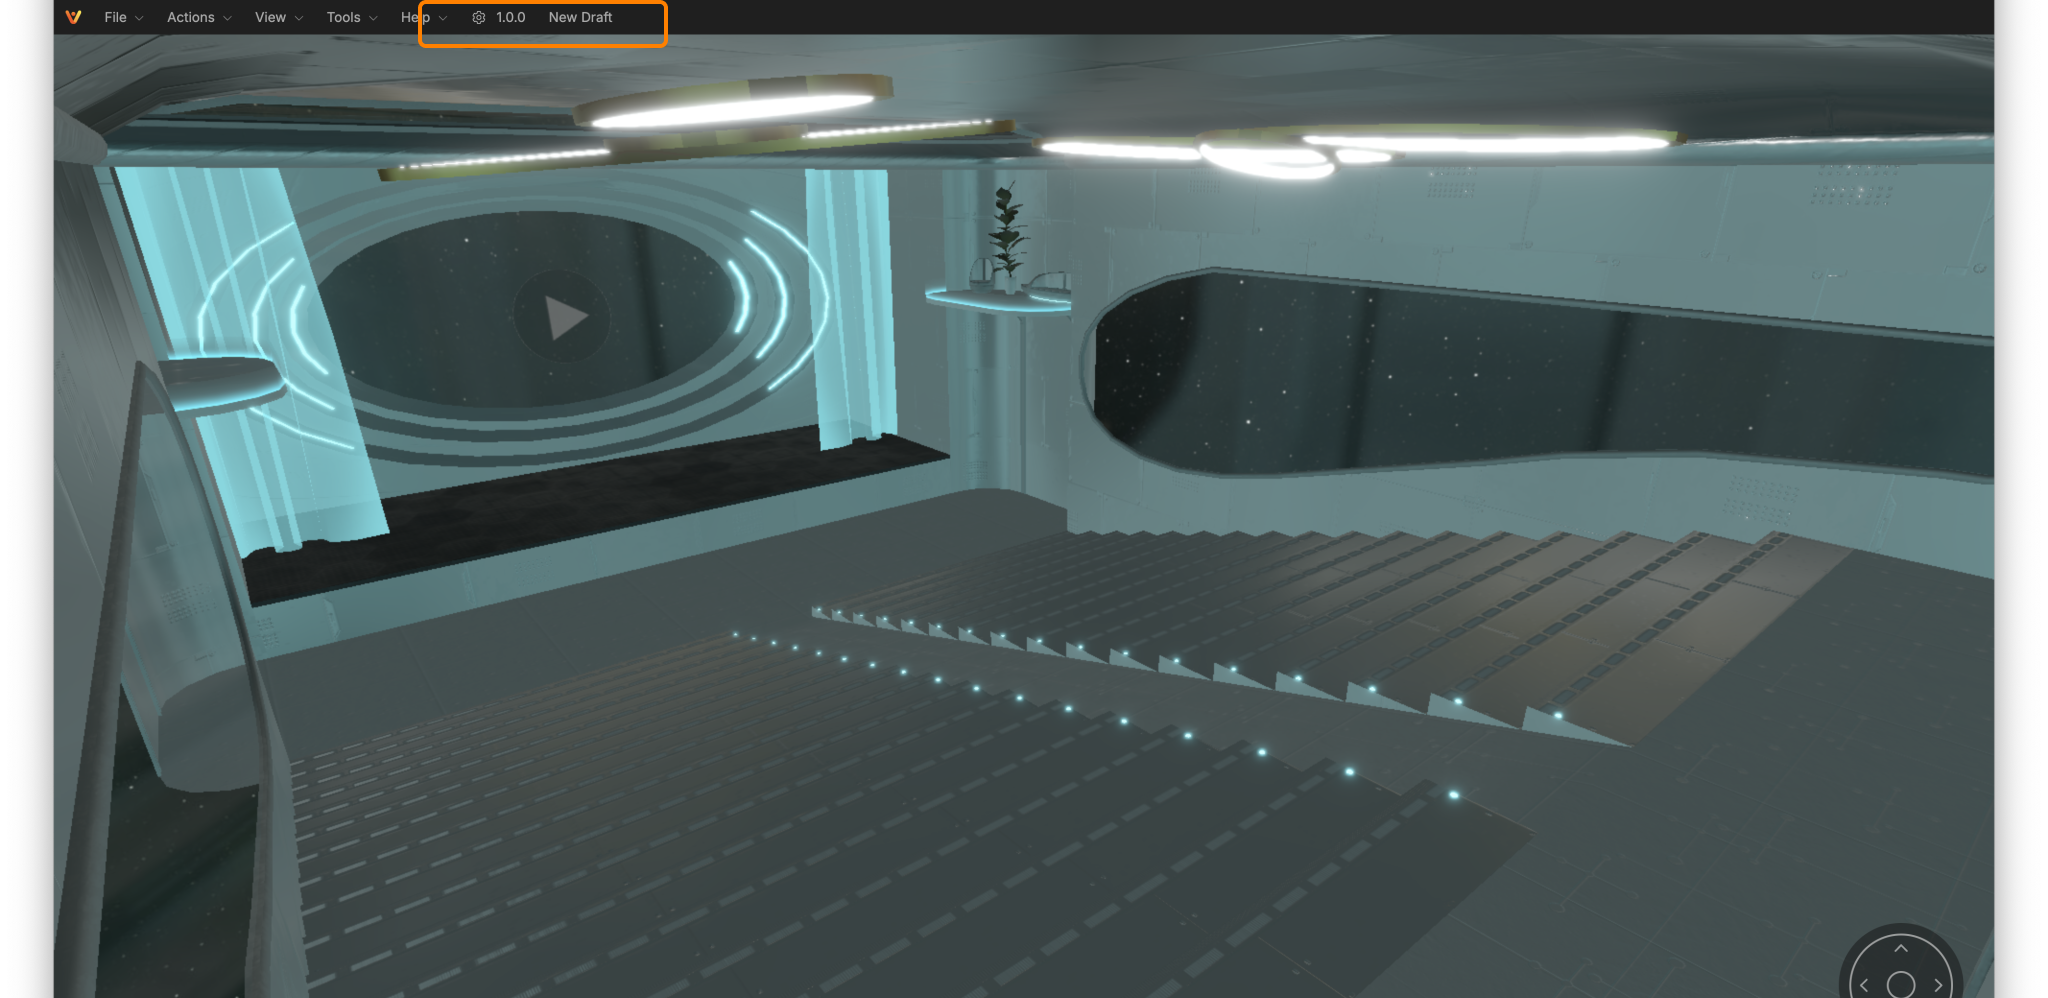
Once your template is published, the interface displays the current Version Number and the option to create a New Draft in the top Admin Toolbar.
The template and template settings can no longer be edited without creating a new version.
Customize Lock Fields
With the Customize Lock Fields setting enabled, each and every setting and component can be locked individually.
For instance, if a designer would like to allow Space Admins to access the editor but not make adjustments to specific objects they can lock down the individual object or setting configurations.


To lock an entire object from adjustment, check the "Locked" field and then lock the setting in Template Designer.

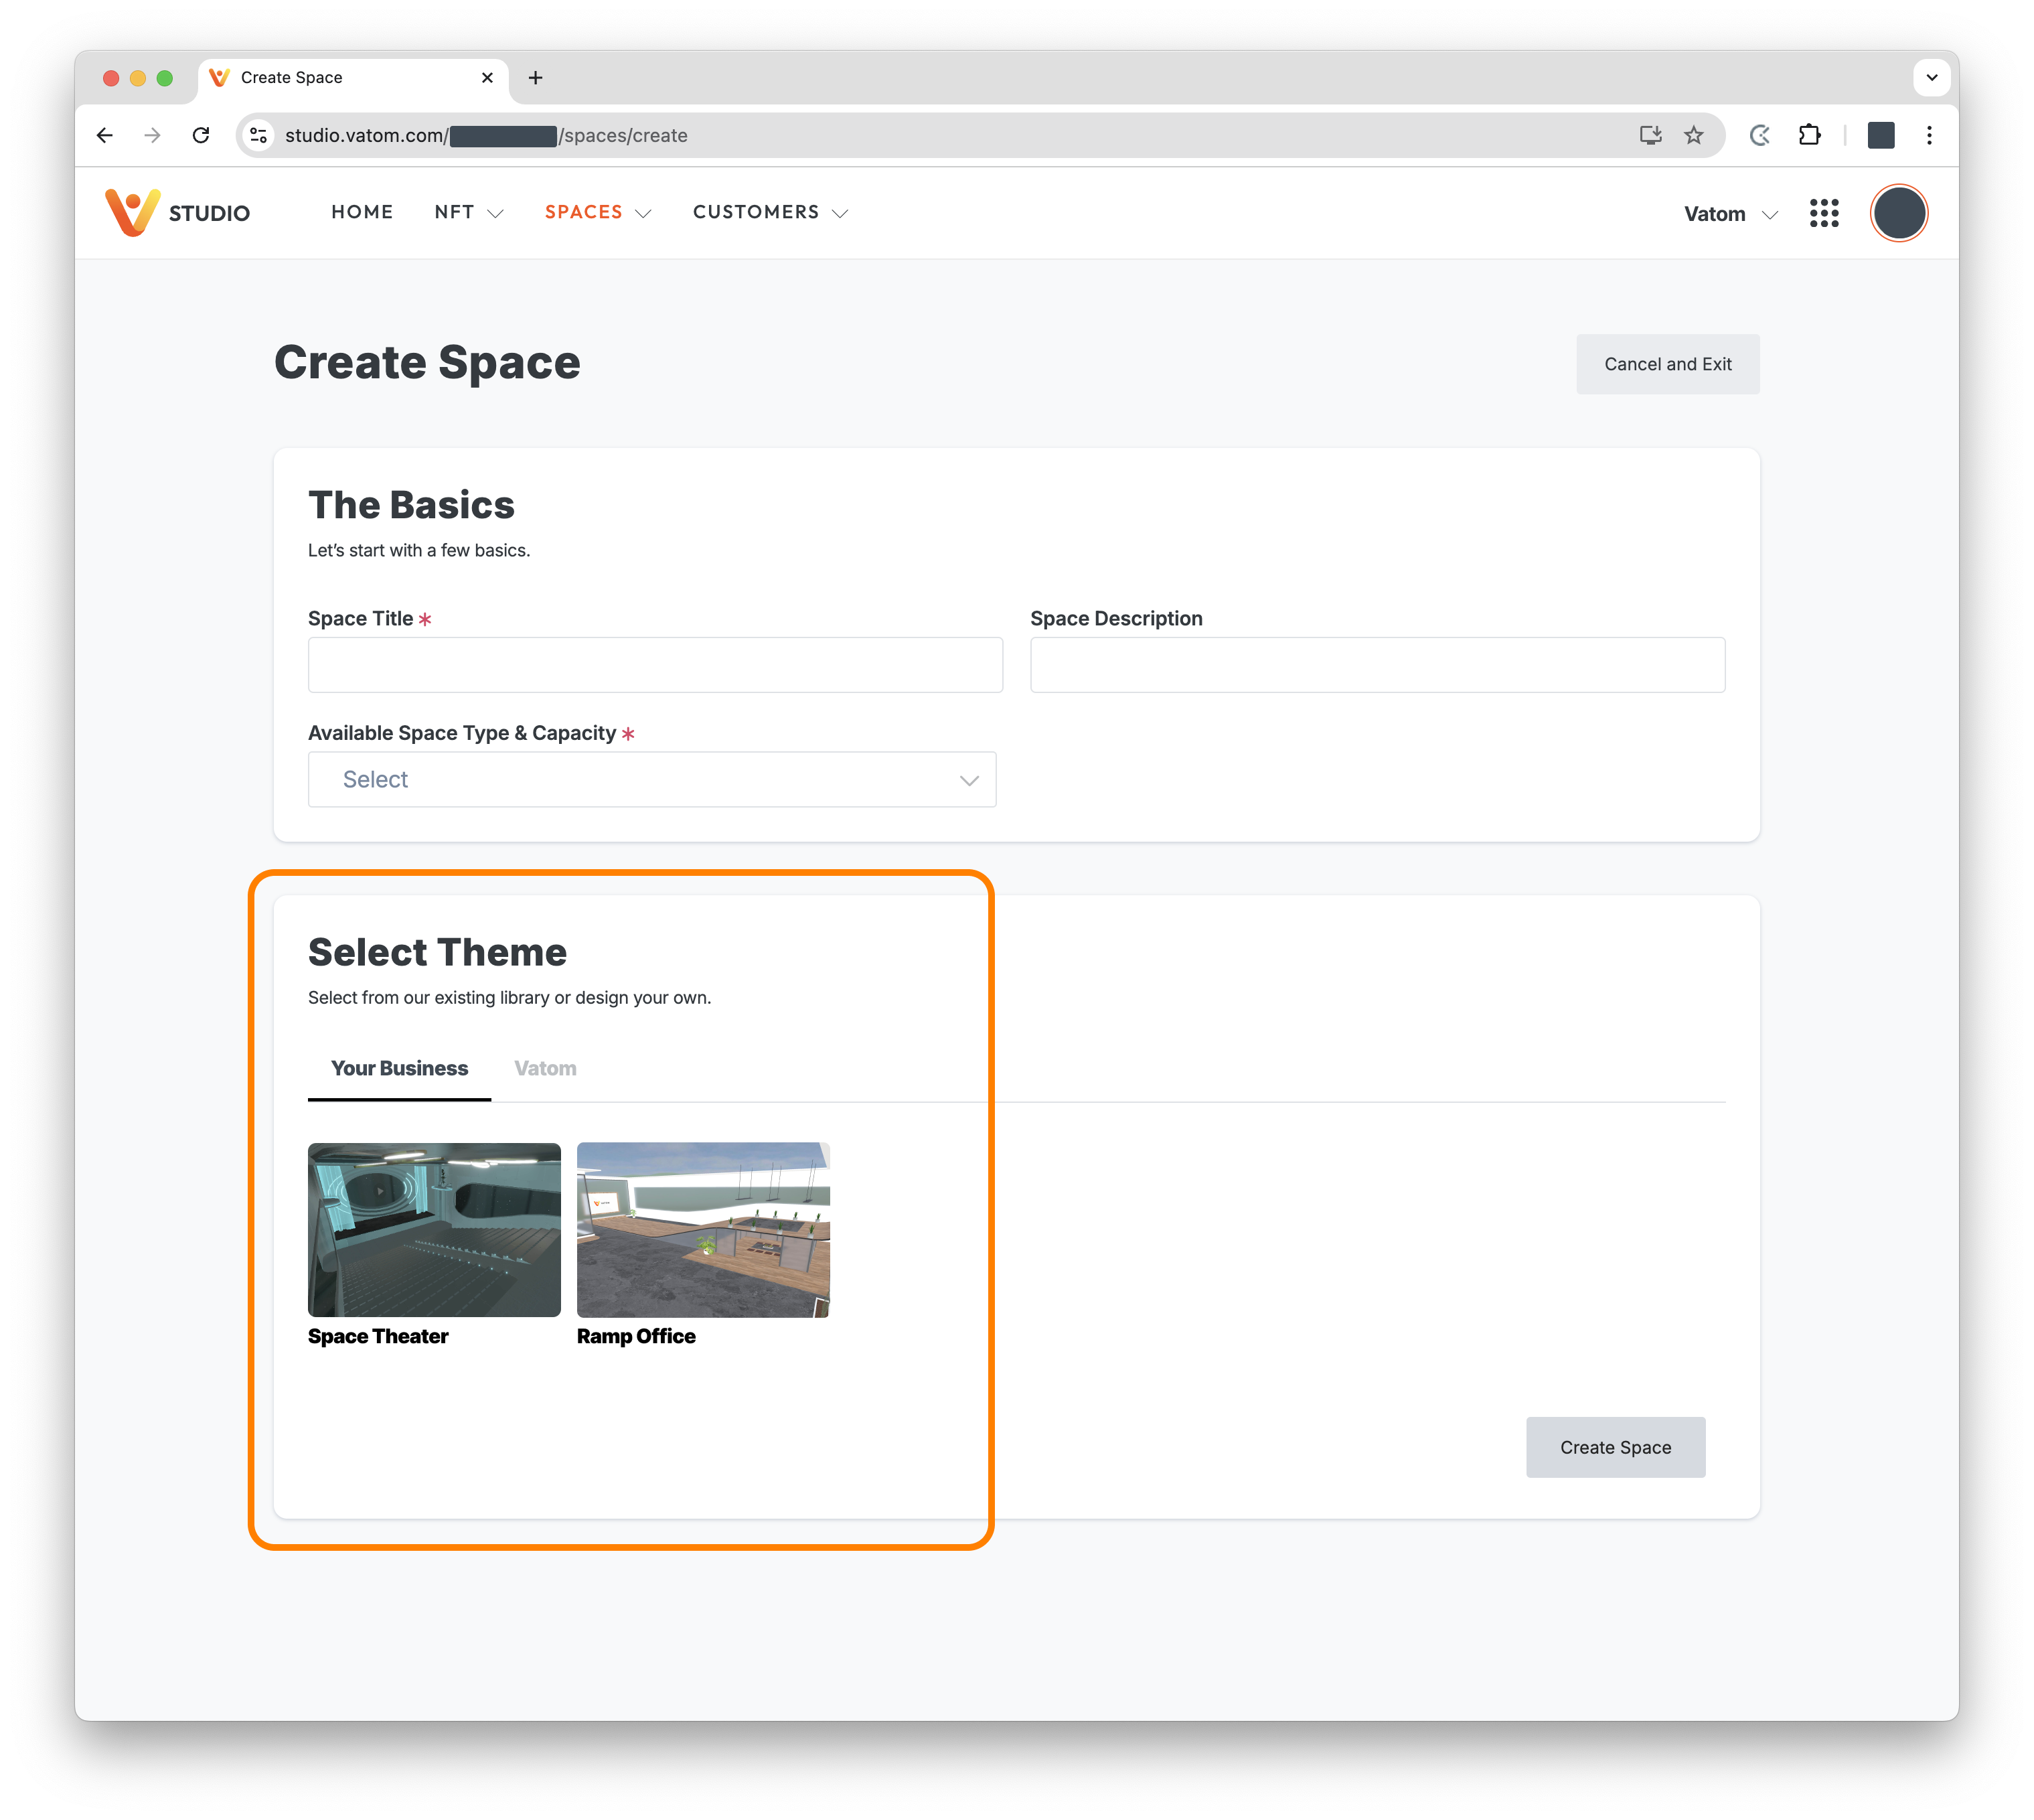
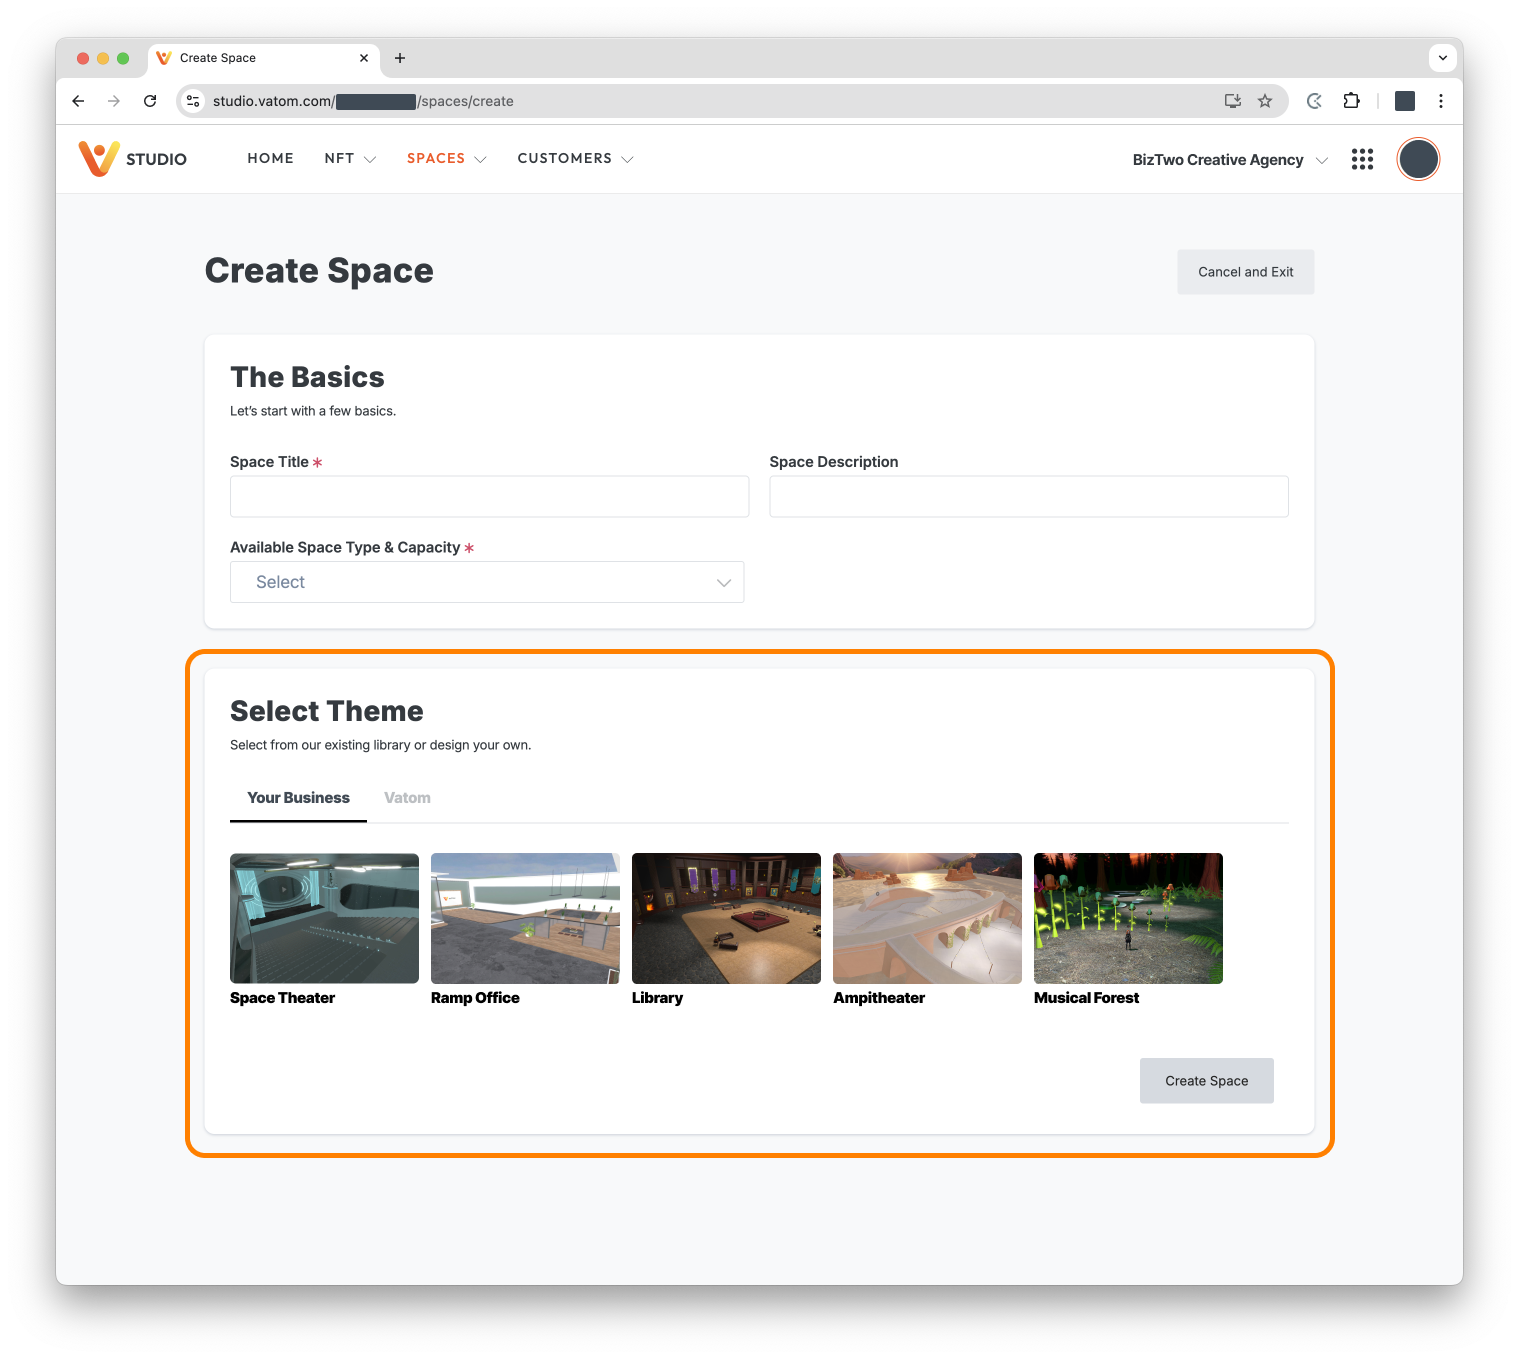
Using a Template
Once a Space is published as a Template, it is no longer a Space. Your Space License will be restored and available to create a new Space from your template.
When creating a New Space under Vatom Studio > Spaces > Create New Space, published custom themes are located in the "Select Theme" menu. You will see one tab for Your Business templates and a second for our default Vatom templates.