Object Distributions
Creators can "Distribute" their NFTs in a variety of methods.
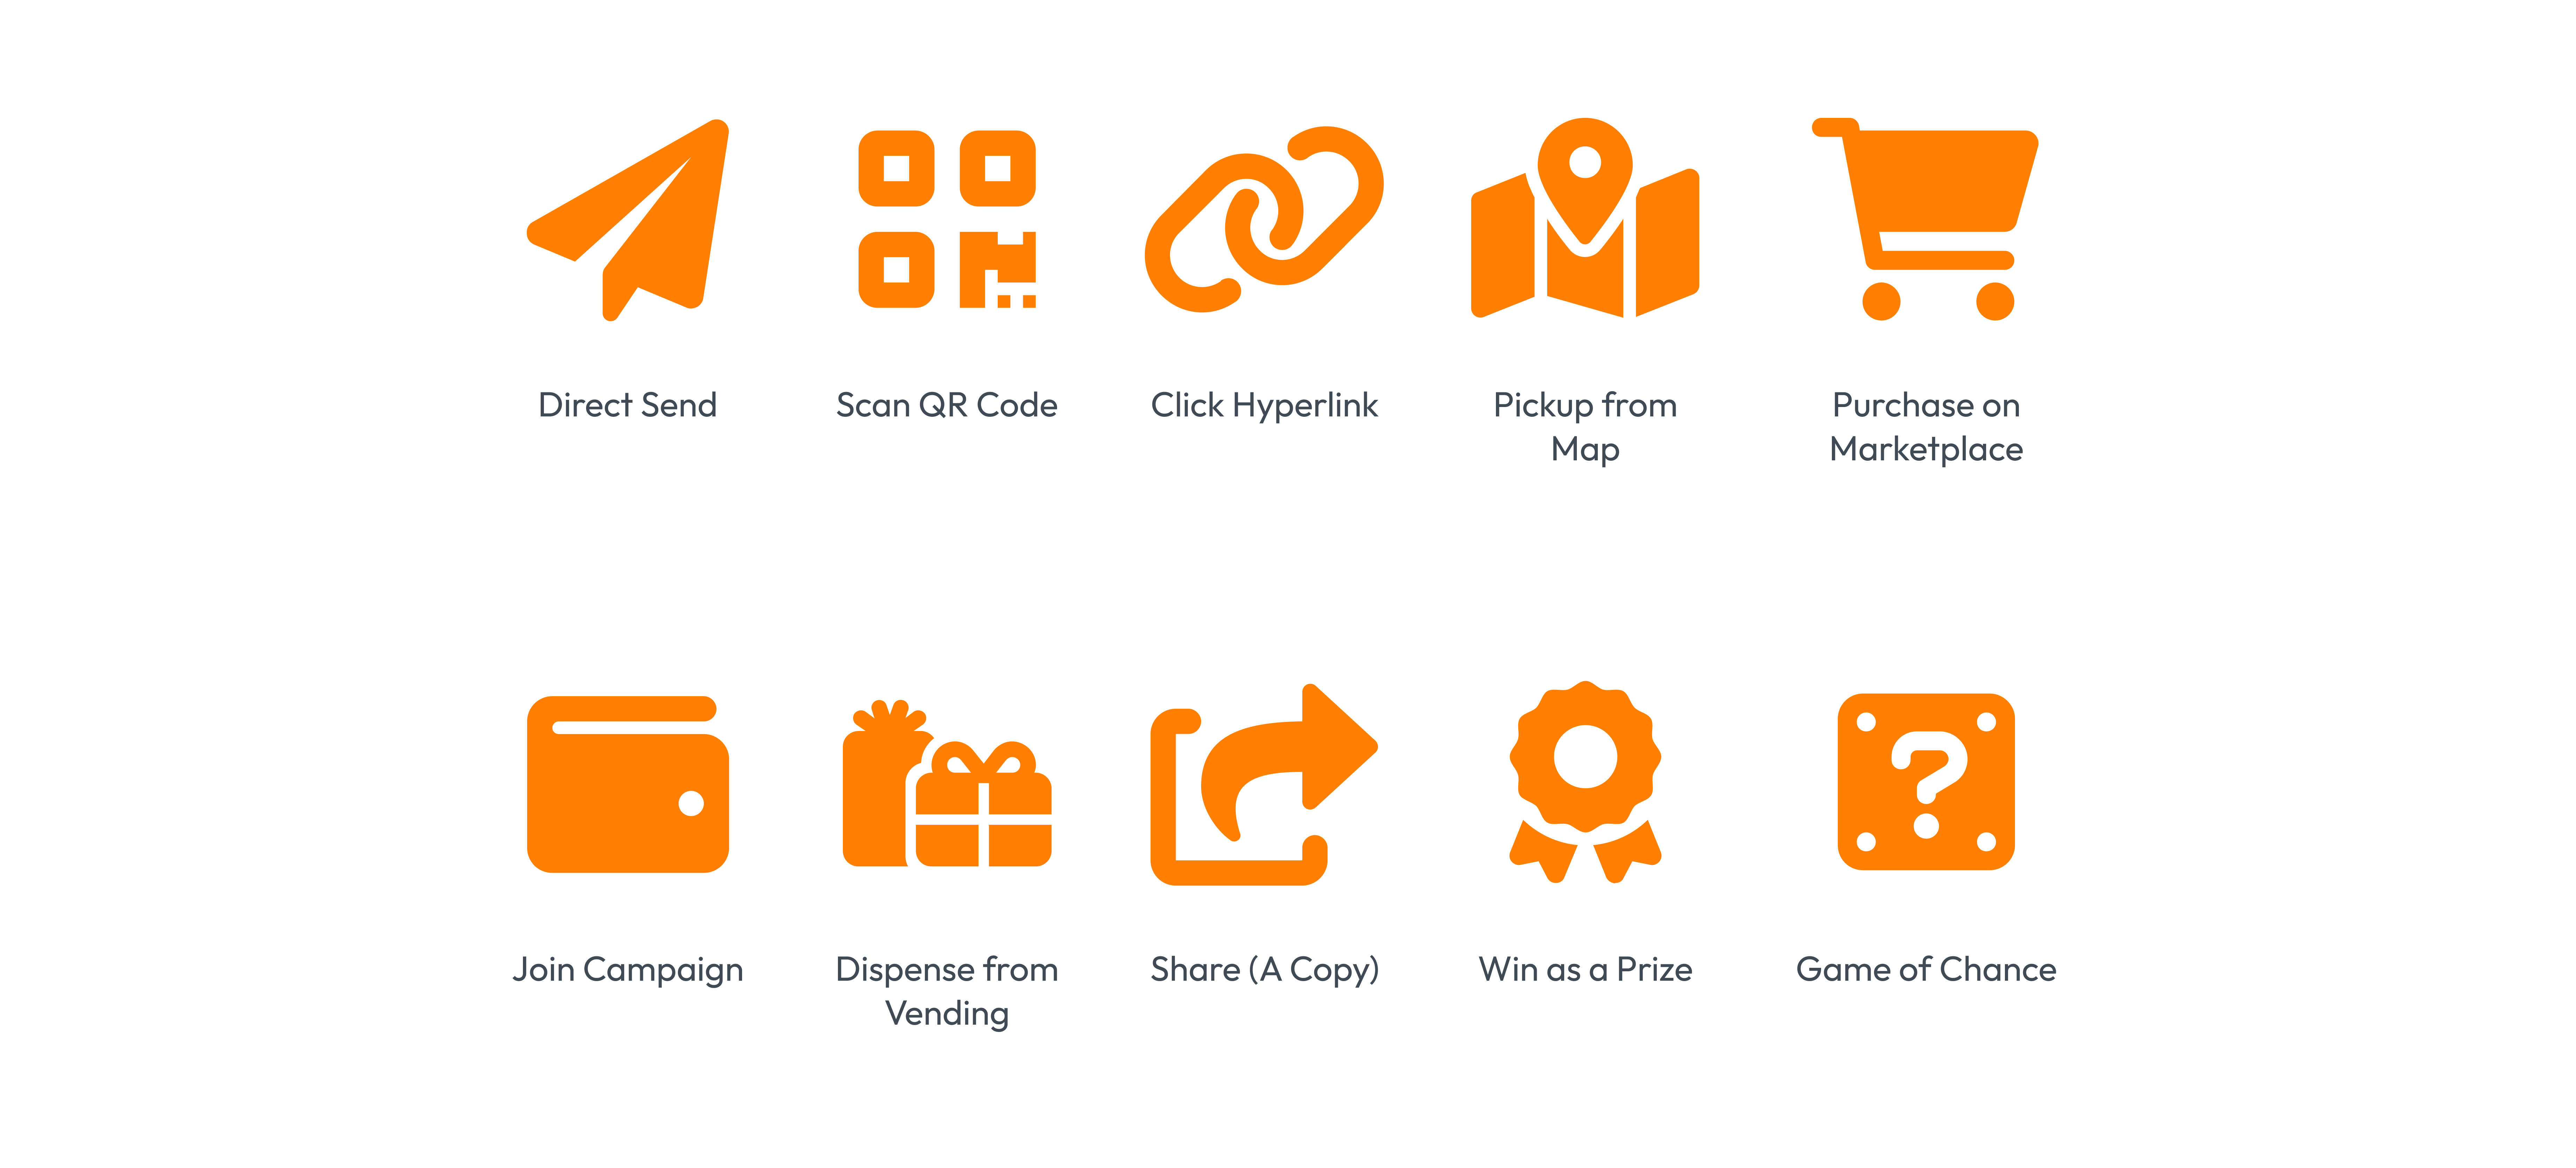
The Vatom Developer Suite allows for a number of additional methods to distribute your digital objects.
- Distribute with a Simple QR or URL
- Send to an Email
- Drop on real-world map for AR or Map Pickup
- Drop items within an area
- Drop items at specific locations
- Sell on the Vatom Marketplace
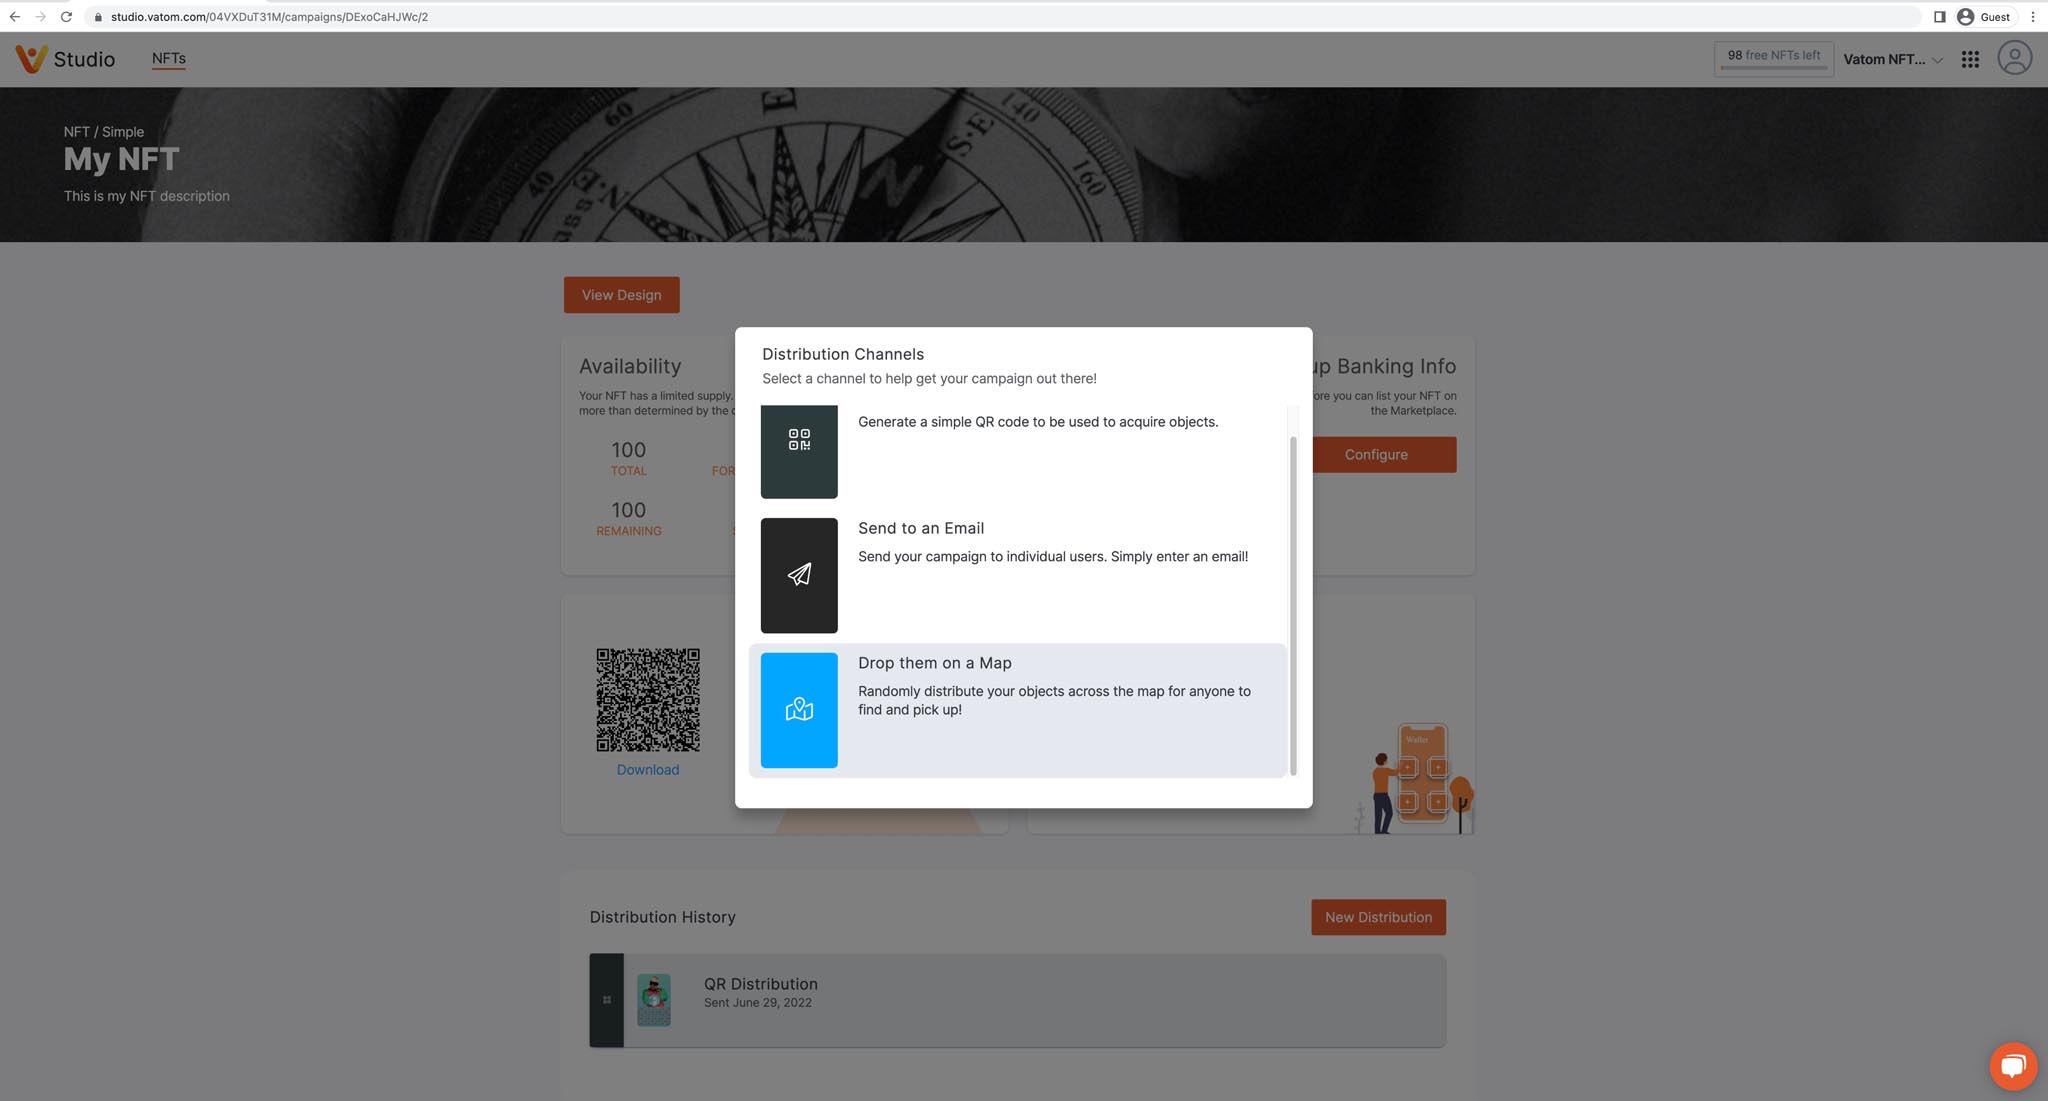
Creating a Distribution from Vatom Studio
Once your campaign is created and either in TEST or LIVE mode, you can create a "New Distribution" or a new method of delivering your objects.
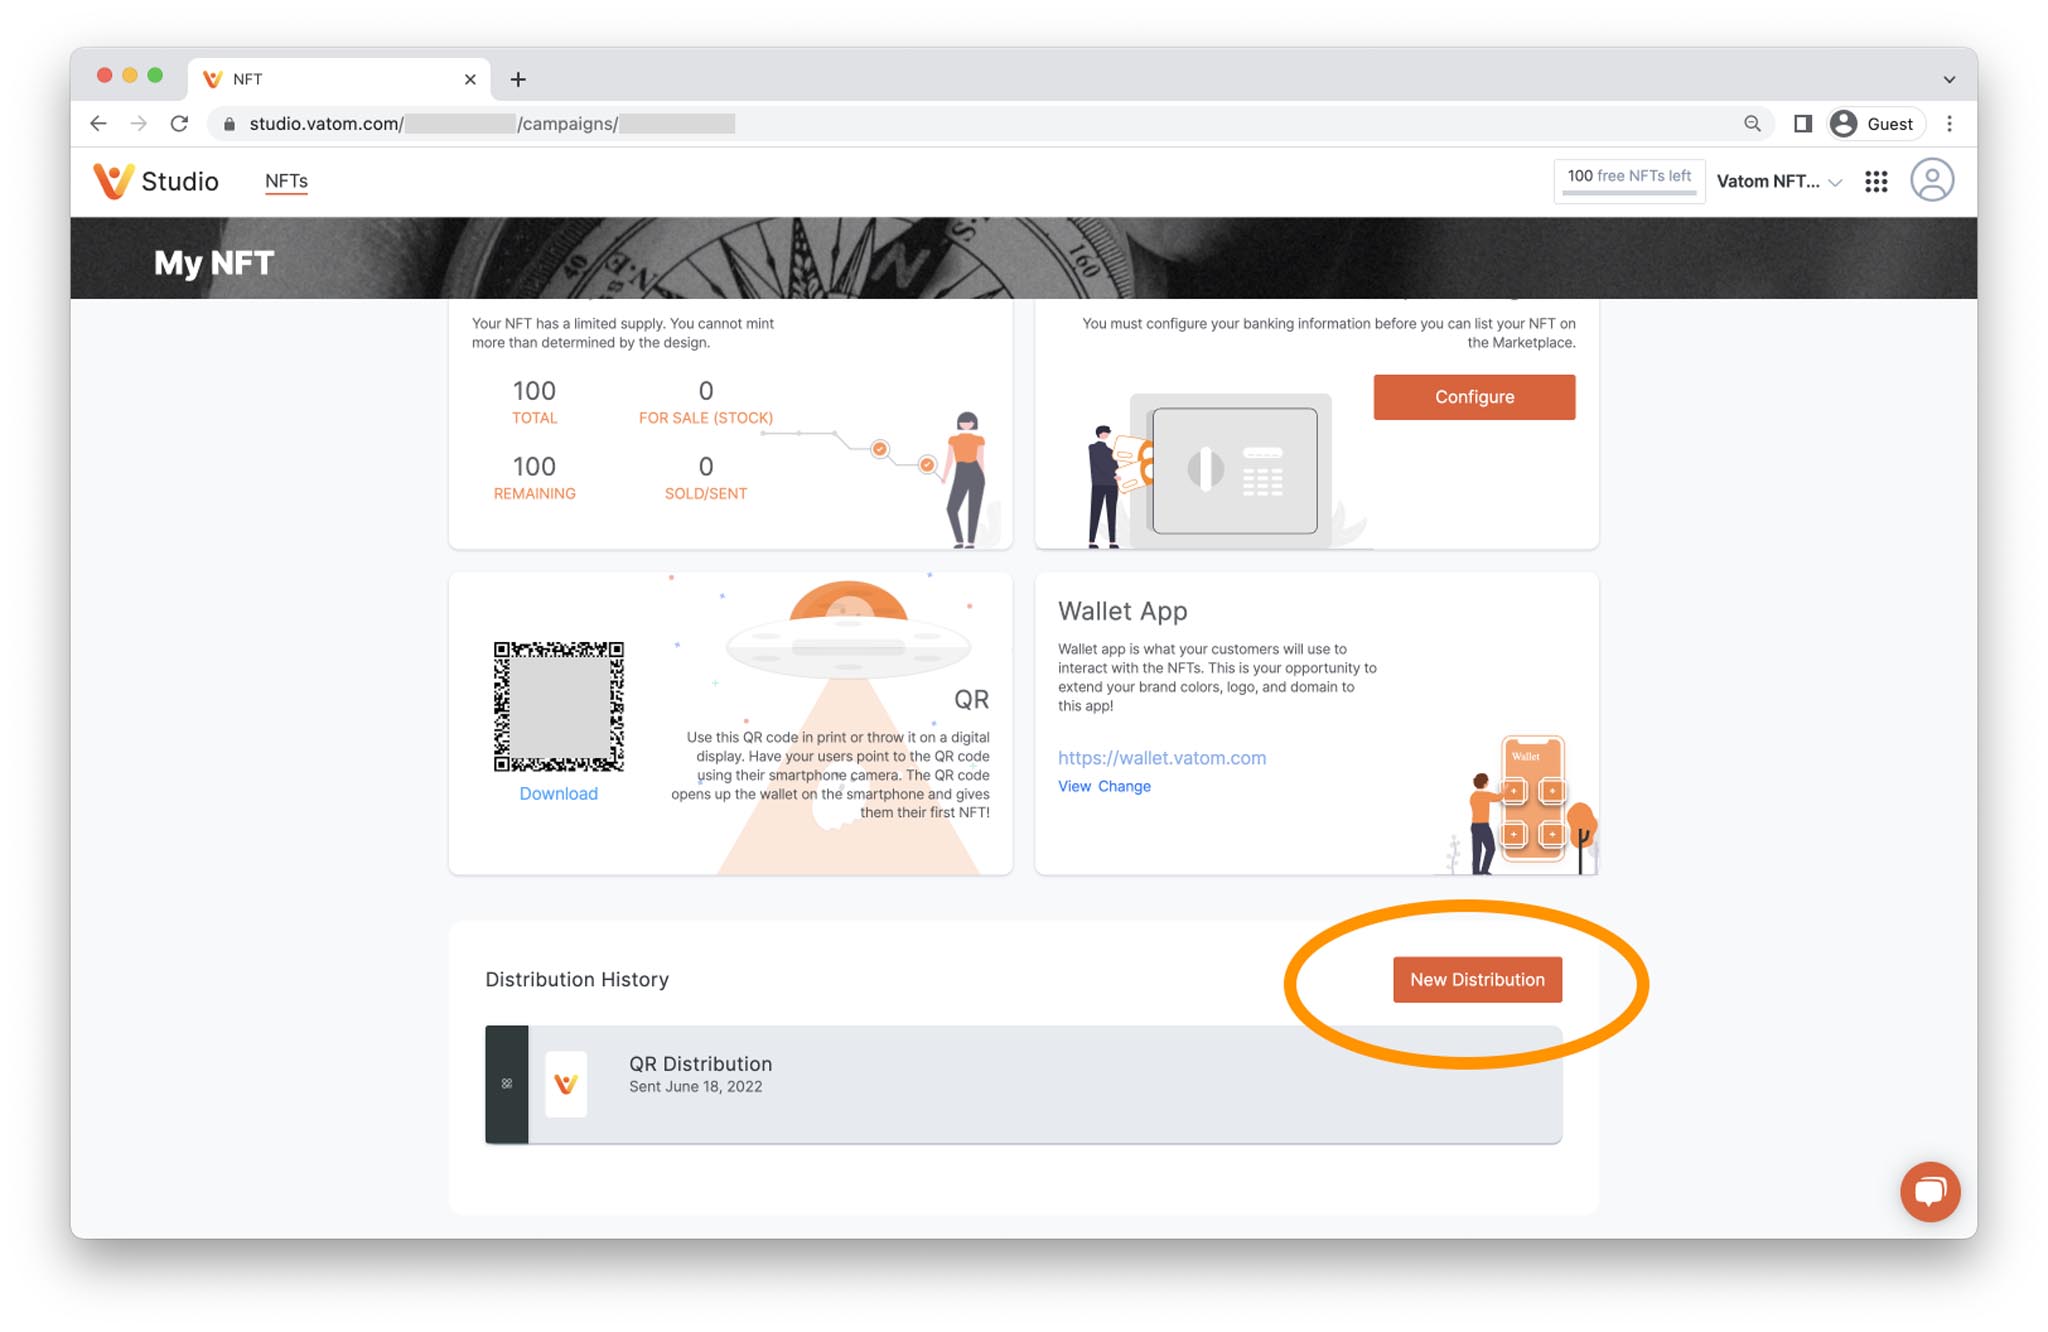
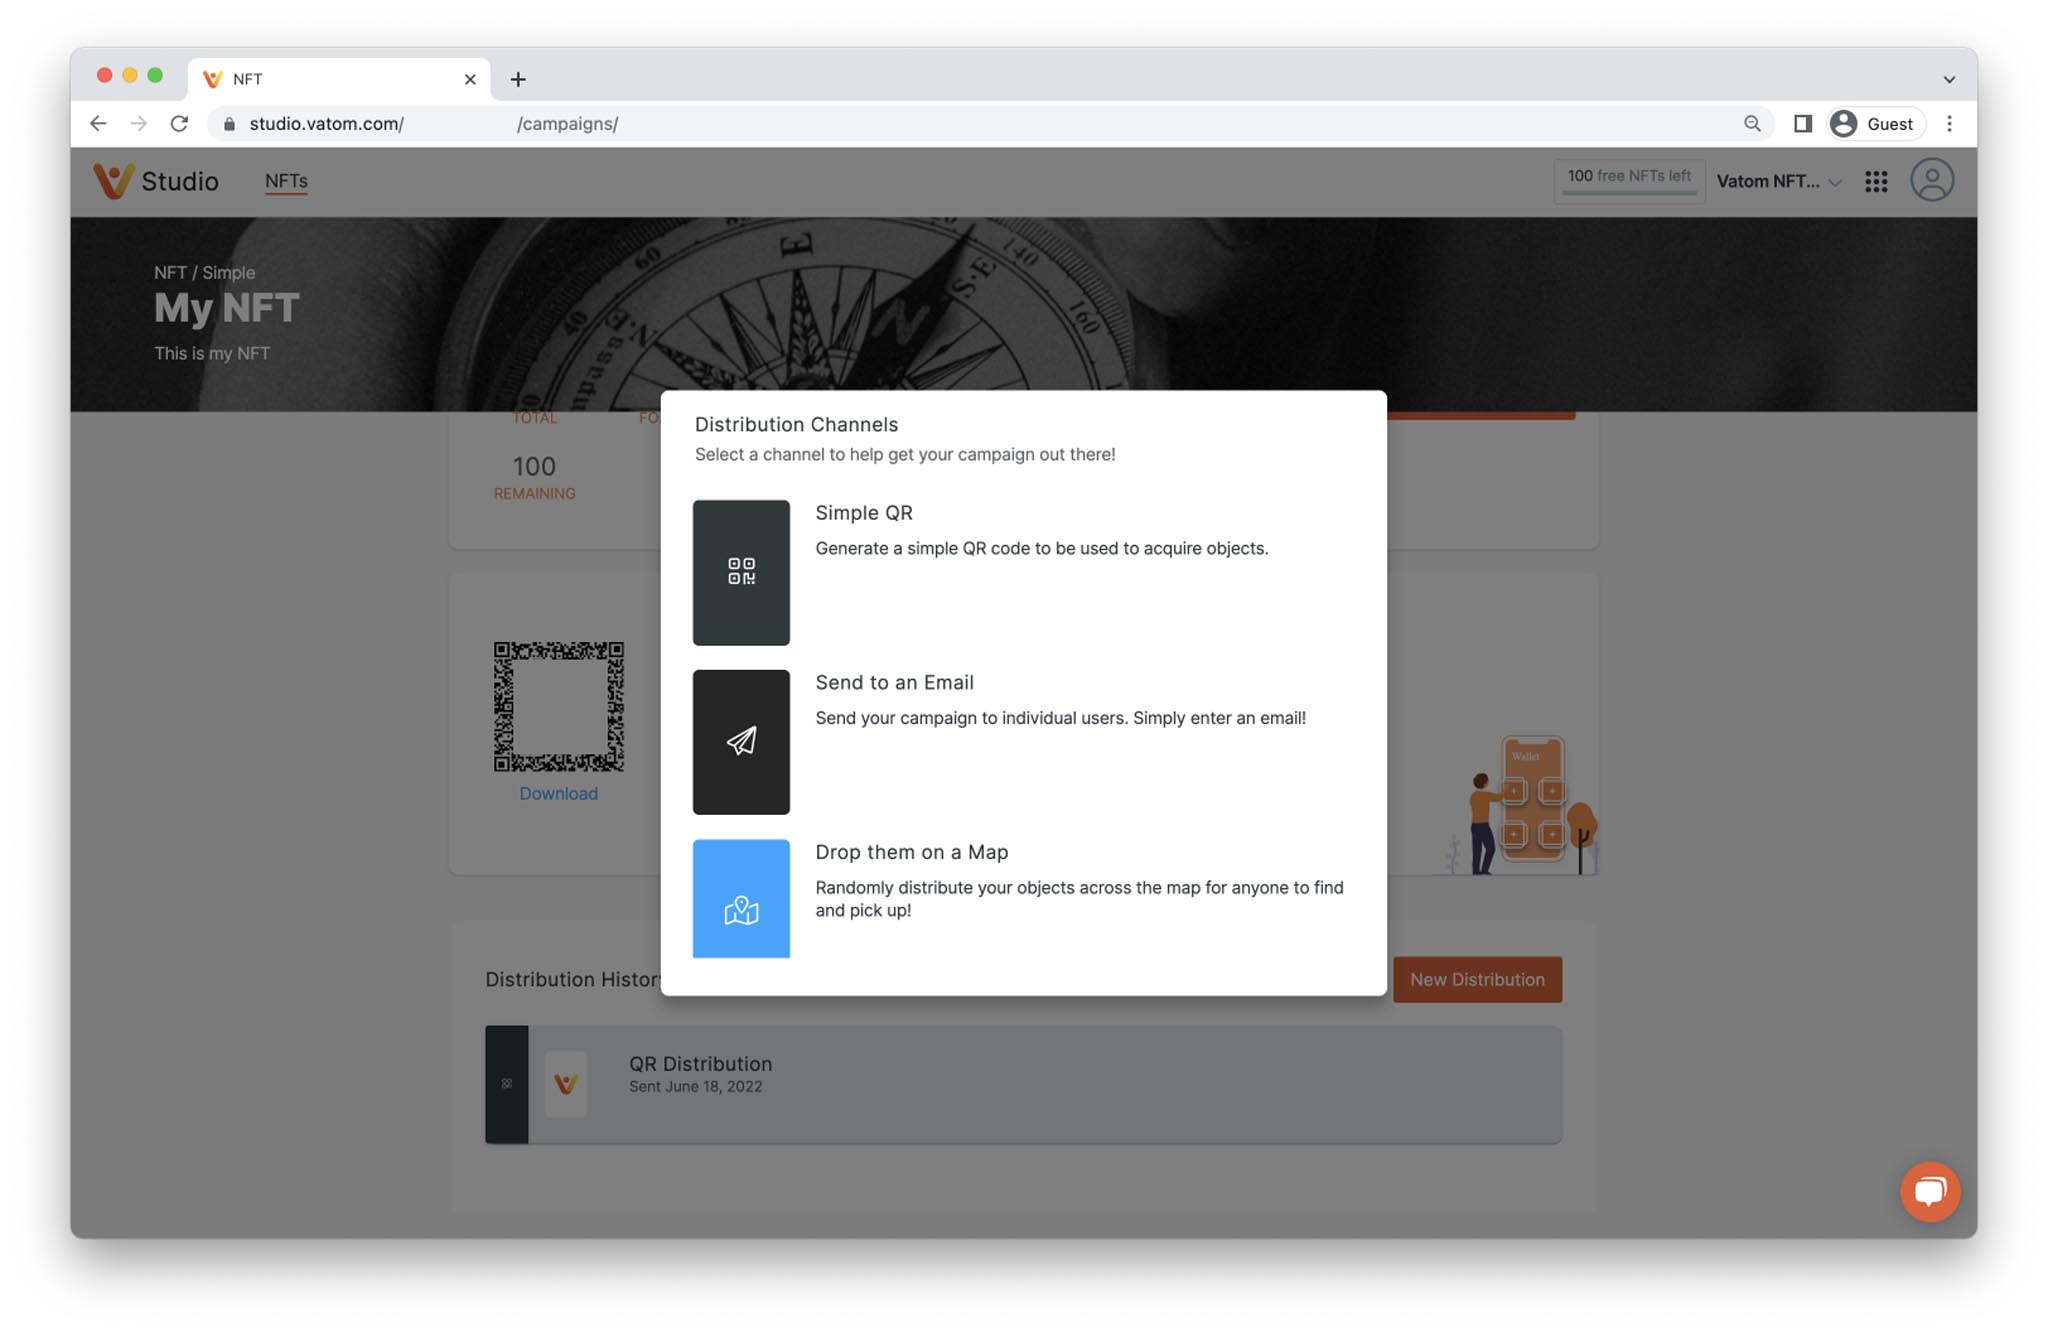
Simple QR or URL Link Distribution
Distribute your objects by allowing users to scan a QR Code or visit a URL link. This creates an "Acquire Link" and guests will acquire one of the digital objects when they visit the link.
This requires the "Scan" behavior to be enabled on objects meant to be delivered via QR or link. Limits on quantity must be set in the Object Behavior settings in the Campaign.
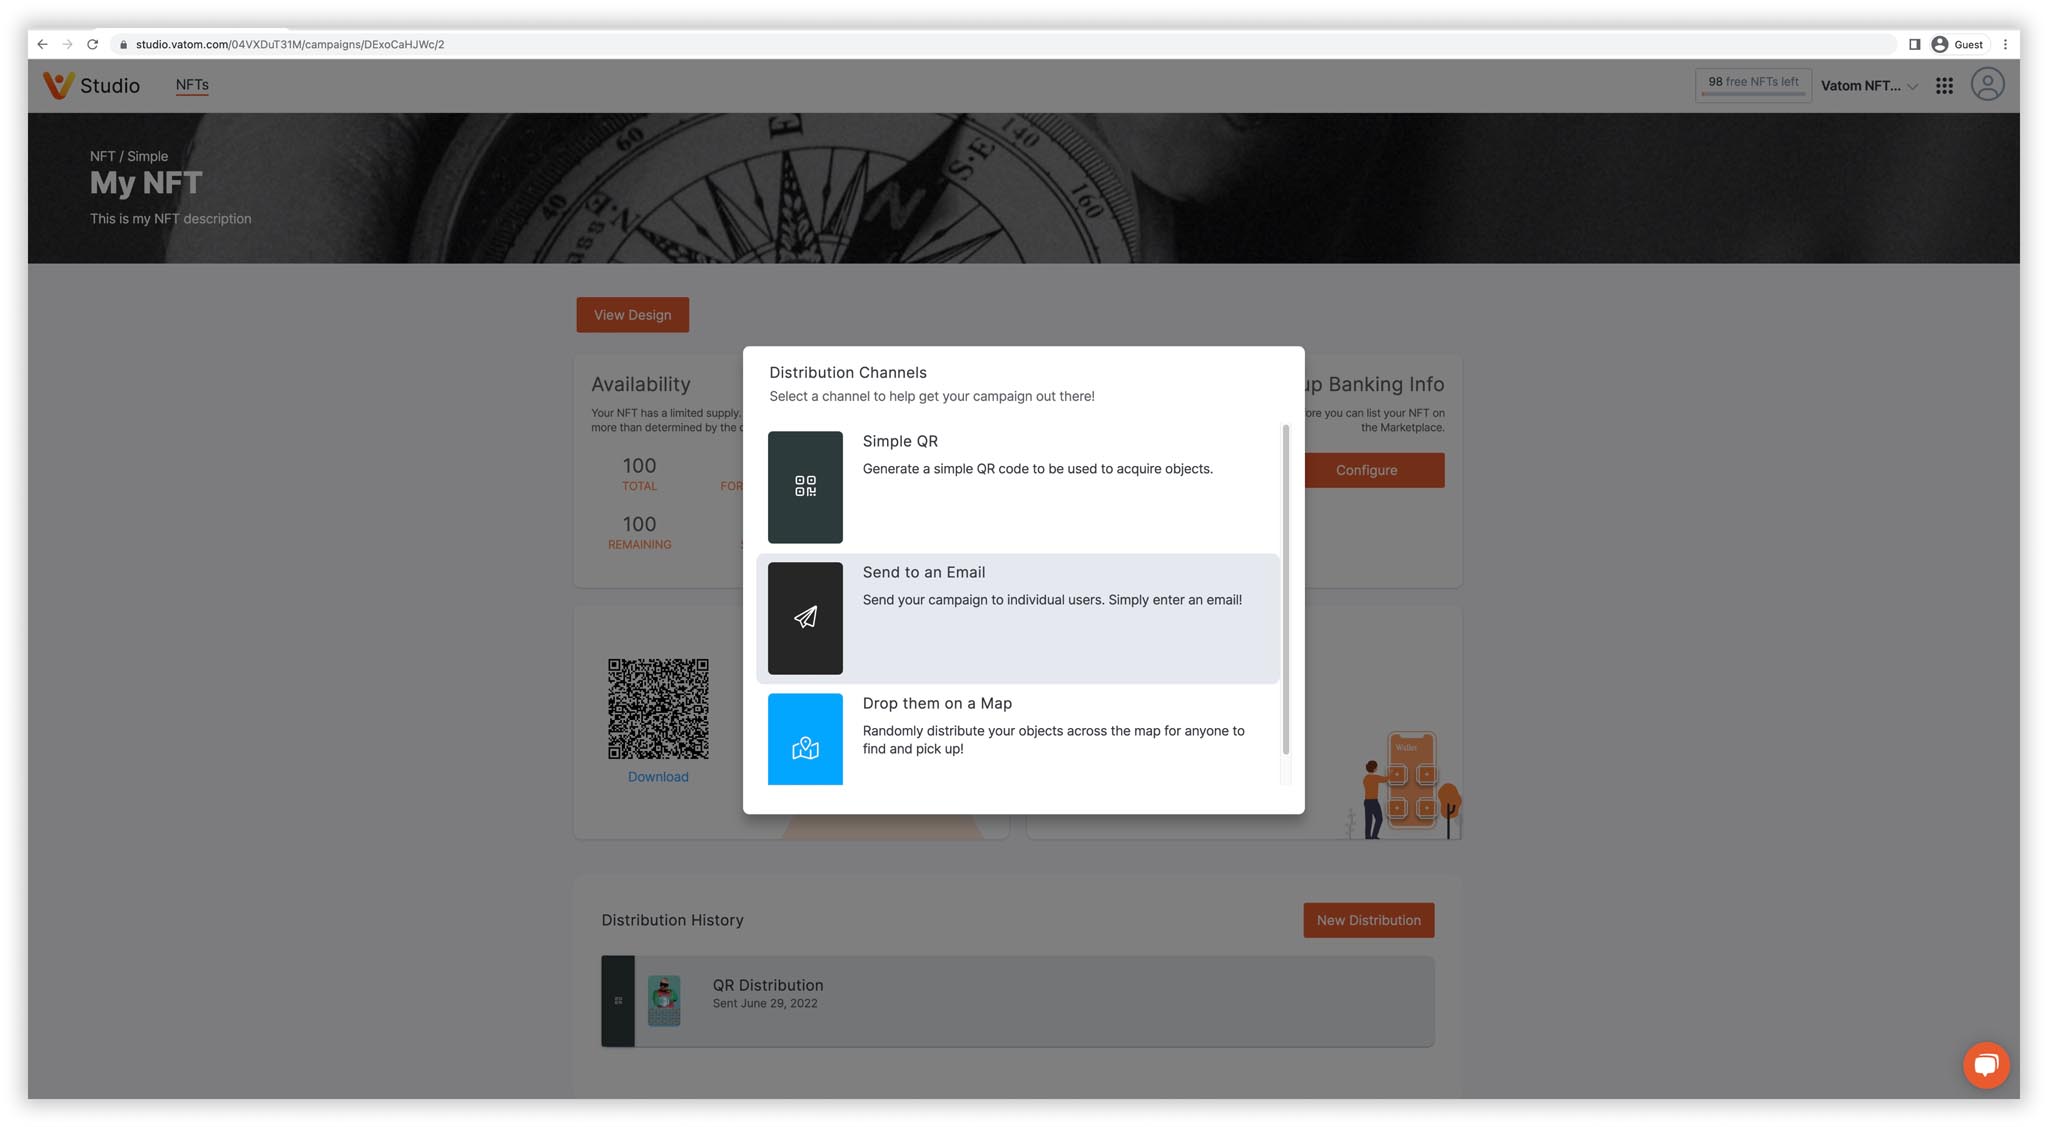
- Choose "New Distribution"
- Select "Simple QR"
- Choose your Objects you'd like to Send with the QR
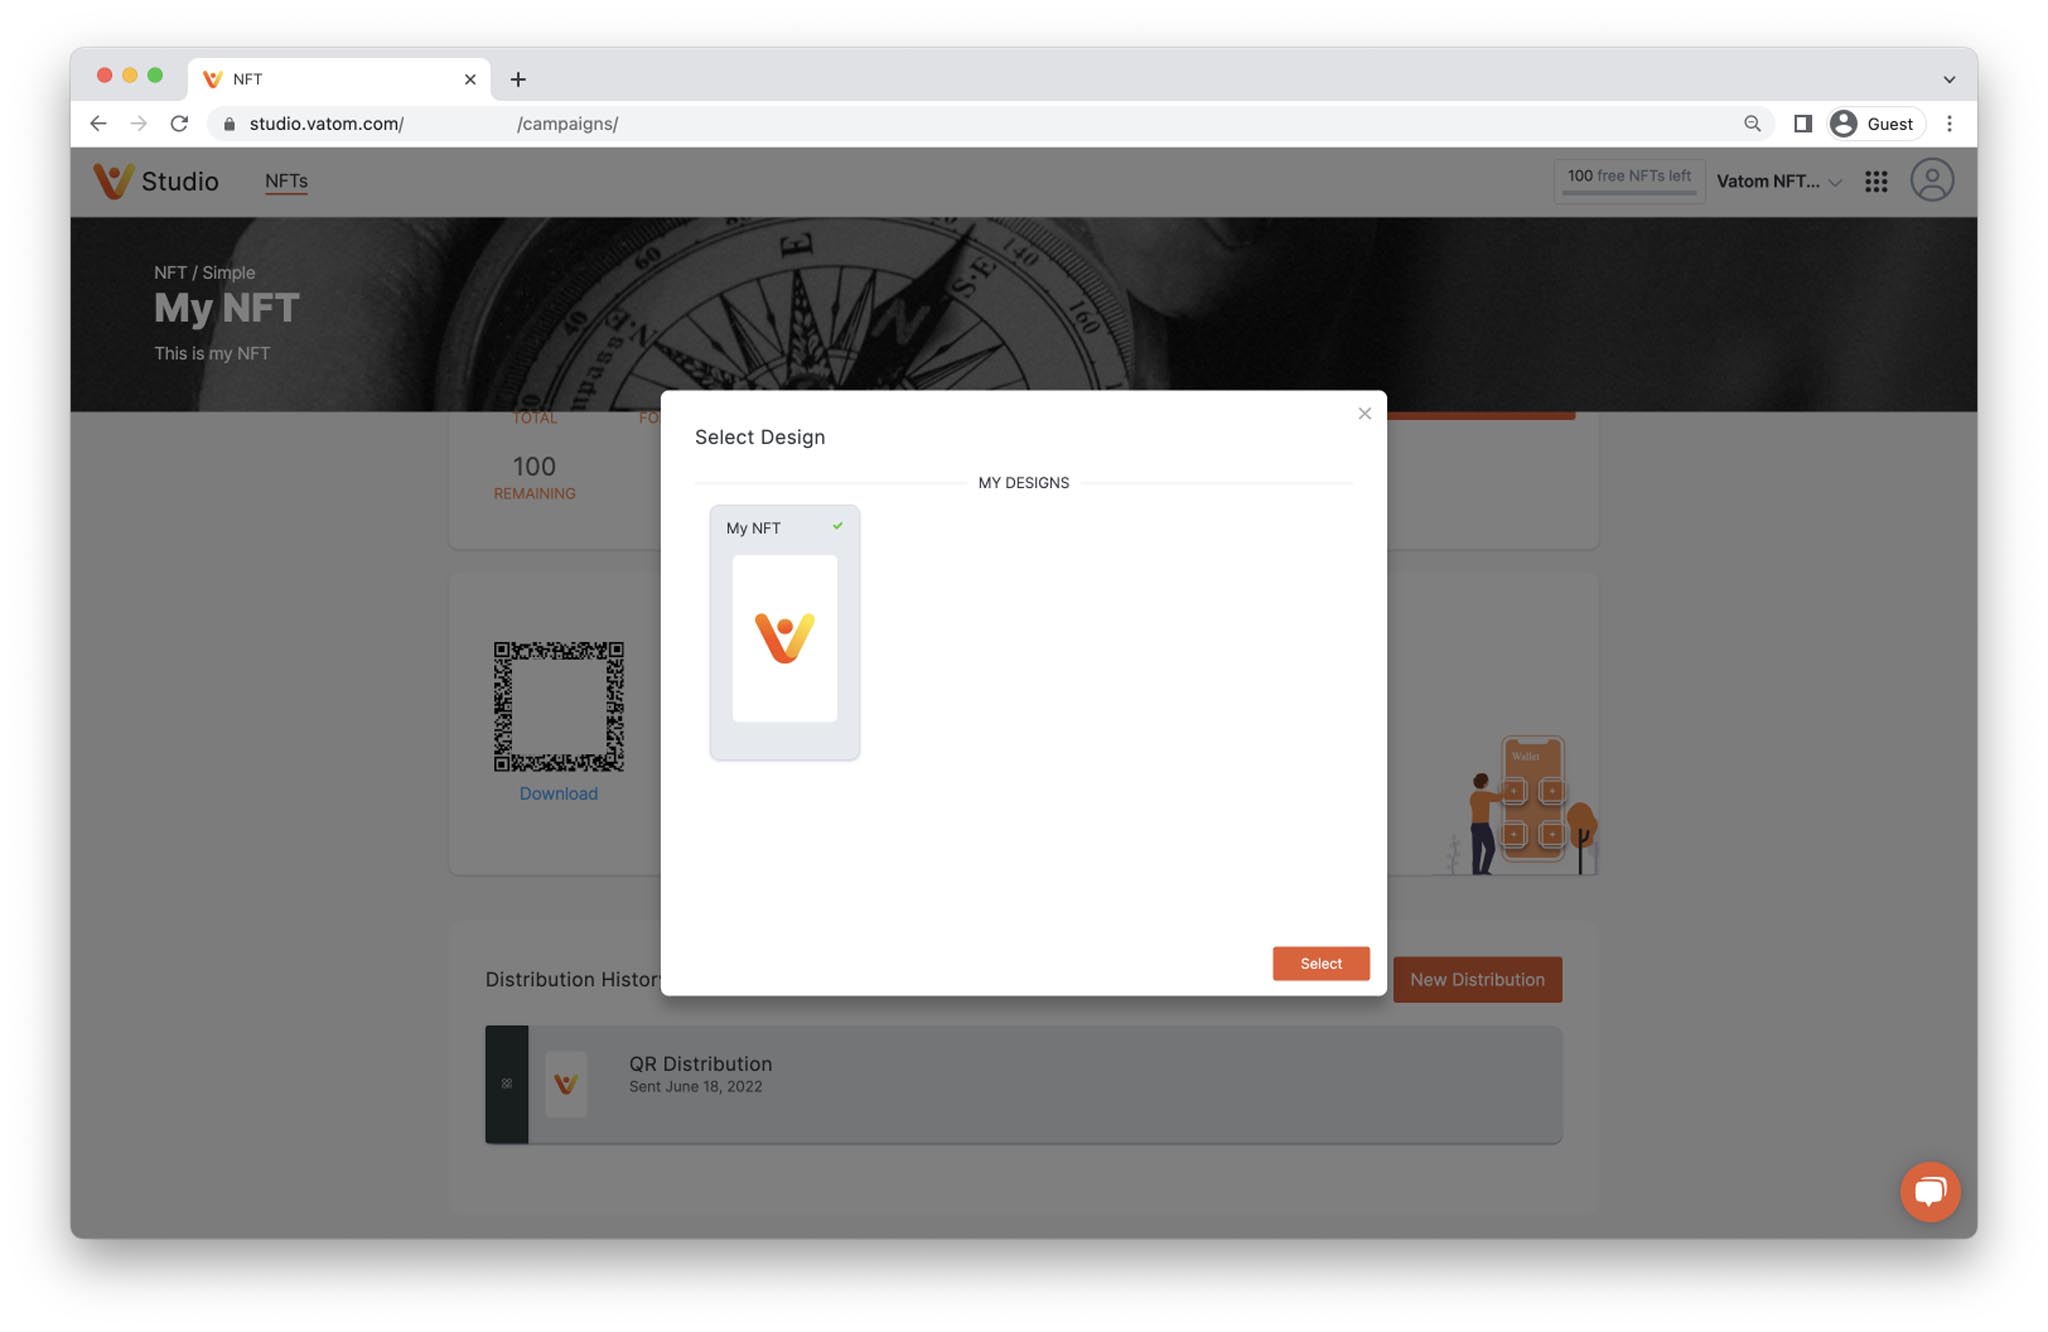
4. Name your QR Distribution. This is only used as a reference for the creator.
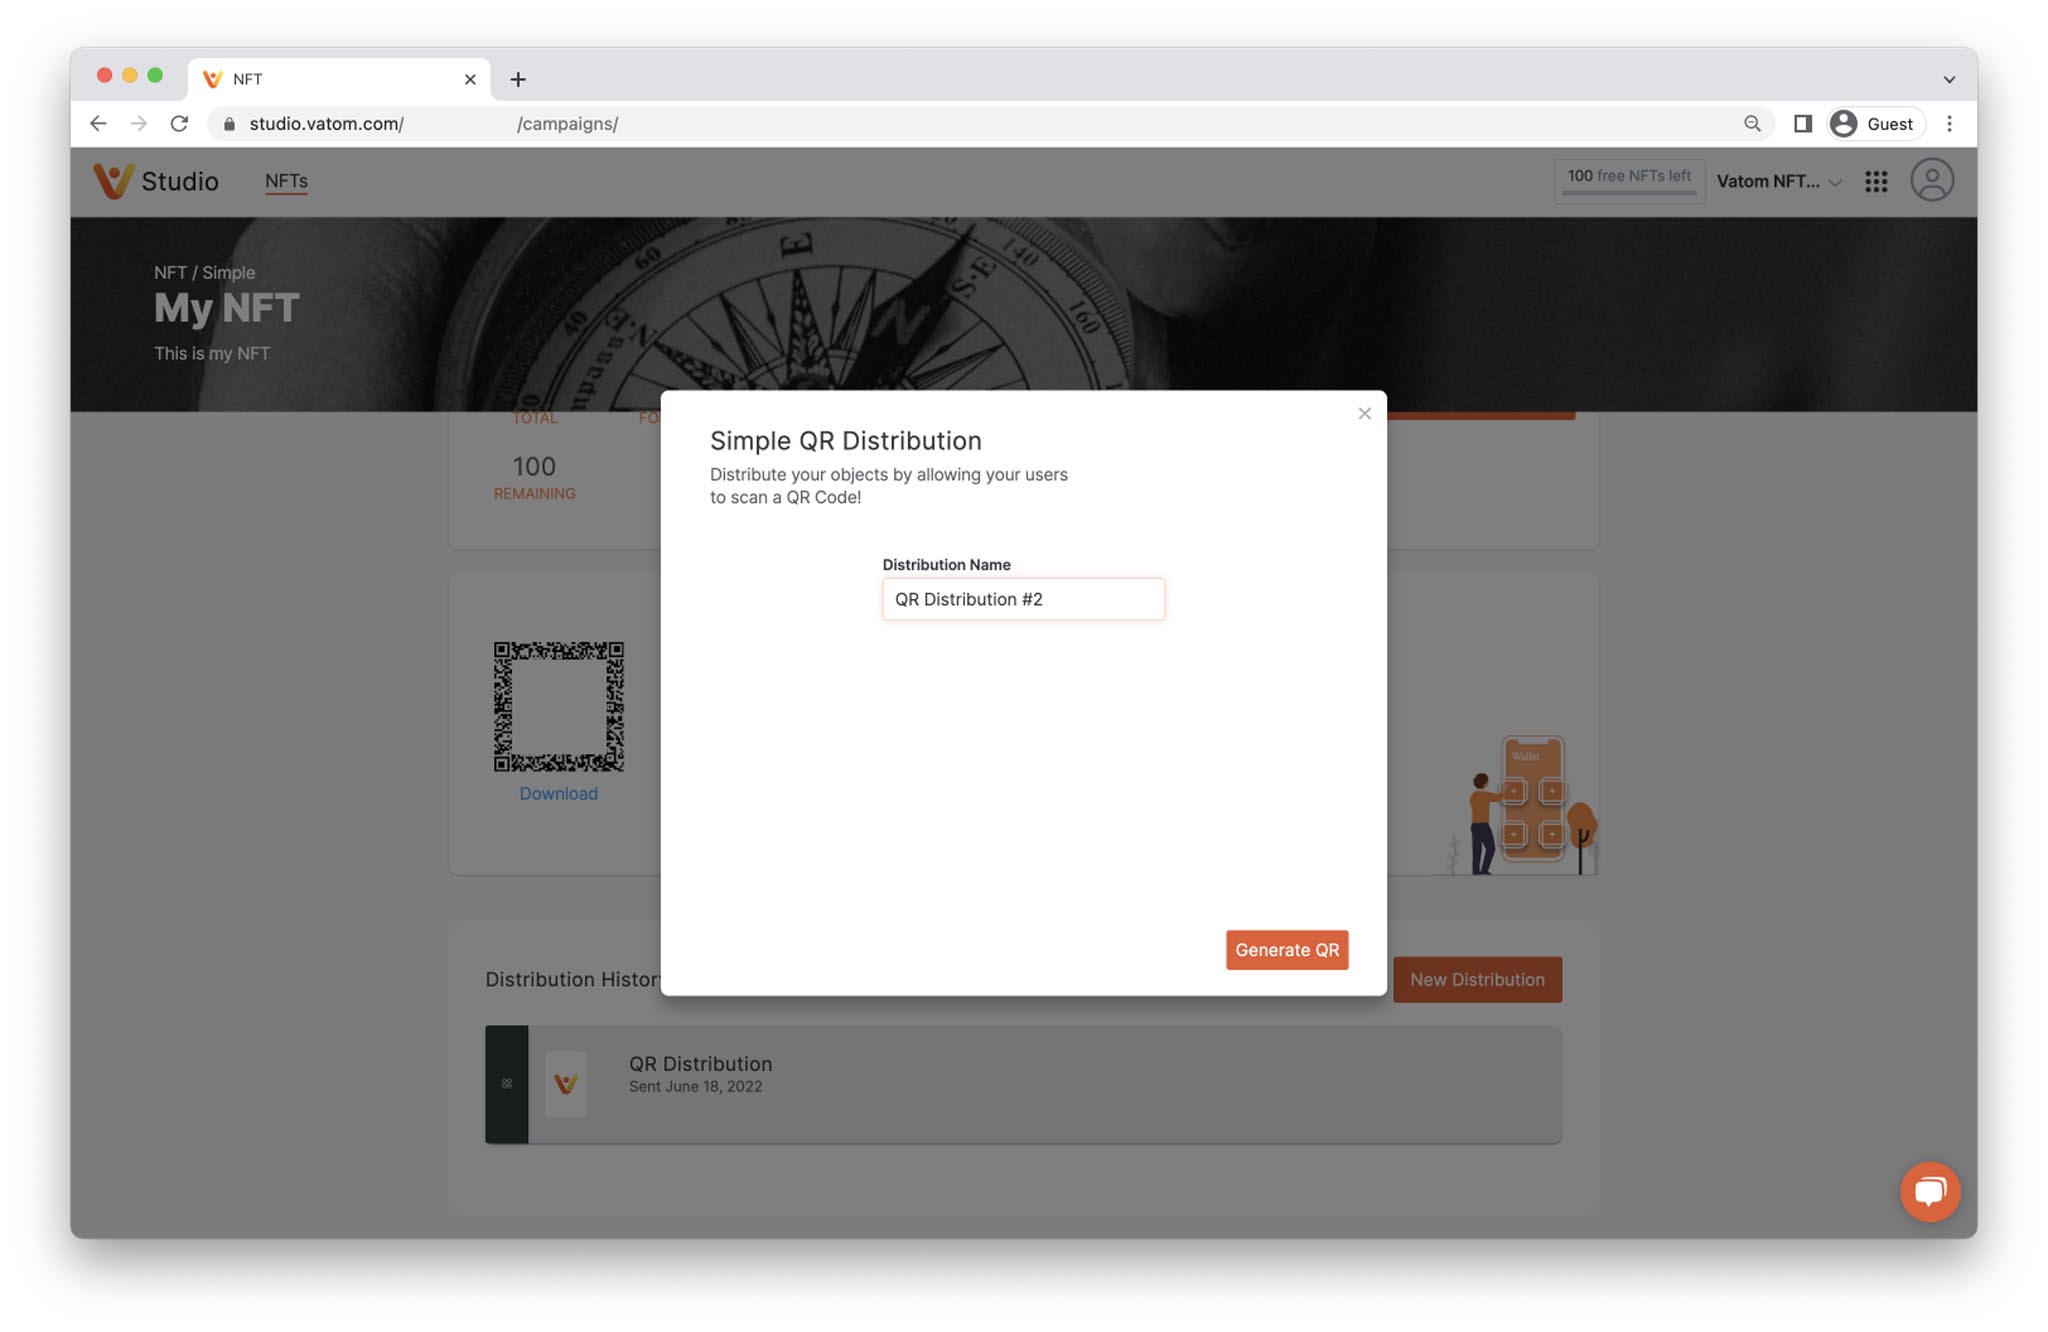
5. Press "Generate QR"
6. Download your QR code or Copy the Share URL with the two buttons below the QR code.
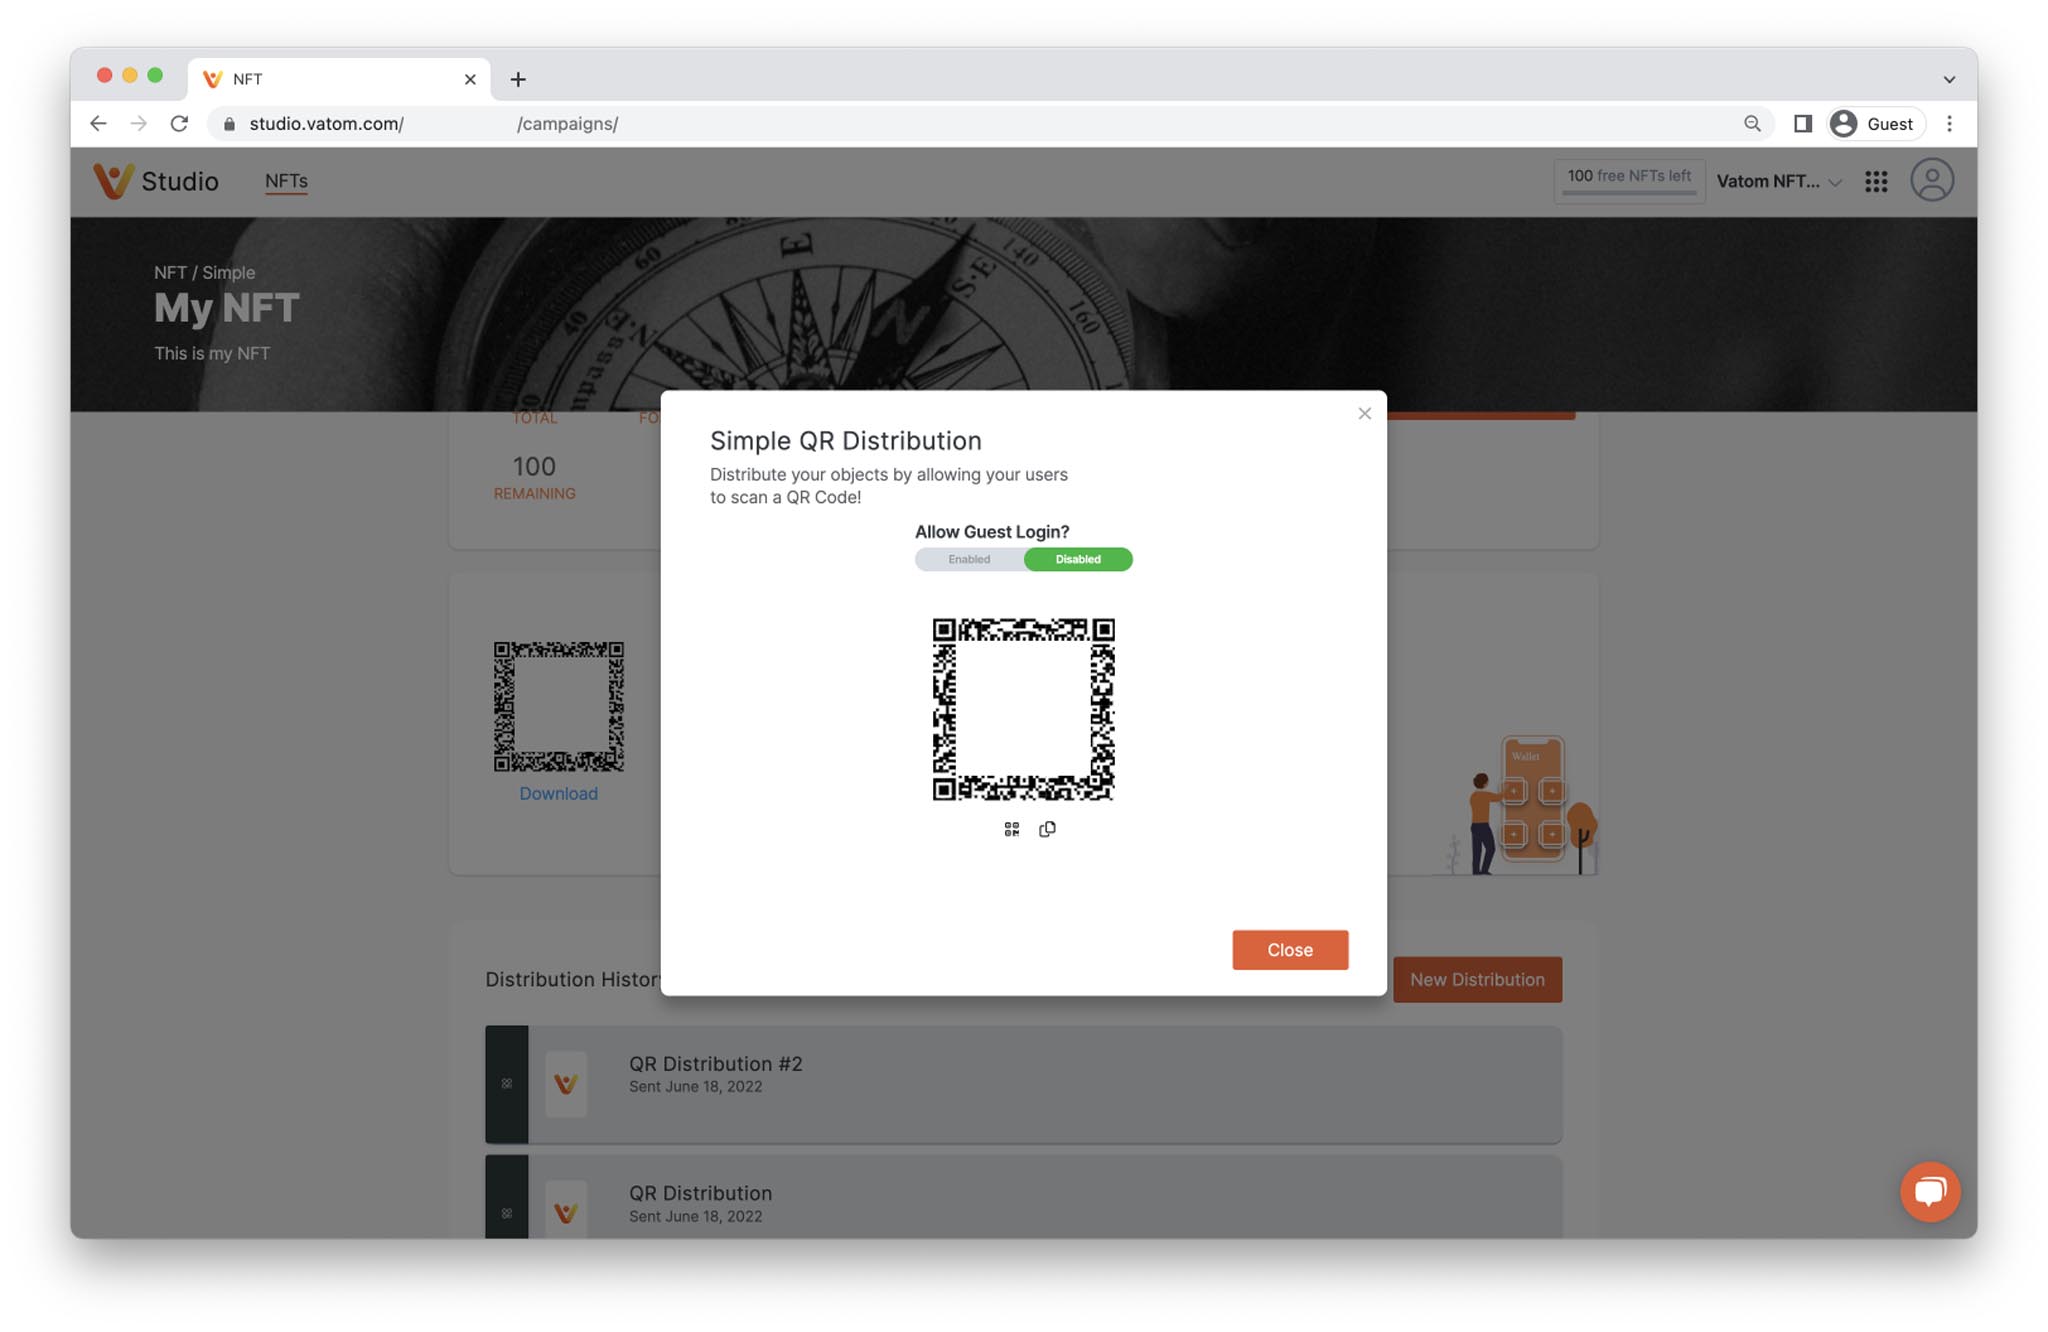
By choosing "Disabled" for Guest Login, users will go through the standard Login/Registration process before receiving their item(s). On registration, everyone is given a custodial address that is associated with the vatom NFT account and wallet.
The option to Enable "Allow Guest Login" allows users to receive, see and interact with Vatoms without registering and logging in. In order to save these items they must register and log in. Guest access counts as a distribution.
We do not recommend Enabling Guest Login on objects with any scarcity, as many objects can be lost or 'burned'.
Direct Email, Phone or UserID Distribution
Send Vatom items directly to an email, phone, userID using the distribution "Send to an Email."
- Choose your Object to send
- Name your Distribution
- Enter the email address of the recipient and choose the quantity that you'd like to send.
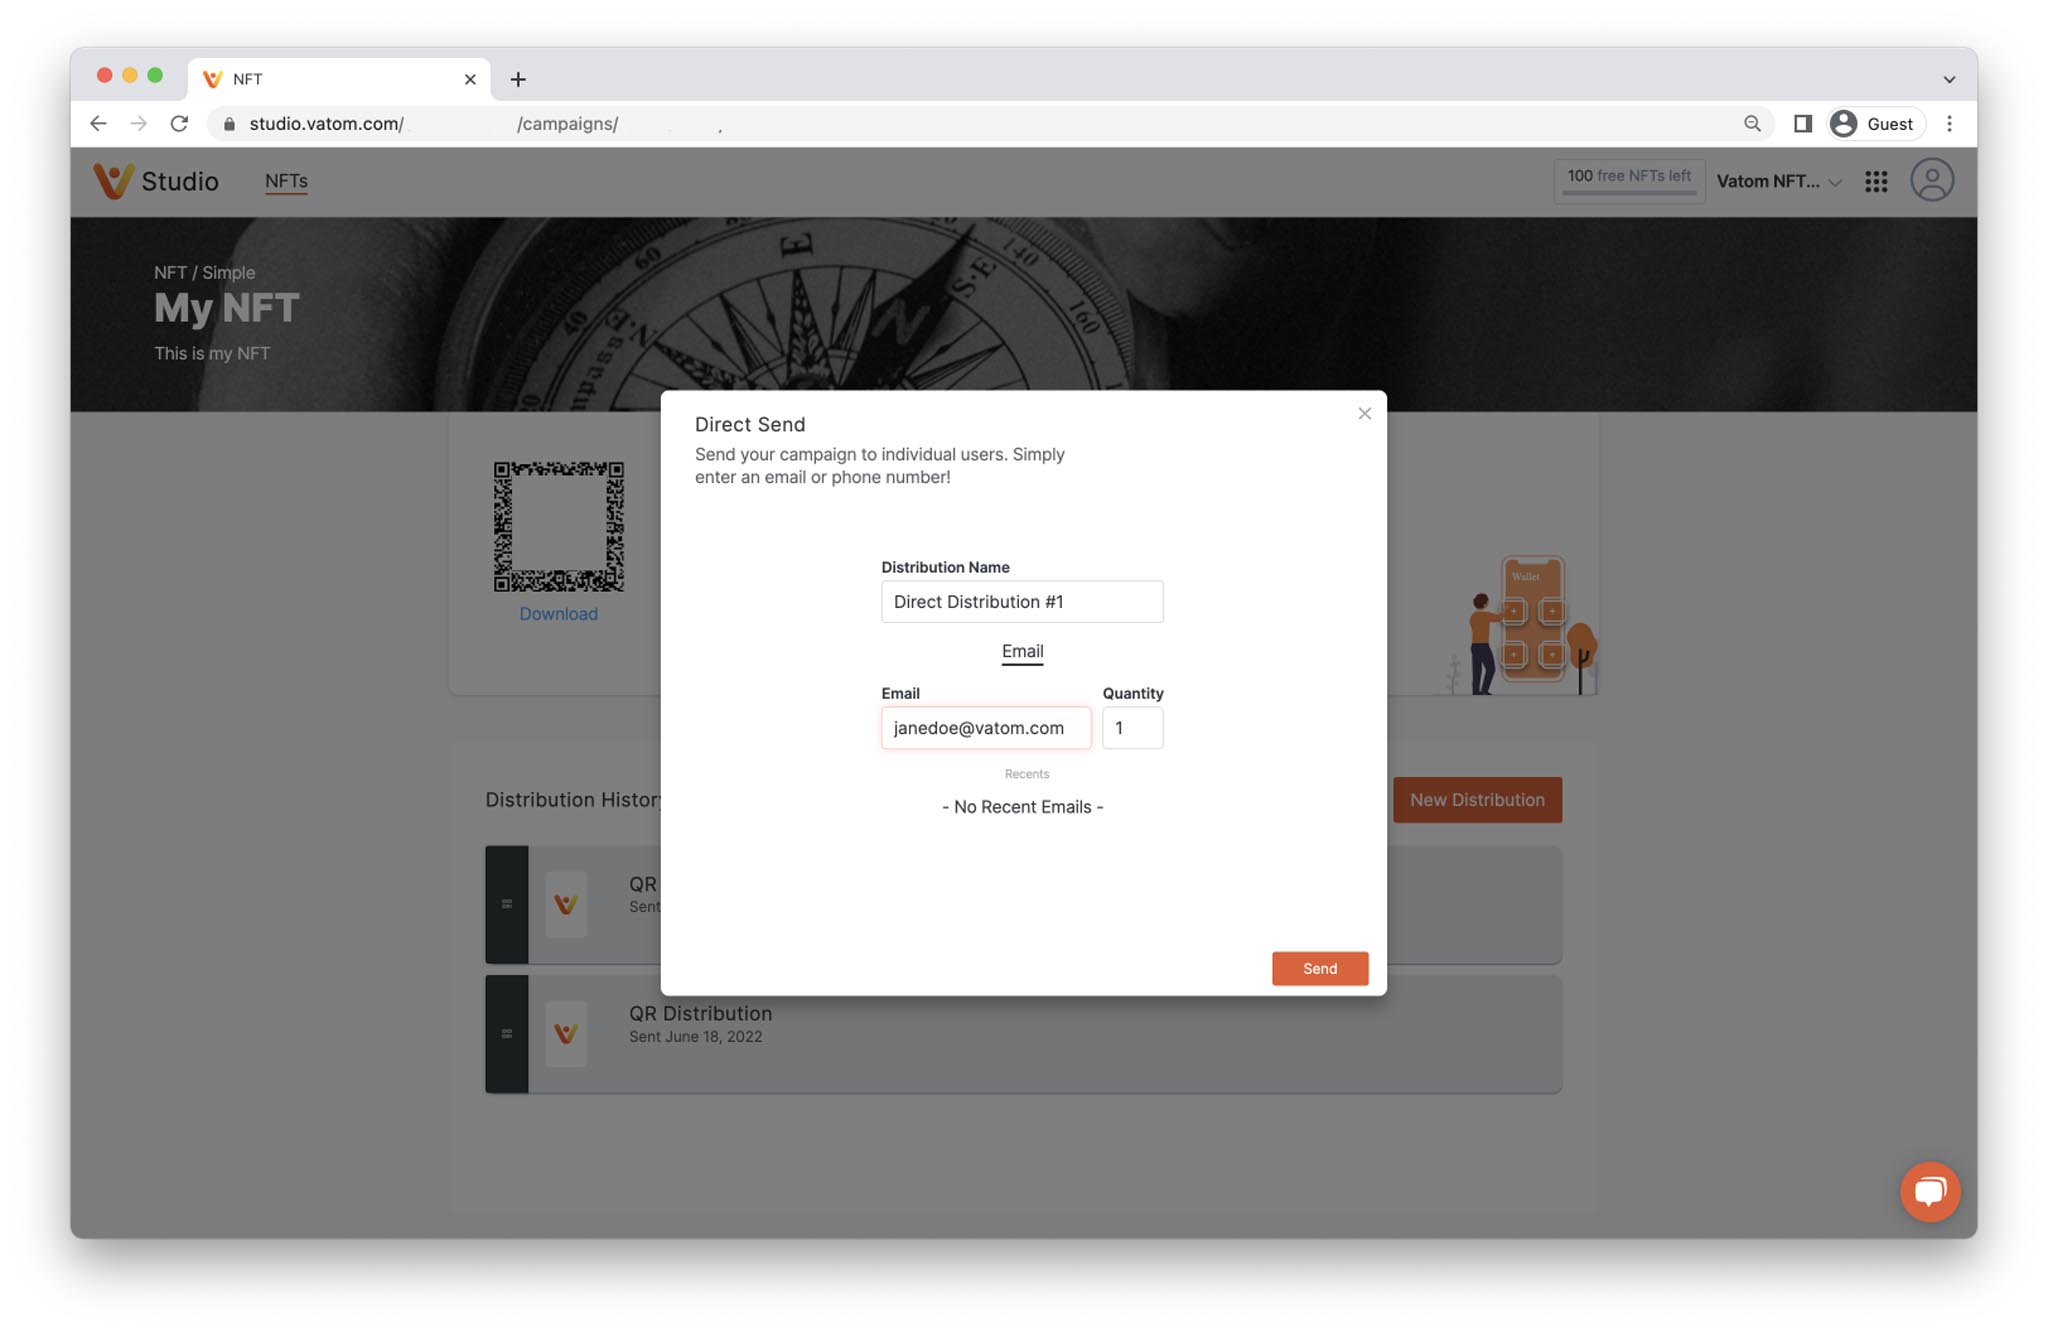
4. Press "Send" and your Vatoms will be delivered immediately.
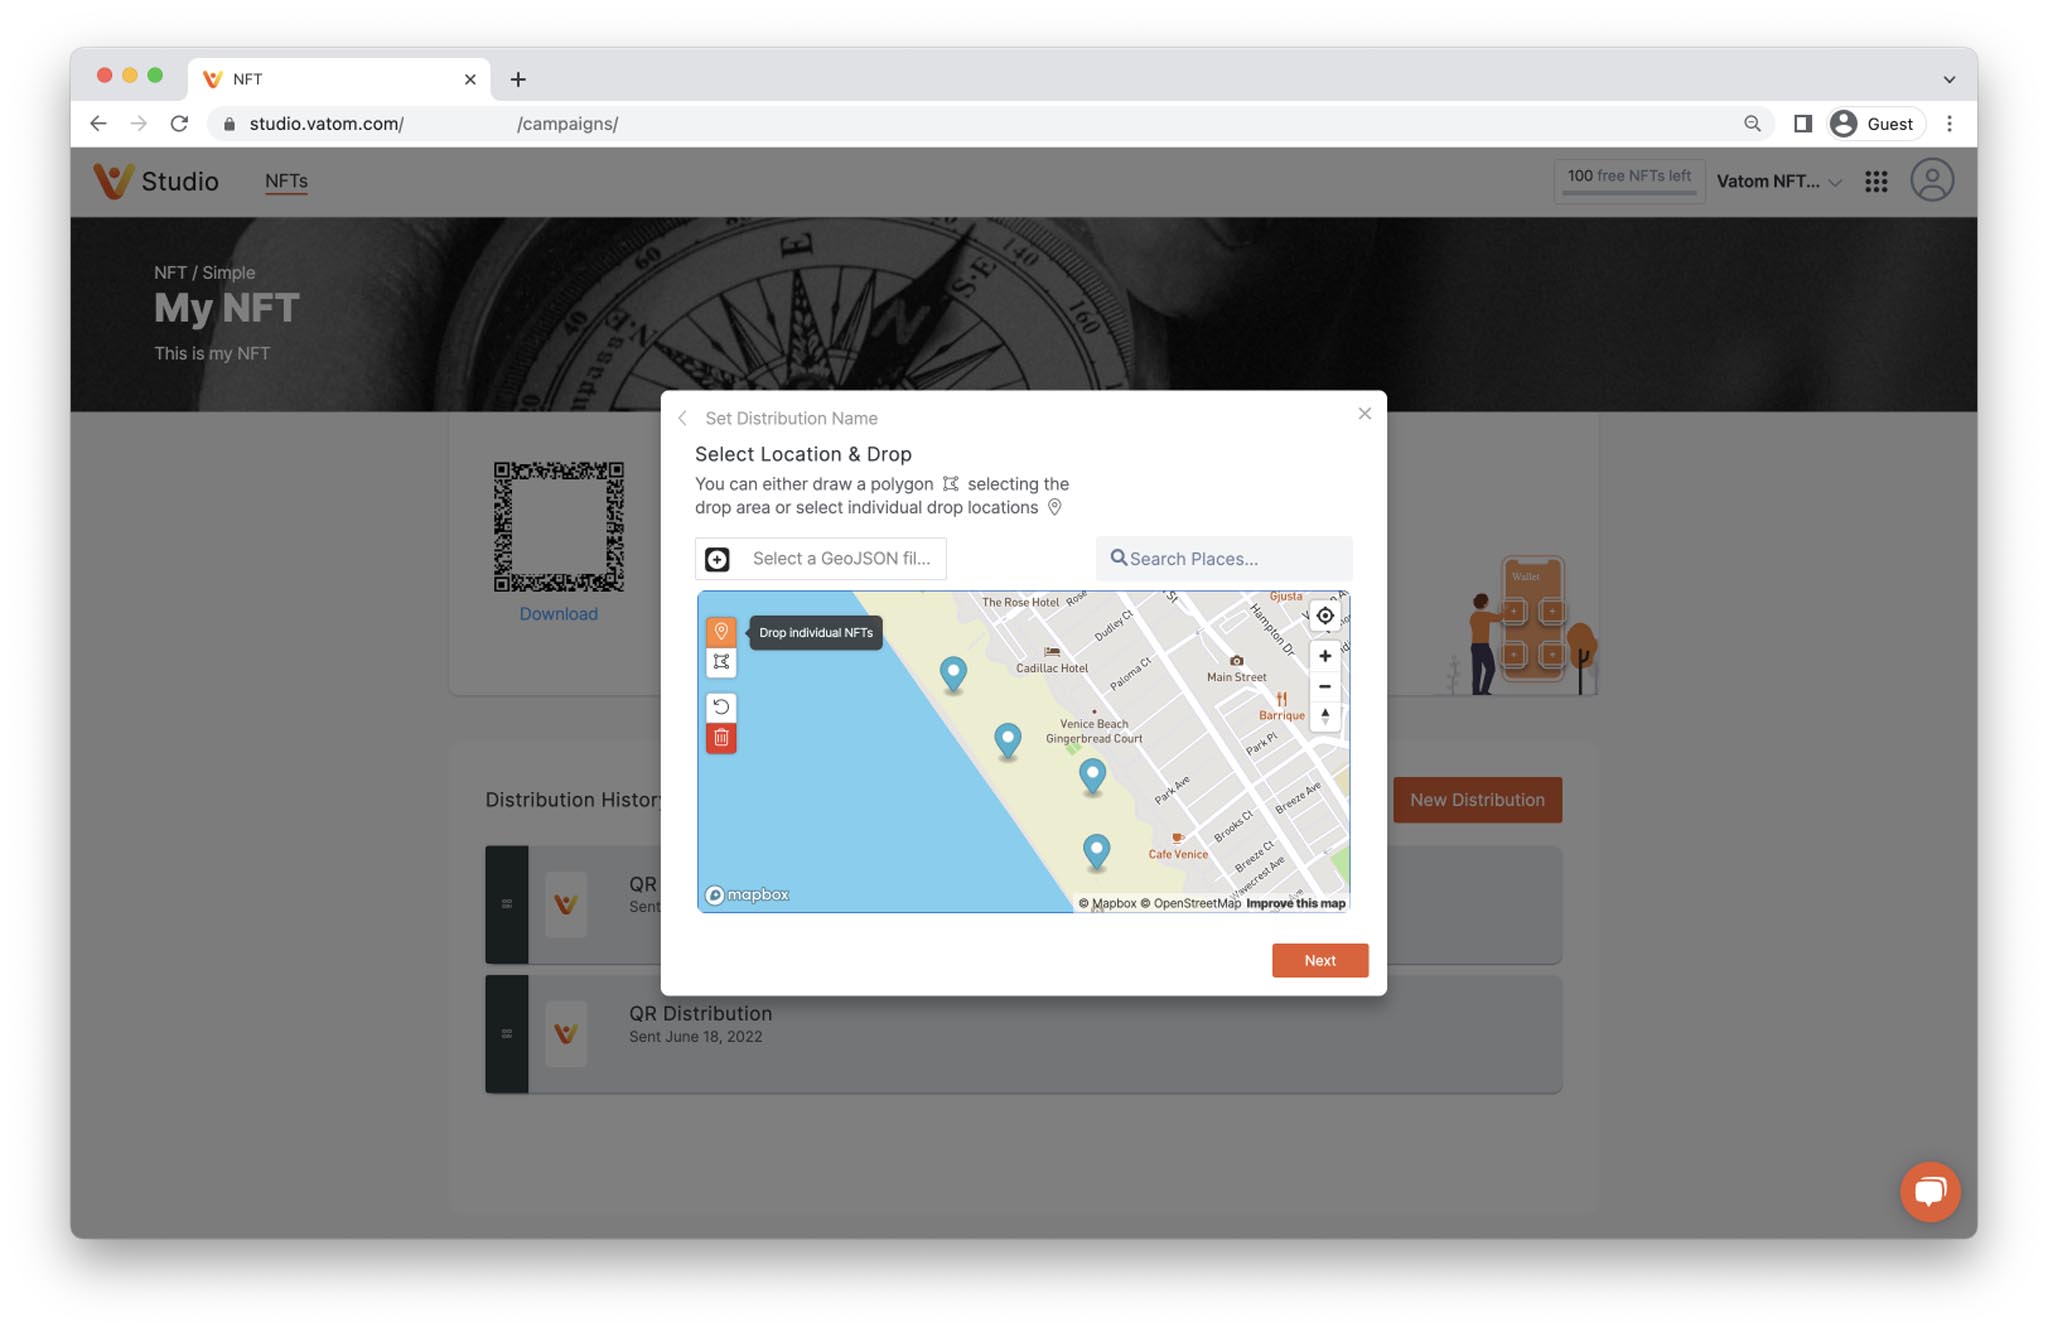
Map Drop Distribution
Drop your NFTs on a real-world map, either at exact locations or scattered around a defined area.
This distribution requires the "Map" behavior to be added to the digital object.
- Choose your Object to Distribute
- Name your Distribution
- Choose map location
Drop multiple NFTs over an Area
- Choose the orange shape icon to start creating an area. Navigate around the map and create a drop area by placing points around the area you would like objects to be dropped. To close the area press "Enter" or click the first point you created.

2. Choose Quantity of objects to be dropped on the map within the defined area. Objects can be dropped "All at once" or "Gradually" with objects can be replaced on the map a defined number of times.
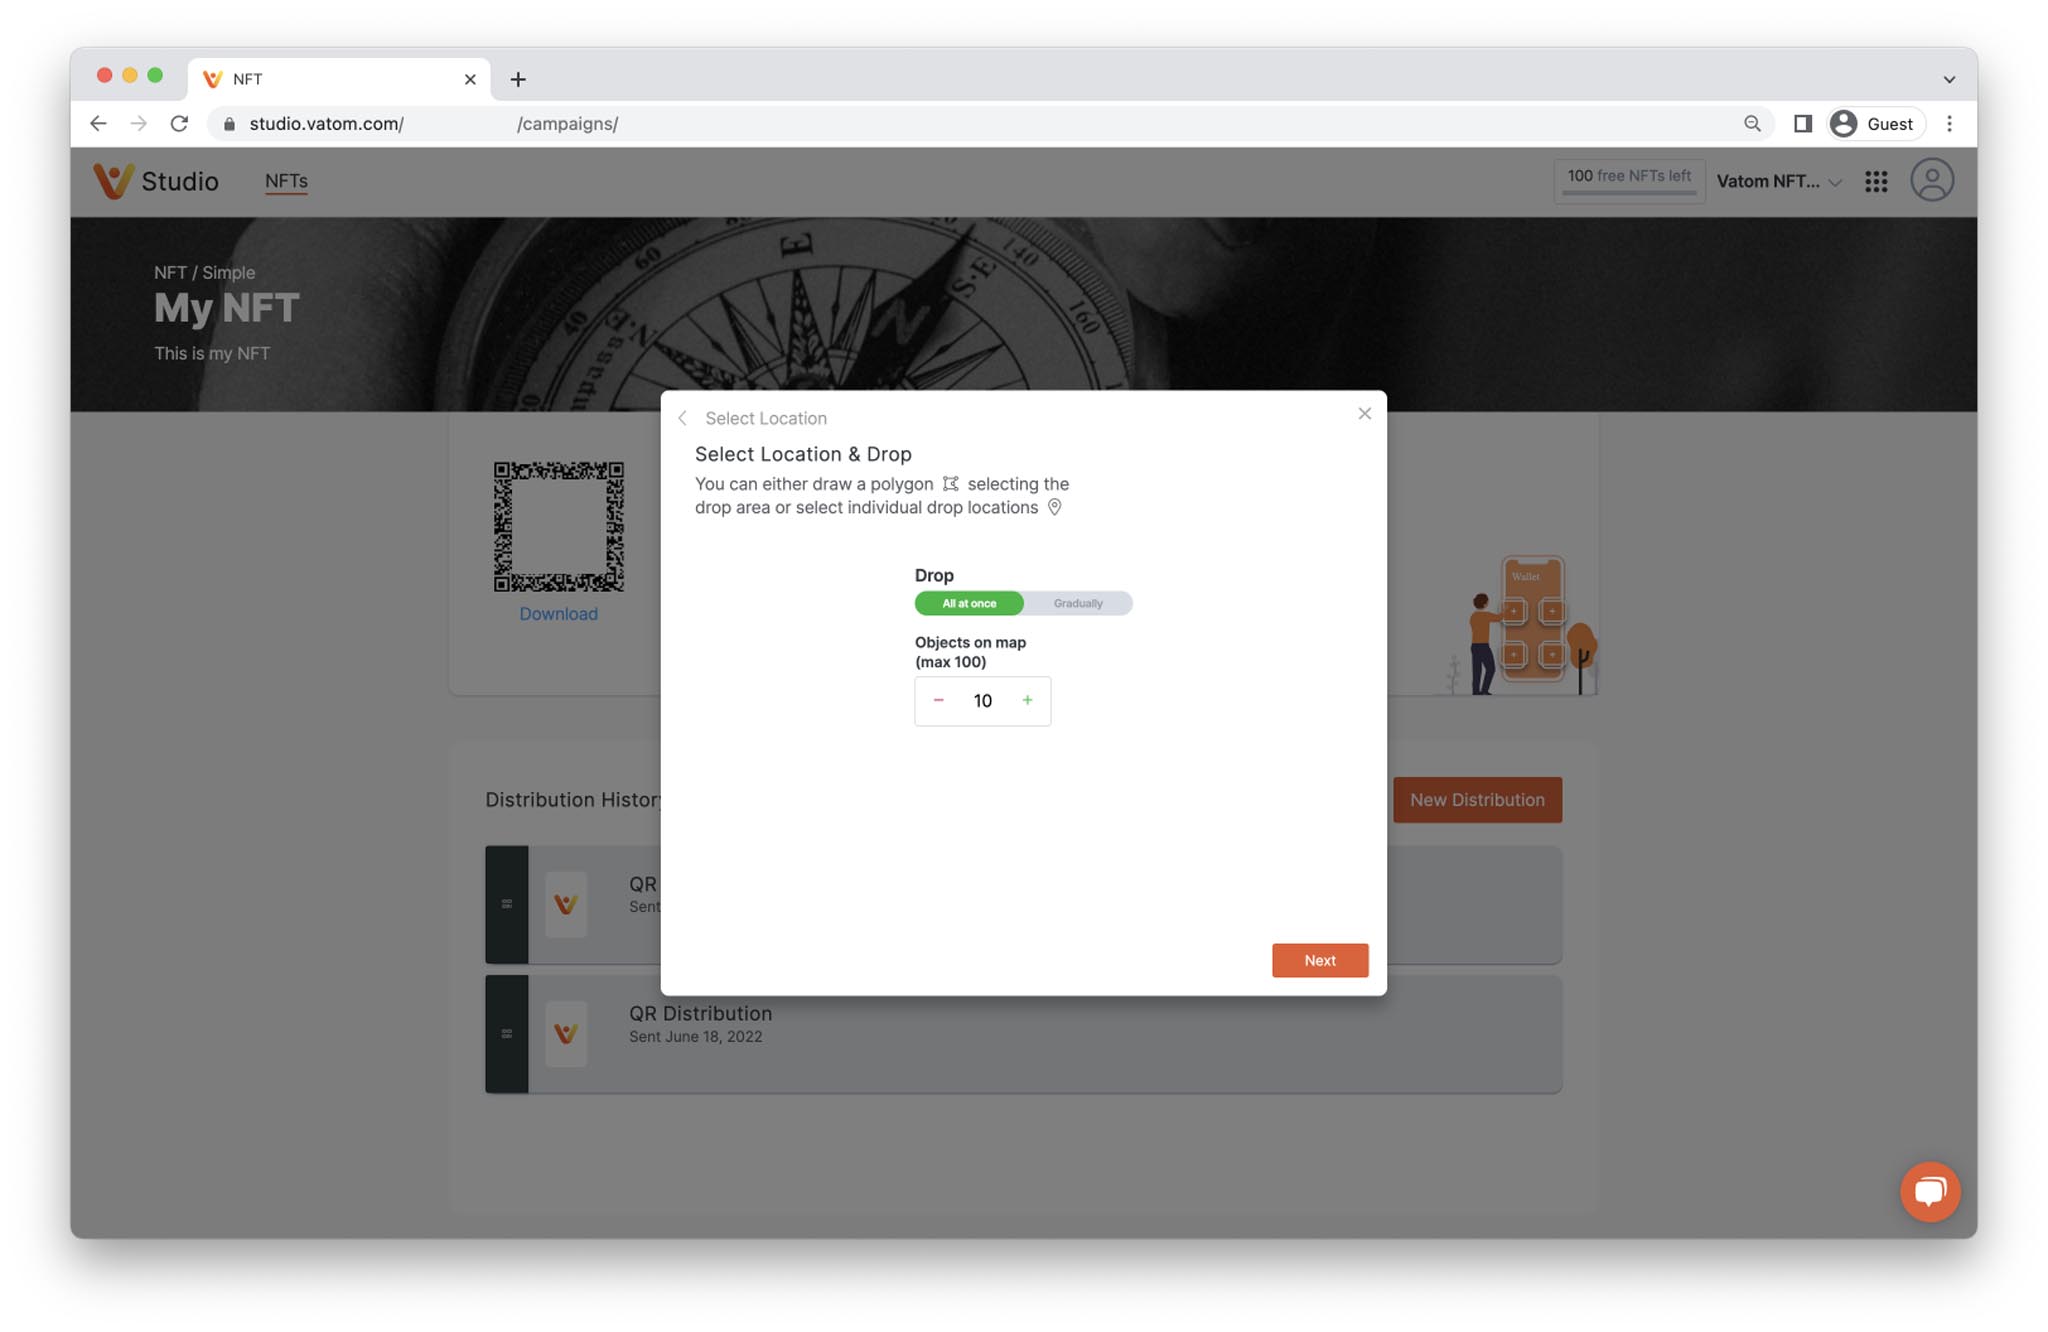
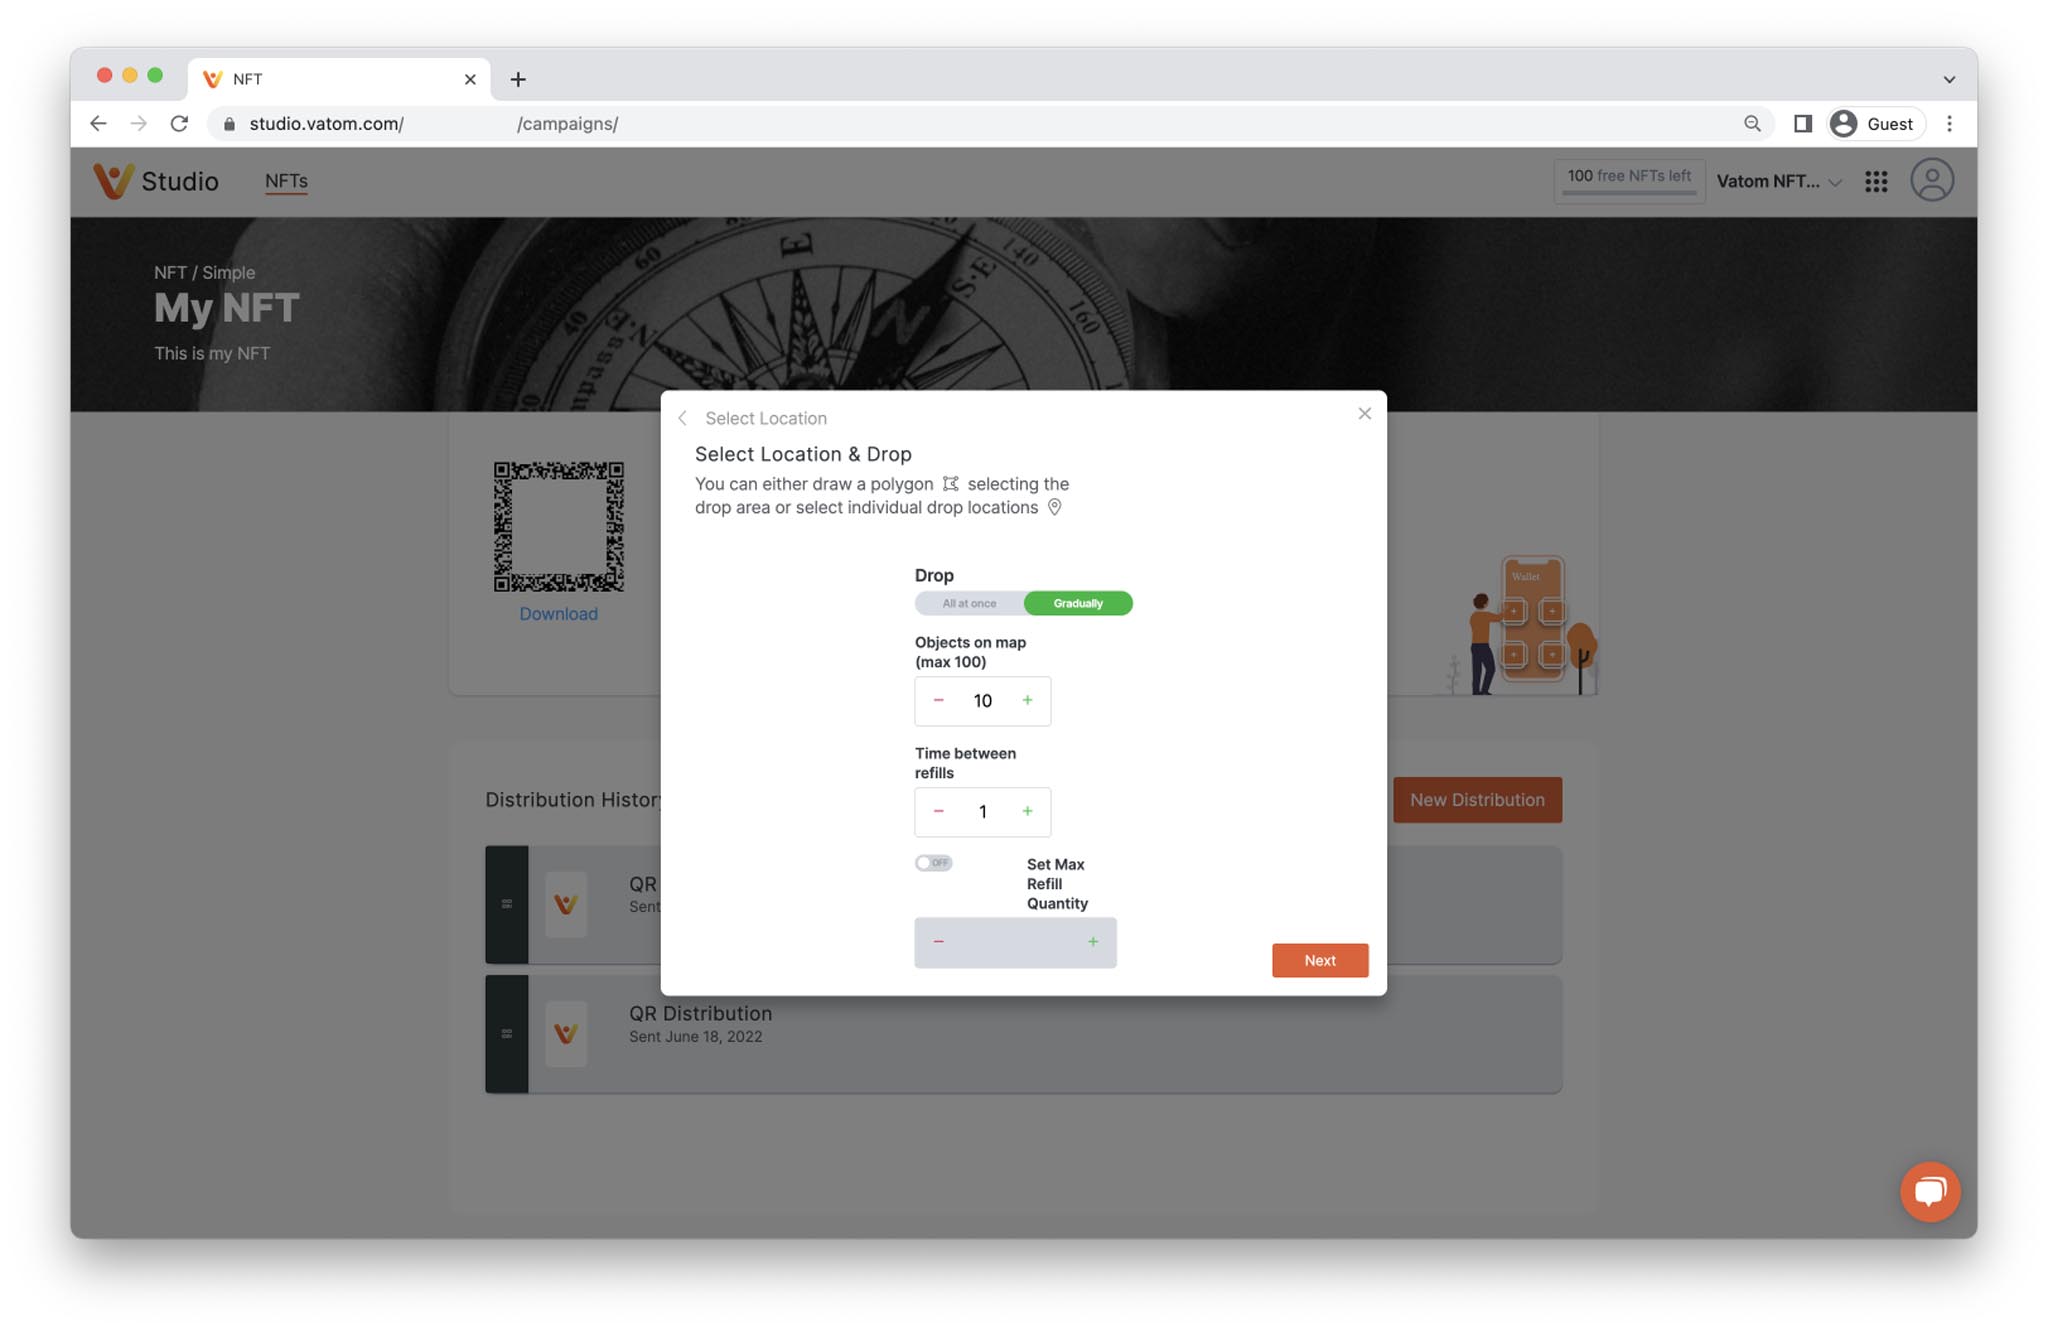
To gradually drop objects or have them replaced on the map at a later time, you have the following additional options:
- Objects on Map - the number of objects available on the map at any time.
- Time Between Refills (seconds) - the amount of time after an object is picked up, before the new item is dropped.
- Max Refill Quantity - the number of times the objects will be replaced.
Schedule your map drop for a later date and time. Leave this box unchecked to drop right away.
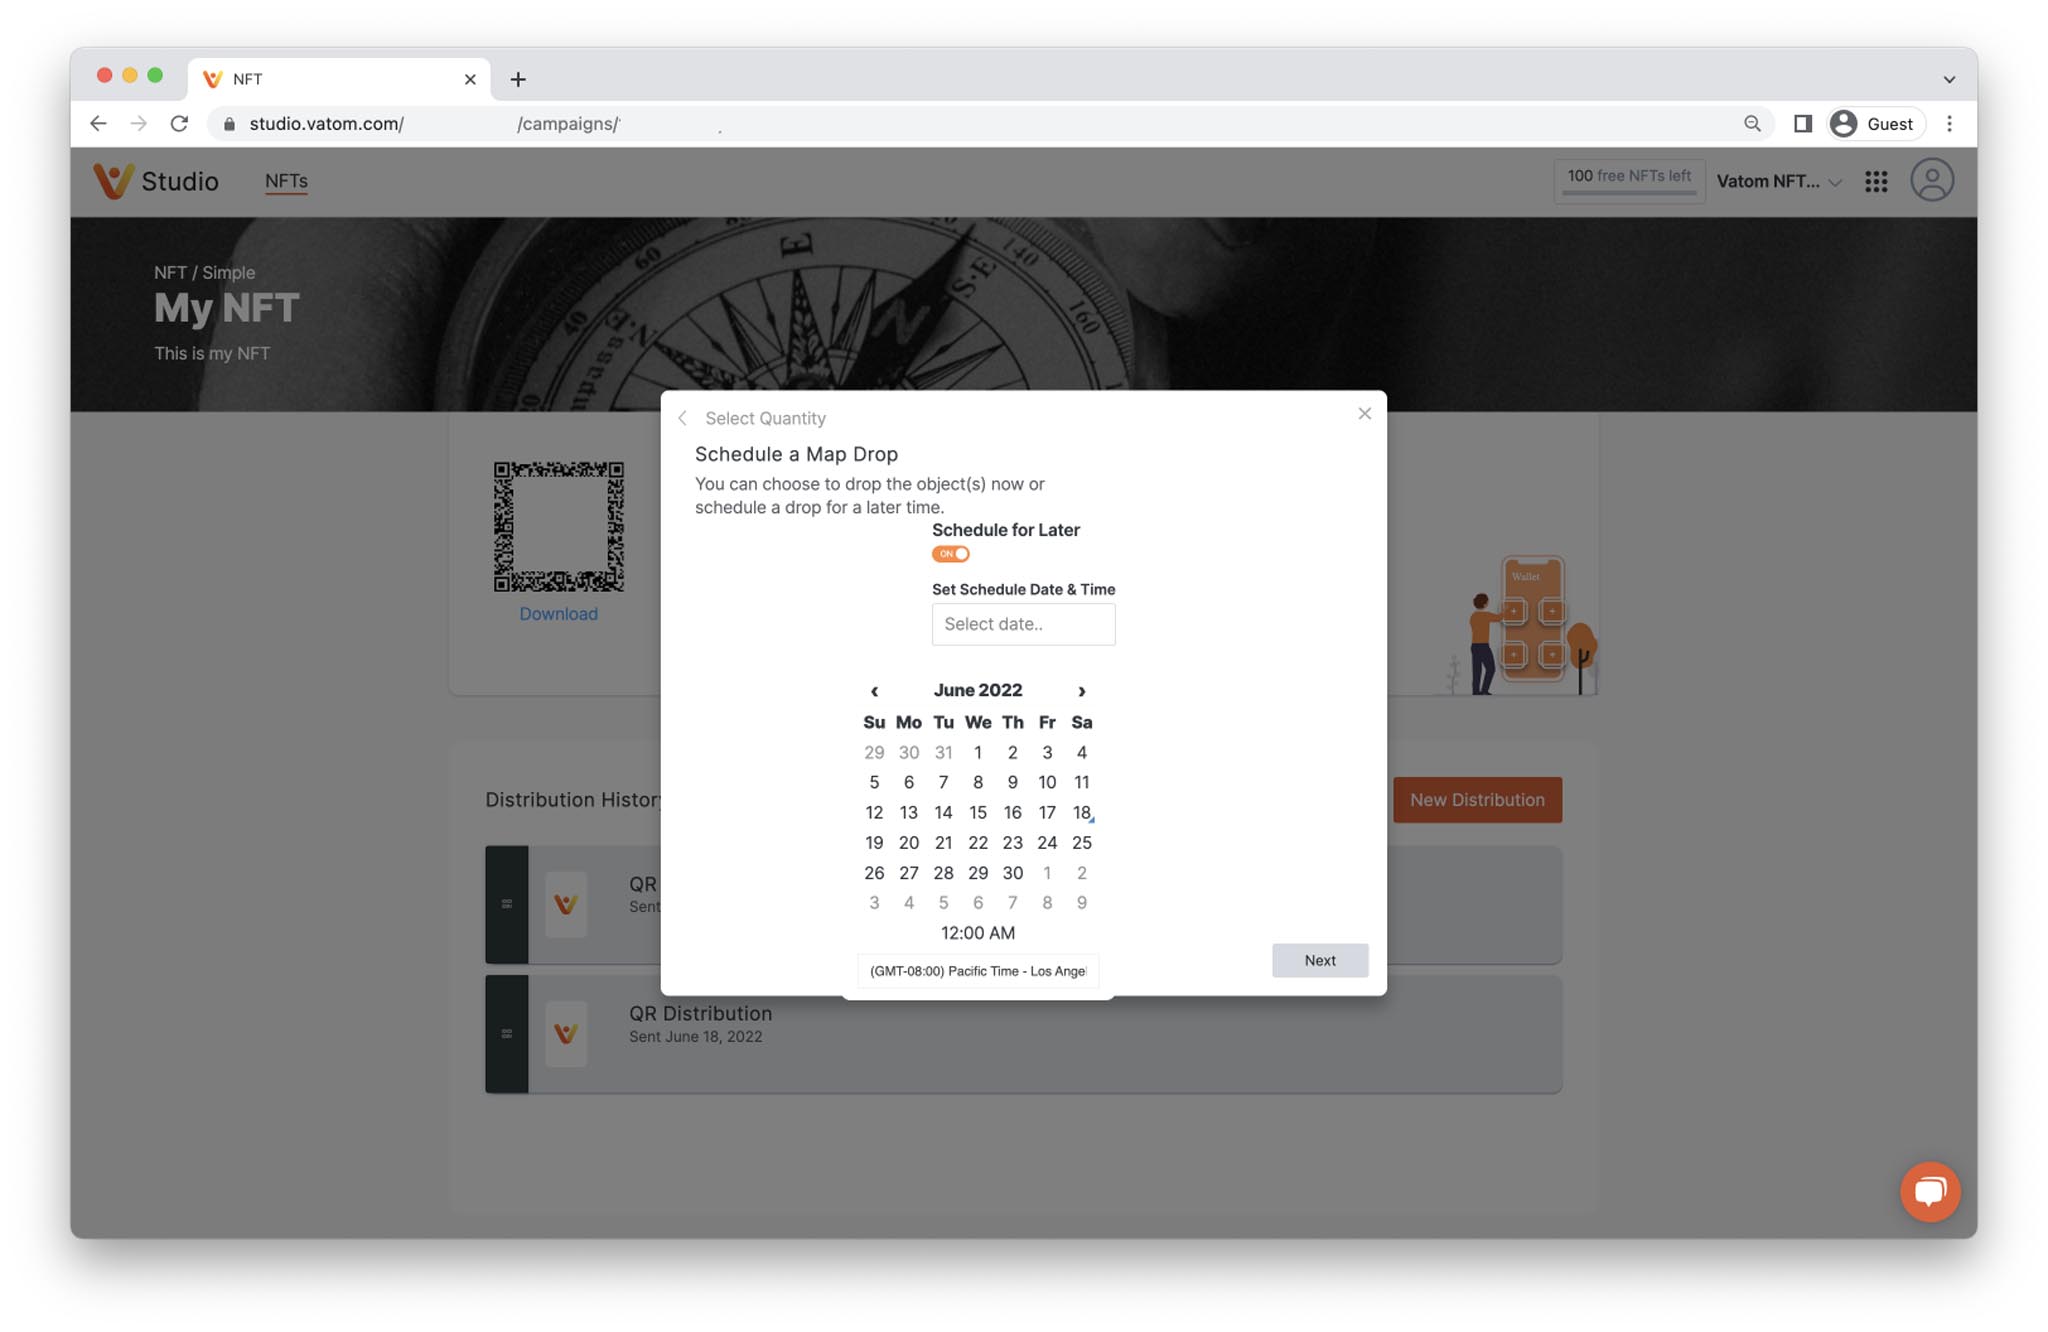
Optionally schedule all objects to be removed from the map at a certain date and time. Once objects are dropped you can return to the Map Distribution and "Clean Up" any objects remaining on the map with one click.

Press "Drop" to drop objects on the map.
You can click the "Map Distribution" in the distributions list
Drop Individual Objects on the Map
Choose specific locations to drop objects on the real-world map. Search for specific Addresses or Places, or navigate around the map and click on specific places to choose.
Clear the map and start again by clicking the red trash can icon.
Marketplace Distribution
Before you can list any of your creations for sale on the Marketplace, you'll need to connect your Payout Banking Info.
Create Marketplace Listing
Name your Distribution: This is a reference for you the creator. This name will not be seen publicly, only in the Vatom Studio Distributions List.
Choose Payment Type: Allow your item to be purchased with USD$ and/or ETH.
Include Physical Item: If your NFT is connected to a physical item, check this box to add additional info and contact requirements to the sale.
When you press "List" your item(s) will be listed on the Marketplace within a few minutes.
Your distribution will be shown in Vatom Studio and you can view and modify the listing by clicking the Green Listing in your "Distribution History"
View Marketplace Listing
To view your listing, choose the Marketplace Listing in the NFT Distribution History after a few minutes. It will now display the URL of your Marketplace Listing for you to copy and share.
Remove Marketplace Listing
To remove the Marketplace listing, return to the NFT Market Distribution in Vatom Studio.
Choose the Marketplace Listing, and update the Quantity to 0 (zero) by typing the number zero. Your listing will be removed within a few minutes.
To re-list your item, return the Marketplace Distribution Quantity to however many you'd like to list.